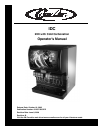
IDC Operator’s Manual
© 2005-2006, IMI Cornelius Inc. - 5 - Publication Number: 621057403OPR
Replenishing CO
2
Supply
NOTE: When indicator on the 1800-psi gage is in the shaded (“change CO
2
cylinder”) portion of
the dial, CO
2
cylinder is almost empty and should be changed.
1. Fully close (clockwise) the CO
2
cylinder valve.
2. Slowly loosen the CO
2
regulator assembly coupling nut allowing CO
2
pressure to escape, then
remove the regulator assembly from the empty CO
2
cylinder
.
3. Unfasten safety chain and remove the empty CO
2
cylinder.
WARNING: To avoid personnel injury and/or property damage, always secure the CO
2
cylinder with
a safety chain to prevent it from falling over. Should the valve become accidently damaged or
broken off, a CO
2
regulator can cause serious personnel injury.
4. Position the full CO
2
cylinder and secure with a safety chain.
5. Make sure gasket is in place inside the CO
2
regulator assembly coupling nut, then install the
regulator assembly on the CO
2
cylinder.
6. Open (counterclockwise) the CO
2
cylinder valve slightly to allow the lines to slowly fill with gas, then
open the valve fully to back-seat the valve (back-seating the valve prevents gas leakage around the
valve shaft).
7. Check CO
2
connections for leaks. Tighten any loose connections.
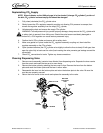
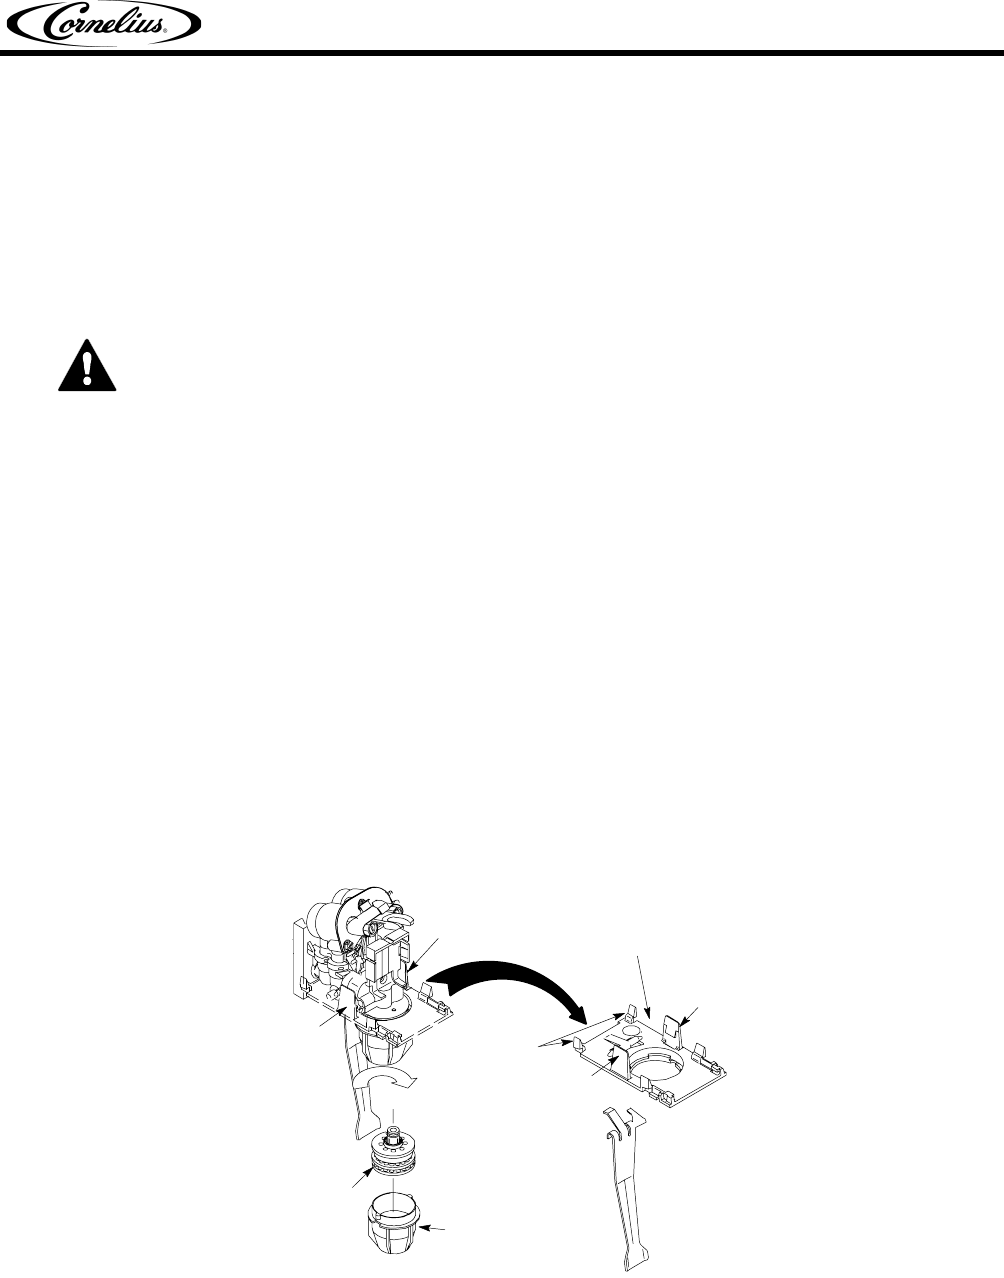
Cleaning Dispensing Valve
1. Remove nozzle assembly (contains Inner Nozzle) from dispensing valve. Separate the inner nozzle
from the nozzle and wash the two parts in warm water.
2. Remove the bottom plate by releasing the two snap-fit clips. Remove the lever from the bottom
plate and wash the bottom plate and the lever in warm water.
3. Reassemble the lever into the bottom plate and return the bottom plate to the valve. Be sure the
rear tabs are properly secured.
4. Return the inner nozzle to the nozzle and replace the assembly to the valve.
BOTTOM
PLATE P/N
1903
O
F
F
SNAP FIT CLIP
REAR
TAB
SNAP FIT
CLIP
INNER
NOZZLE
NOZZLE
SNAP FIT
CLIP
SNAP FIT
CLIP