14 Pelco Manual C1402M-B (2/98)
3.3.2 Dropped Ceiling, Tile Replacement Mounting
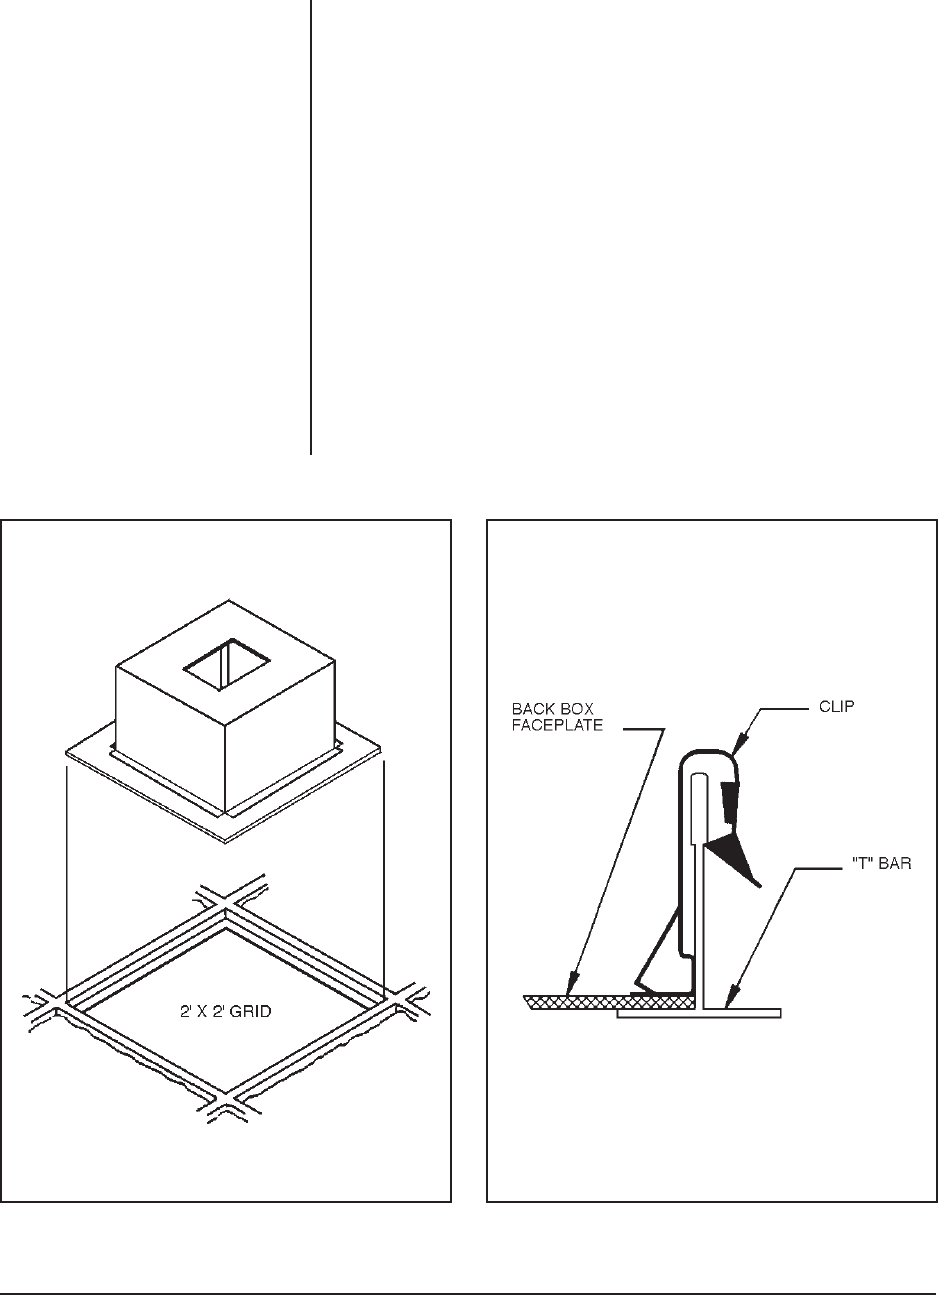
To mount the enclosure into a dropped ceiling grid, perform the following steps
(refer to Figure 6):
1. Determine the location for mounting the enclosure and remove the appropri-
ate ceiling tile.
2. Remove trim ring and dome. Angle the back box through the grid opening and
set the box into the grid. If additional support of the back box is required,
thread the two (2) 1/4-20 eye bolts (supplied) into the two attachment points in
the top of the back box and hang the unit per local code.
3. From an opening in a grid adjacent to the beck box, apply the four (4) clips
supplied to the “T” bar for support (refer to Figure 7).
4. Mount the camera/lens onto the pan/tilt (fixed mount) assembly with the
camera/lens centered on the tilt table. Use the mounting screw provided.
5. Hook up camera power, video, and lens with the connectors supplied.
6. Attach the safety chain to the lower dome and install the dome.
7. Operate the pan/tilt to verify that there are no obstructions within the back box
or dome.
Figure 6. Dropped Ceiling Mounting with
Optional Mounting Kit
Figure 7. “T-Bar” Clip Installation
IMPORTANT:
When installing the
enclosure in a 2' x 4' (.61 m x 1.22 m)
ceiling grid, cut the ceiling tile in half
and install an additional “T” bar for
support.


