


3M
TM
Ranger
TM
Blood/Fluid and Irrigation Warming Systems
English
16
Check the 3M
TM
Ranger
TM
system website to ensure you have the most recent version of this document. www.rangerfluidwarming.com reorder #202524A
Ranger Irrigation Fluid Warming System, Model 247 Preventative
Maintenance Checklist
caution
Temperature adjustments cannot be made to the Ranger irrigation uid warming unit. If the test
shows the temperature is out of specication, please call 3M Patient Warming technical support at
1-800-733-7775.
toolS and equipment
• ermocouple: 0.005" lead or smaller
(part #90020)
• Calibrated thermocouple temperature monitor
• Aluminum tape
• Ranger irrigation uid warming set
• Phillips screwdriver
• Saline/water
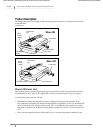
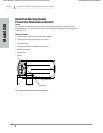
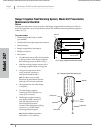
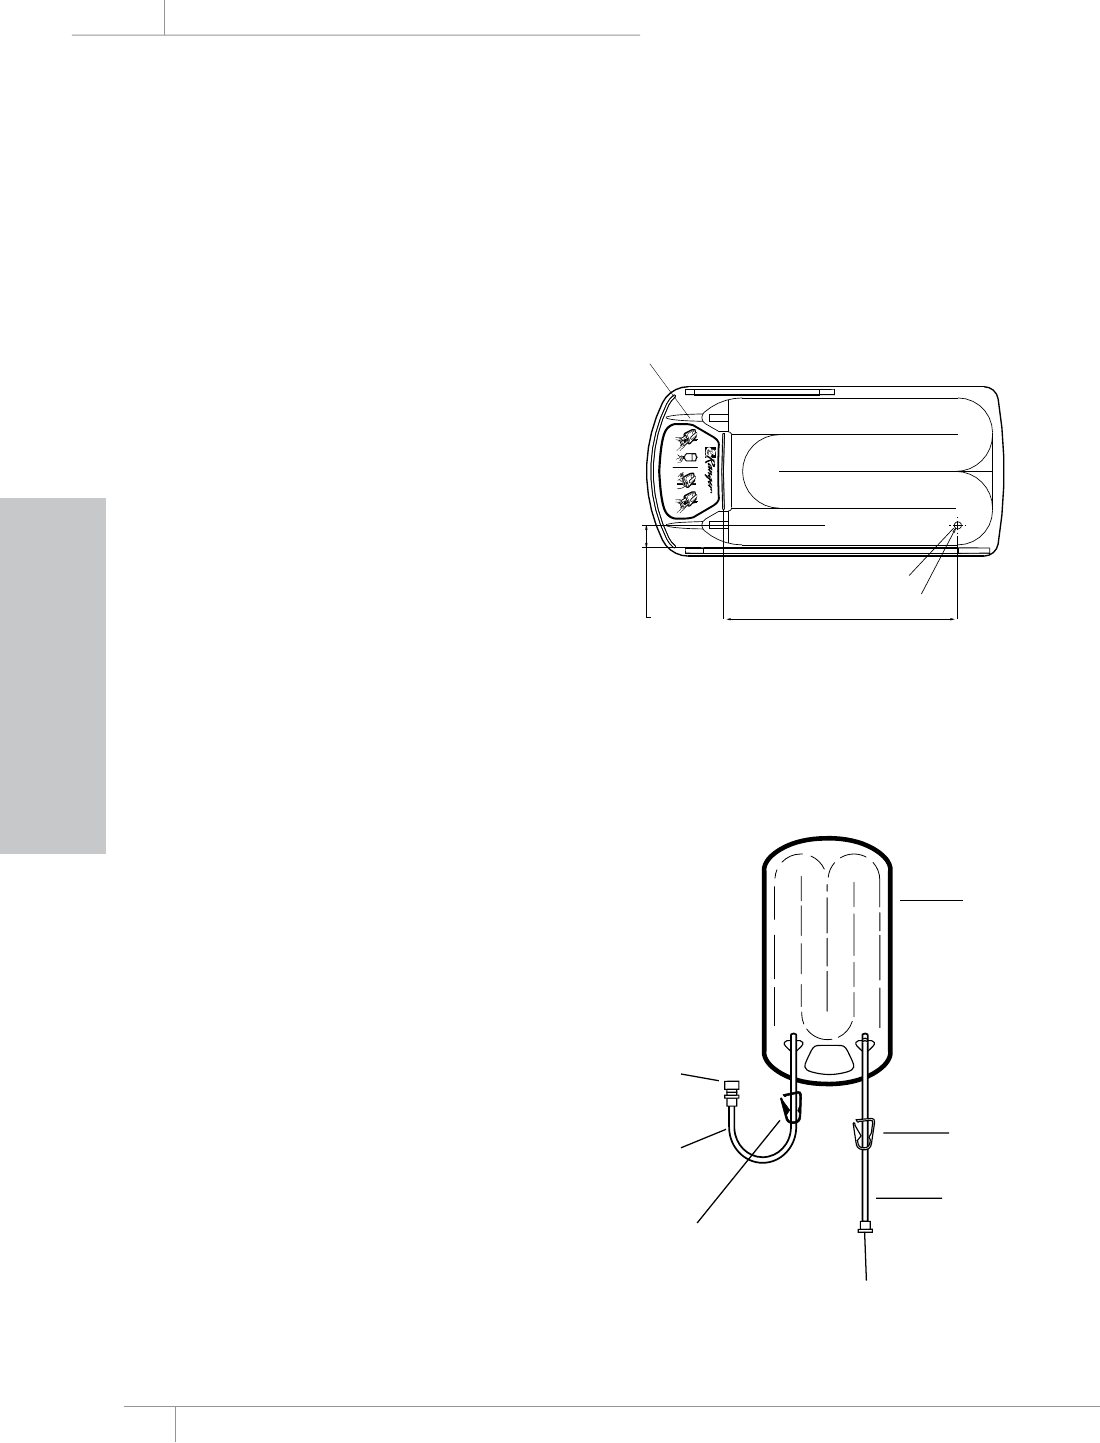
1. Use aluminum tape to ax a thermocouple
to the top surface of the Ranger irrigation
uid warming cassette as shown in Fig. 1.
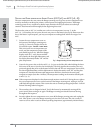
2. Slide the warming cassette into the slot of
the Ranger irrigation uid warming unit.
3. Using room temperature saline/
water, prime the cassette per
instructions included with it.
note: To achieve correct results,
uids must be administered into the
inlet tube, NOT into the outlet tube.
4. Close patient line with white clamp
to stop ow.
5. Turn the Ranger irrigation
warming unit ON and allow it to
warm up for 5 minutes.
6. e Ranger irrigation warming
unit display should read 41°C±1.
Note the temperature on the
thermocouple temperature
monitor. If the temperature reading
is not 41°C±1, call 3M Patient
Warming technical support.
note: Most handheld temperature
meters have a ±1°C tolerance.
Fig. 1: Ranger irrigation uid warming cassette
0.75"
8.50"
Thermocouple
Inlet tube
Aluminum tape
Irrigation Fluid Warming
Drain 2mL or mo re
from casse tte to remove.
Insert cassette
before priming.
Model 247
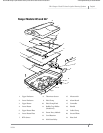
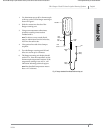
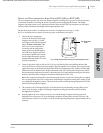
Fig. 2: Ranger irrigation uid warming set
Exit
White
clamp
Blue clamp
Fluid source
Cassette
Inlet tube
Outlet tube
Model 247