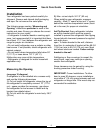
Connecting the Water Supply
To reduce the risk of injury or death, follow
basic precautions, including the following:
• Read all instructions before installing ice maker.
• Do not attempt installation if instructions are not under-
stood or if they are beyond personal skill level.
• Observe all local codes and ordinances.
• Do not service ice maker unless specifically recom-
mended in Use & Care Guide or published user-repair
instructions.
• Disconnect power to refrigerator before installing ice
maker.
• Water damage due to an improper water connection
may cause mould/mildew growth. Clean up spills or leak-
age immediately
Use & Care Guide
7
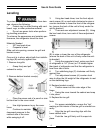
Transporting Your Refrigerator
• NEVER transport refrigerator on its side. If an upright
position is not possible, lay refrigerator on its back. Allow
refrigerator to sit upright for approximately 30 minutes
before plugging it in to ensure oil returns to the compressor.
Plugging the refrigerator in immediately may cause damage
to internal parts.
• Use an appliance dolly when moving refrigerator.
ALWAYS truck refrigerator from its side or back–NEVER
from its front.
• Protect outside finish of refrigerator during transport by
wrapping cabinet in blankets or inserting padding between
the refrigerator and dolly.
• Secure refrigerator to dolly firmly with straps or bungee
cords. Thread straps through handles when possible. Do
not overtighten. Overtightening restraints may dent or dam-
age outside finish.
To avoid property damage or possible injury,
follow basic precautions, including the fol-
lowing:
• Consult a plumber to connect 1/4” O.D. copper tubing
to household plumbing to assure compliance with local
codes and ordinances.
• Confirm water pressure to water valve is between 35
and 100 pounds per square inch, 20 pounds per square
inch if there is not a water filter.
• Do not use a self-piercing, or 3/16" saddle valve. Both
reduce water flow and can become clogged over time;
and may cause leaks if repair is attempted.
• Tighten nuts by hand to prevent cross threading.
Finish tightening nuts with pliers and wrenches. Do not
overtighten.
• Wait 2-3 hours before placing refrigerator into final
position to check and correct any water leaks. Recheck for
leaks after 24 hours.
• Verify the copper tubing under the sleeve is smooth,
cut square and free from defects. Do not reuse an old
sleeve.
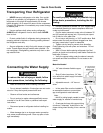
Materials Needed
• 1/4" outer diameter flexible copper
tubing.
• Shut-off valve (requires a 1/4" hole
to be drilled into water supply line before
valve attachment).
• Adjustable wrench • 1/4" hex nut
driver.
• In-line water filter must be installed in
an accessible location to prevent dam-
age to refrigerator’s water solenoid.
Note:
• Add 8' to tubing length needed to reach
water supply for creation of service loop.
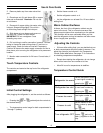
1. Create service loop with copper tubing
(minimum 2’ diameter) Avoid kinks in the
copper tubing when bending it into a service
loop.


