


SERVICING - WARNING
Disconnect from electricity and gas before servicing. Check appliance is safe when you have finished.
10
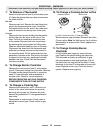
25 To Remove the LH Oven Bottom and
Top Elements
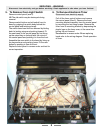
Disconnect from the electricity supply.
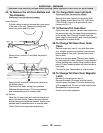
Bottom Element
Pull the cooker forward to access the cover boxes
at the rear of the unit. Remove the fi xings that
secure the cover and lift it clear.
Remove the 2 screws ‘A’ and allow the plate to
drop down.
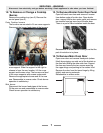
Remove the 2 screws B, holding the element to
the bottom sheet.
Disconnect the leads, noting their positions.
Withdraw bottom element. Fit the new element
and re-assemble parts in reverse order.
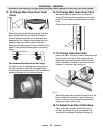
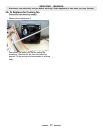
Top Element
Open the LH oven door and undo the fi xings that
secure the heat shield. Remove the top element
bracket fi xings and withdraw element. Replace the
element and re-assemble parts in reverse order.
Check that the oven operates satisfactorily.
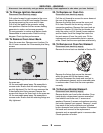
26. To change Main oven light bulb.
Disconnect from the electricity supply.
Remove the oven furniture. Unscrew the bulb.
Fit an Edison screw fi tting 15w 125-130v lamp,
FOR OVENS. It must be a special bulb, heat
resistant to 300 °C.
27 To Remove Tall Oven Door
Open oven door, support the door and remove the
two screws securing the upper hinge and packing
to the cooker front. Remove the door from the
lower hinge by lifting slightly and moving outwards.
Reassemble in reverse order.
28. To Change Tall Oven Door Outer
Panel
Remove oven door see 16. Lay door face down
on a suitable surface and remove 2 screws from
bottom edge of door and 2 screws from inside
face of door.
Remove outer door panel. Remove door handle
by unscrewing 2 screws. Remove 2 cross-headed
screws holding door handle fi xing bracket to door
panel. Fit door handle bracket and door handle to
new panel.
Fit panel to door. Reassemble in reverse order.
29. To Change Tall Oven Door Magnetic
Latch
Remove the control panel (see 4).
Remove the plinth (3 screws) and the central
vertical cover (5 screws). Prize the retaining clip
off the magnet unit. Fit new unit and retaining clip.
Reassemble in reverse order.
Check correct door operation.