9
Auto cooking programme:
Cook Period button
Cook period is the actual length of time for which the
timer will switch the oven(s) on as part of an ‘Auto
Cooking’ programme.
For example: If you set 2 hours, the food will be
cooked for 2 hours.
End Time button
The time of day at which you want an ‘Auto Cooking’
programme to end.
For example: If you set a ‘Cook Period’ for 2 hours,
and the end time of 11:00. The timer will switch the
oven(s) on at 09:00 and turn the oven(s) off at 11:00.
You will hear an audible tone at 11:00, to indicate that
the Auto Cooking programme has finished.
●
Notes
- When setting an Auto Cooking programme you
will need to set the oven control(s) to the required
temperature(s) when you set the timer.
- If an Auto Cooking programme has been set, the
oven(s) will only operate during the pre-
programmed time.
Manual button
Needs to be pressed to cancel an Auto Cooking
programme and return the oven(s) to Manual operation.
‘+’ and ‘-’ buttons
Used to adjust the various timer function settings.
Know your timer
Timer function buttons::
Minute Minder button
Here you can set a time period of up to 23 hours 59
minutes, that will count down. When it reaches zero,
the timer will emit an audible tone.
For example: If you set 20 minutes, the audible tone
will occur 20 minutes later.
Step 1 Make sure all oven controls are turned off.
Step 2 Check the electricity supply to the appliance
is turned on.
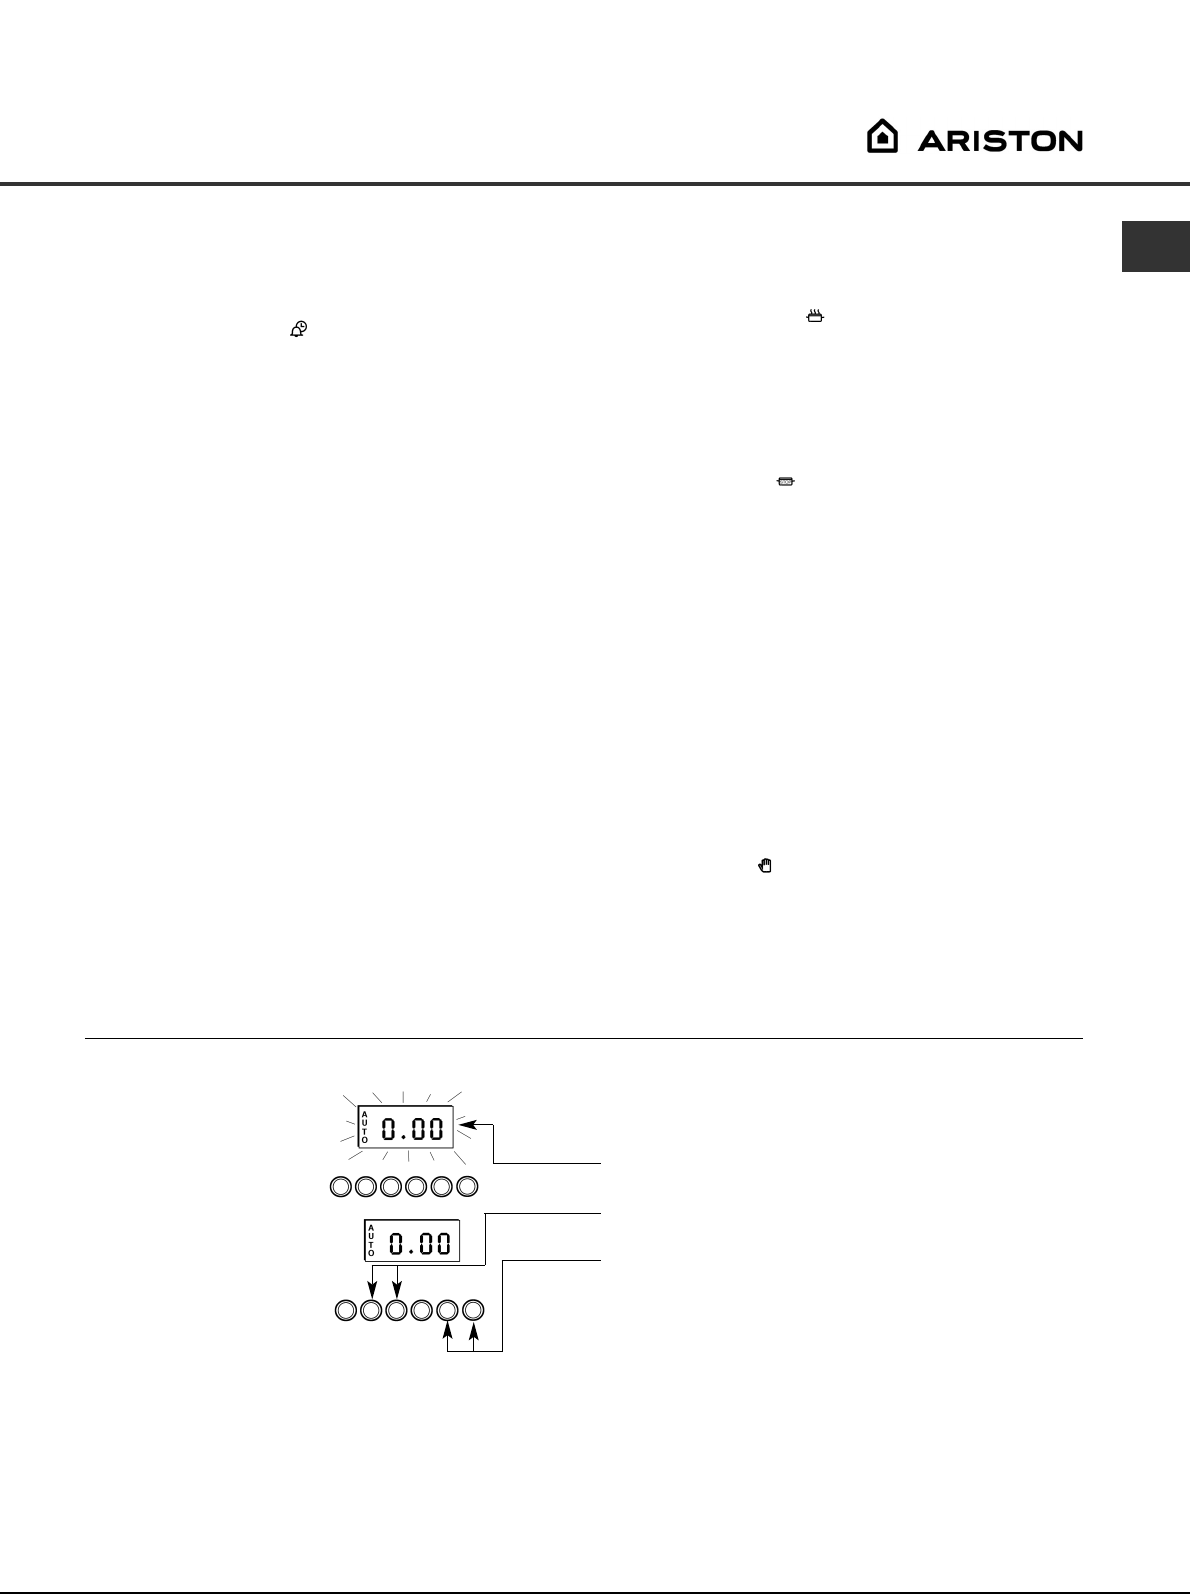
Step 3 When switched on the display will show 0:00
and AUTO will flash intermittently.
Step 4 Press and hold in both the Cook Period and
End Time buttons together.
Step 5 With the Cook Period and End Time buttons
still held in, press either the ‘+’ or the ‘-’
buttons to set the correct time of day.
Step 6 Release all buttons simultaneously.
THE TIME OF DAY IS NOW SET.
●
To change the time of day repeat Steps 4,5 and 6
above.
●
Note
- You cannot adjust the time of day if the timer has
been set for an Auto Cooking programme.
Setting the time of day
GB


