


Page 5
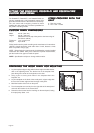
ASKO provides a 7/8” (22 mm) corregated drain hose
which is connected to the back of the unit to form a high
loop. If additional drain hose is the added hose and
any joints or connections can be no smaller than 7/8"
O.D. Stock.
NOTE:Do not use any fittings anywhere in the drain
line that are less than 7/8" (22 mm) O.D. Stock.
.
The access hole for the drain line should be 1-1/2" (38 mm).
The end of the drain line is
1/2” (12 mm), but it is
adjustable to 7/8”, 3/4”, 5/
8” (22mm, 19 mm, and 16
mm). If the drain connection is larger than 1/2” (12 mm),
you can easily cut the drain line to fit the connection.
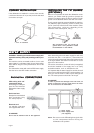
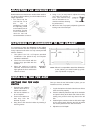
The illustrations to the right show three ways to connect
the drain supply line.
THE HIGH LOOPTHE HIGH LOOP
THE HIGH LOOPTHE HIGH LOOP
THE HIGH LOOP
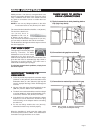
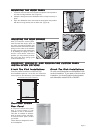
The high loop is necessary for proper
draining. Therefore, all ASKO
dishwashers have the drain hoses
attached to the drain pump and
fastened to the top back of the unit, as illustrated. This
gives the drain hose an automatic high loop, which is
necessary for proper draining. The drain hose is
fastened at the best high loop height.
To eliminate potential drain problems, simply leave
this hose in place.
IMPORIMPOR
IMPORIMPOR
IMPOR
TT
TT
T
ANT ANT
ANT ANT
ANT
THINGS THINGS
THINGS THINGS
THINGS
TT
TT
T
OO
OO
O
REMEMBER:REMEMBER:
REMEMBER:REMEMBER:
REMEMBER:
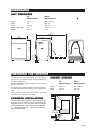
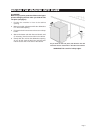
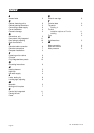
♦ Failure to provide the proper drain connection height
(minimum of 20" (508 mm) above the bottom of the
dishwasher base) or a 20" (508 mm) high loop will
result in improper drainage, which will damage the
machine.
♦ No part of the drain hose should be higher than 35"
(889 mm) from the bottom of the dishwasher.
♦ The drain hose can be extended to a maximum length
of 10 feet (3048 mm). Joints and jointed tubes, if any,
must have a minimum 7/8" (22 mm) O.D. Stock.
♦ If the drain line is going to be connected to a waste
disposer, be sure to remove the knockout or plug
from the fitting on the disposer before connecting
the drain line.
♦ Do not use fittings smaller than 7/8” (22 mm);
otherwise the water may not drain properly.
When the installation is ready, open the supply valve
and let the pressure act for a while. Then check that all
connections are tight and there are no leaks.
THREE THREE
THREE THREE
THREE
WW
WW
W
AA
AA
A
YY
YY
Y
S S
S S
S
TT
TT
T
O INSTO INST
O INSTO INST
O INST
ALLALL
ALLALL
ALL
DRAIN CONNECTIONSDRAIN CONNECTIONS
DRAIN CONNECTIONSDRAIN CONNECTIONS
DRAIN CONNECTIONS
A.)Typical connection to sink plumbing before
trap (high loop drain)
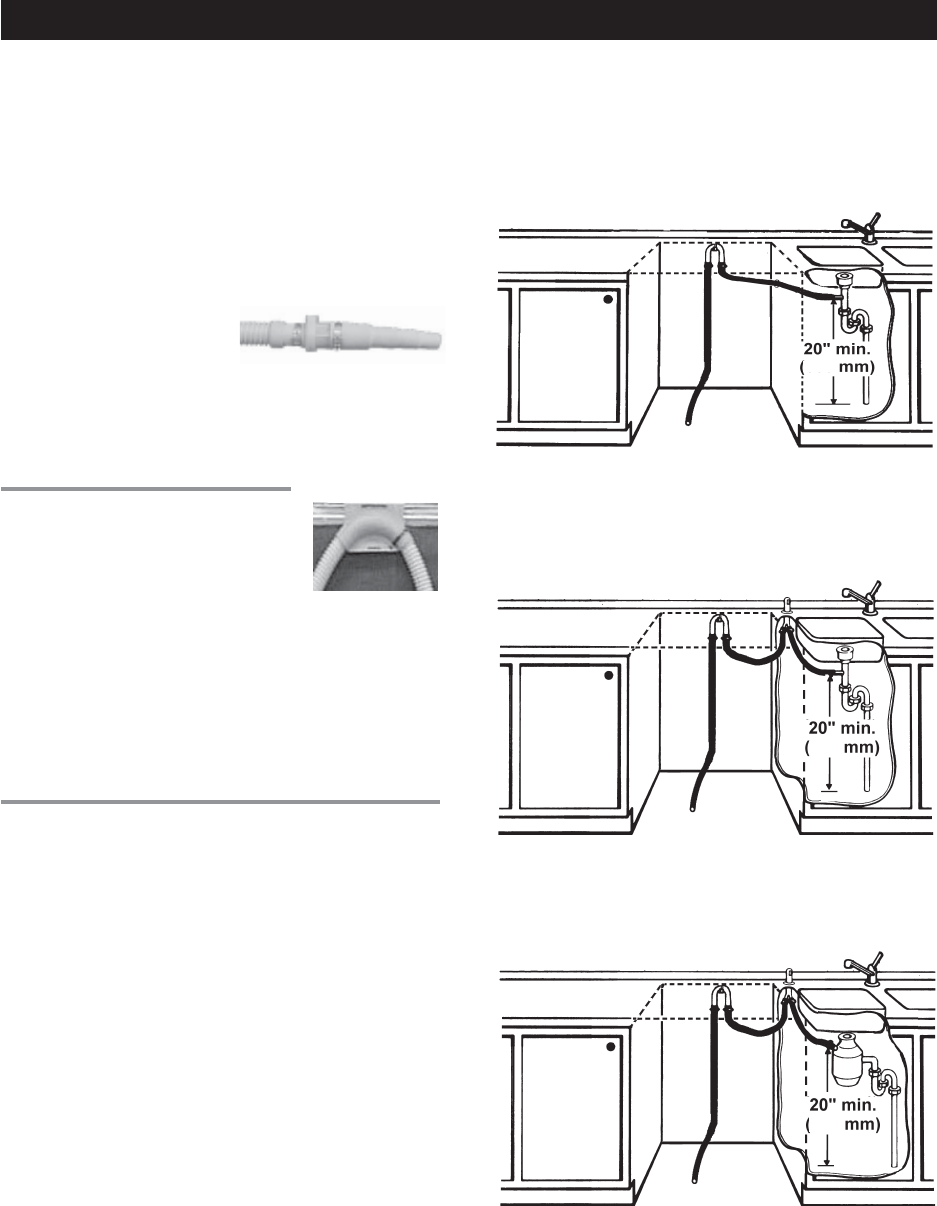
B.) Connection to air gap then to the trap
C.) Connection to waste disposer with air gap
NOTE: Don’t forget to remove the knockout
or plug from the disposer fitting.
DRAIN CONNECTIONSDRAIN CONNECTIONS
DRAIN CONNECTIONSDRAIN CONNECTIONS
DRAIN CONNECTIONS
508
508
508