


Page 9
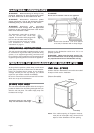
Now that all the connections are made and the machine
is in place under the cabinet, you should make the final
height adjustment.
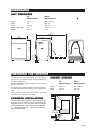
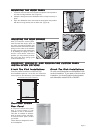
1. You should set the
rear foot first. To do
this, use a
screwdriver to rotate
the adjusting screw
on the bottom front of
the machine. Turn the
screw clockwise to
raise the foot and
counterclockwise to lower it.
2. Using a 1/2” (12 mm) wrench, adjust the locking
nuts until the machine is
level. (The machine may
have an inclination of 1/4"
maximum without affecting
its performance.)
3. When the feet are properly adjusted, tighten the
locking nuts to the base pan.
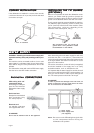
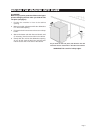
Once you have the toe kick bracket in place, you can
install the toe kick, as follows:
1. Lay the insulation on the back side of the toe kick to
make sure it fits properly.
2. Peel the adhesive protection strip off the insulation
and press it firmly to the back side of the toe kick,
making sure you don’t cover any slots on the toe
kick.
3. Positioning the notches on the toe kick at the edge
of the access panel, slide the toe kick up behind
the access panel then let it slide to the floor.
4. Adjust the toe kick depth.
INSTINST
INSTINST
INST
ALLING ALLING
ALLING ALLING
ALLING
THE THE
THE THE
THE
TT
TT
T
OE KICKOE KICK
OE KICKOE KICK
OE KICK
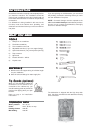
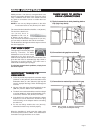
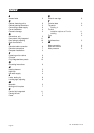
It’s necessary to fasten the dishwasher to the cabinet
so it won’t tilt when the door is opened or if something
heavy is placed on the door. Use only screws provided
with the machine.
1. Use option A for U.S. or European standard
installations. Use option B only for European
standard installations.
2. Cover the screw heads with the
plastic plugs provided with the
machine.
3. When the machine is properly
attached, check that the feet are
tight against the floor and that the
machine is level.
FASTENING THE DISHWASHER TO THE CABINETFASTENING THE DISHWASHER TO THE CABINET
FASTENING THE DISHWASHER TO THE CABINETFASTENING THE DISHWASHER TO THE CABINET
FASTENING THE DISHWASHER TO THE CABINET
NOTE:
When it is not possible to attach the dishwasher
to the cabinet, you should install tip guards.
(See “Tip Guards” on page 2.)
Mounting
Screws
ADJUSTING THE LEVELING LEGSADJUSTING THE LEVELING LEGS
ADJUSTING THE LEVELING LEGSADJUSTING THE LEVELING LEGS
ADJUSTING THE LEVELING LEGS
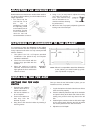
SETTING SETTING
SETTING SETTING
SETTING
THE THE
THE THE
THE
TT
TT
T
OE KICKOE KICK
OE KICKOE KICK
OE KICK
DEPTHDEPTH
DEPTHDEPTH
DEPTH
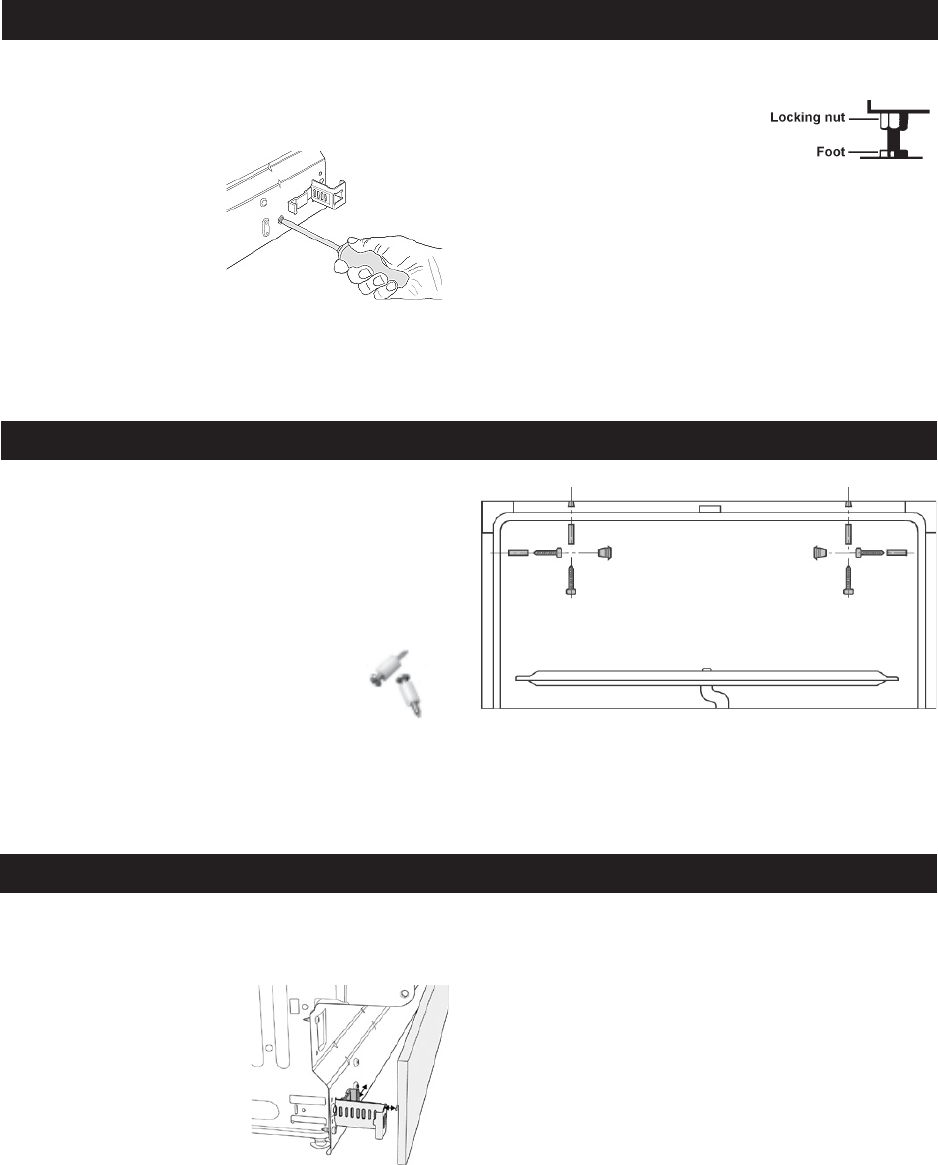
1. Press the grey catches
toward each other to
release the bracket.
2. Pull out the holders as
far as required.
3. Press in the catches so
that they lock the
brackets in place.
4. Hang the toe kick onto the holders by inserting it
into the grooves.
AA
BB