


!
!
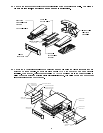
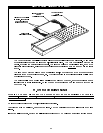
E. Remove all loose parts and packages from the interior of the conveyor oven. The conveyor oven has
mounting. For further information on removal and mounting of interior panels, see Section 10,
cleaning.
(4) air-directing "plenum fingers" in the interior cooking chamber. Check these items for proper
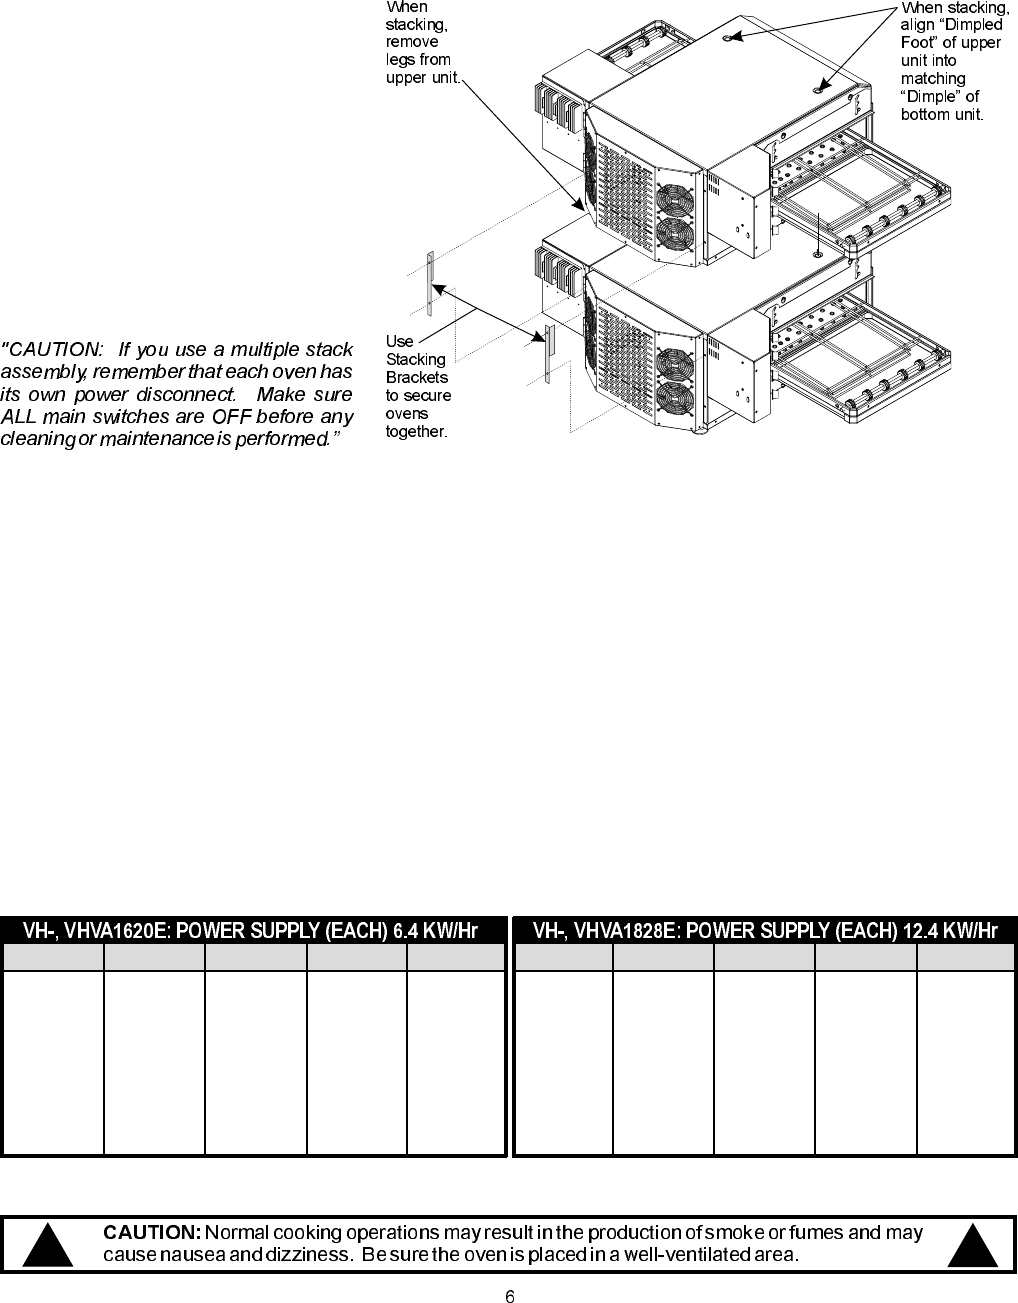
4. STACKING
5. ELECTRICAL CONNECTIONS
General Instructions
a
e) Only a licensed electrician should make the electrical connections.
f) Proper connections are shown on the wiring diagrams as well as the rating plate.
g) Wiring diagrams are located in the control box containing the Main Switch (green rocker).
h) When installed, the unit must be electrically grounded in accordance with the local codes and/or the
latest edition of the national Electrical Code ANSI/NFPA No. 70 in the USA or Canadian Electrical
Code, CSA Standard C22.1, Part 1 in Canada.
) Only use copper conductor wires rated at 90°C suitably sized for the electric current drawn.
d) Make sure the electrical supply corresponds with that specified on the rating plate.
b) Dual Air Model 1828E ovens are constructed for permanent connections - no power cord is supplied.
c) Dual Air Model 1620E ovens are supplied with a flexible power cord and plug.
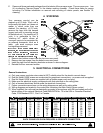
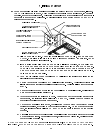
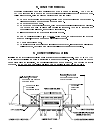
Your conveyor oven(s) can be
stacked up to (3) high. Each unit is
built exactly the same, so it does not
matter in which order they are
stacked. For stacking of (2) units,
remove the legs from the second
(upper) unit prior to mounting on top
of the bottom unit. For stacking of (3)
units, it is preferable to use a
"stacking kit", which allows all
conveyor ovens to be supported by
an external framework, such as a
table, with each conveyor oven
having all legs removed.
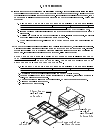
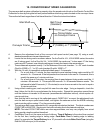
1. Remove two bottom screws from the top oven rear panel.
2. Remove two top screws from the bottom oven rear panel.
3. Install the right and left stacking brackets as shown in above diagram.
4. Reinstall the four removed screws.
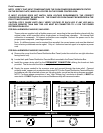
EACH CONVEYOR OVEN REQUIRES A SEPARATE CONNECTION
200-208 1 31 31 N/A 200-208 1 60 60 N/A
220 1 29 29 N/A 220 1 56 56 N/A
230 1 28 28 N/A 230 1 54 54 N/A
240 1 27 27 N/A 240 1 52 52 N/A
200-208 3 14 21 19 200-208 3 27 40 38
220 3 13 18 17 220 3 25 38 36
230 3 12 17 16 230 3 24 36 34
240 3 12 18 17 240 3 23 35 33
Volts Phase L1 L2 L3 Volts Phase L1 L2 L3