10 •
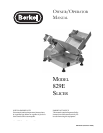
829E OWNER/OPERATOR MANUAL
5. Loosen the sharpener locking knob, raise and rotate the sharpener until the stones sit with one on
each side of the knife. Retighten the knob to hold the sharpener in its sharpening position.
6. Plug in the slicer and switch on the power.
7. Press the sharpening stone push-button to bring the stone against the knife and hold it for 5 to 10
seconds and release. When the sharpener is the in the sharpening position, the sharpening stone
push-button is on the left side of the knife.
8. Press the deburring stone push-button to bring the stone against the knife and hold it for 2 to 3
seconds and release. When the sharpener is the in the sharpening position, the sharpening stone
push-button is on the right side of the knife.
9. Switch OFF the power.
10. Return the sharpener to its stored position and lock in place.
11. Clean slicer before slicing product. (See “Cleaning and Sanitizing,” page 8).
Your slicer is now sharpened, cleaned and sanitized—ready to use.
7528%/(6+227,1*
Should your slicer fail to function properly, here are a few things you can check before calling
a Berkel Serviceman.
Product not slicing properly; thick and thin or irregular slices
1. Is the knife sharp? If not, sharpen according to instructions (page 10). Remember, only
sharpen a clean knife.
2. Does the product size exceed the capacity of the slicer? Too large a product may rub
against the sharpener assembly causing interference to normal slicing.
3. Is the product positioned correctly and held securely on the product table? If not, product may
move or rotate during slicing operation resulting in partial or thick and thin slices.
4. Are all components held securely in place? A loose product table or pusher can cause inconsis-
tent slices.


