Model # 900149: Page 7
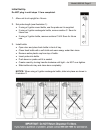
4. Plug cord into a properly grounded wall outlet.
x The unit will come ON and start pumping air into the bottle.
x The air will force water from the bottle into the hot and cold water reservoirs.
5. Turn energy saving switches on back of dispenser to ON.
x The red switch controls the heating of water. If you do not want hot water, leave
this switch OFF.
x The blue switch controls the cooling of water. If you do not want cold water,
leave this switch OFF.
Notice:
x For unit to operate properly the probe head must have an air tight seal on the
bottle and the door must be fully closed.
x It will take up to 3 minutes for the reservoirs to load. During this time the pump
will run on and off. This is normal.
x Each time you dispense water from the taps, the pump will come on to refill the
tanks. This is normal.
Initial Rinsing of Water Lines
This unit has been tested and sanitized prior to packing and shipping. During transit dust
and odors can accumulate in the tank and lines. Dispense and dispose at least one
quart of water from cool and cold taps prior to drinking any water.
Dispensing Cold Water
Note: After setup, it will take 1 hour to get water to maximum cold temperature. During
this time the compressor may run continuously. This is normal.
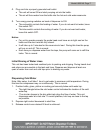
1. Position bottle, glass, pitcher or cooking pot securely below cold water tap.
x The right triangle below the cold water control indicates the location of the cold
water tap.
x The circular shapes in the drip plate help align the flow of water. This unit
dispenses water at a fast rate. To avoid splashes, hold cup as close to the tap
as possible.
2. Depress right control downward to start flow.
3. Release control once desired fill level is achieved.


