


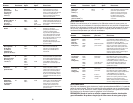
5
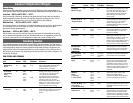
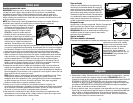
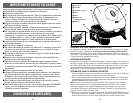
Tilt-Lid Feature
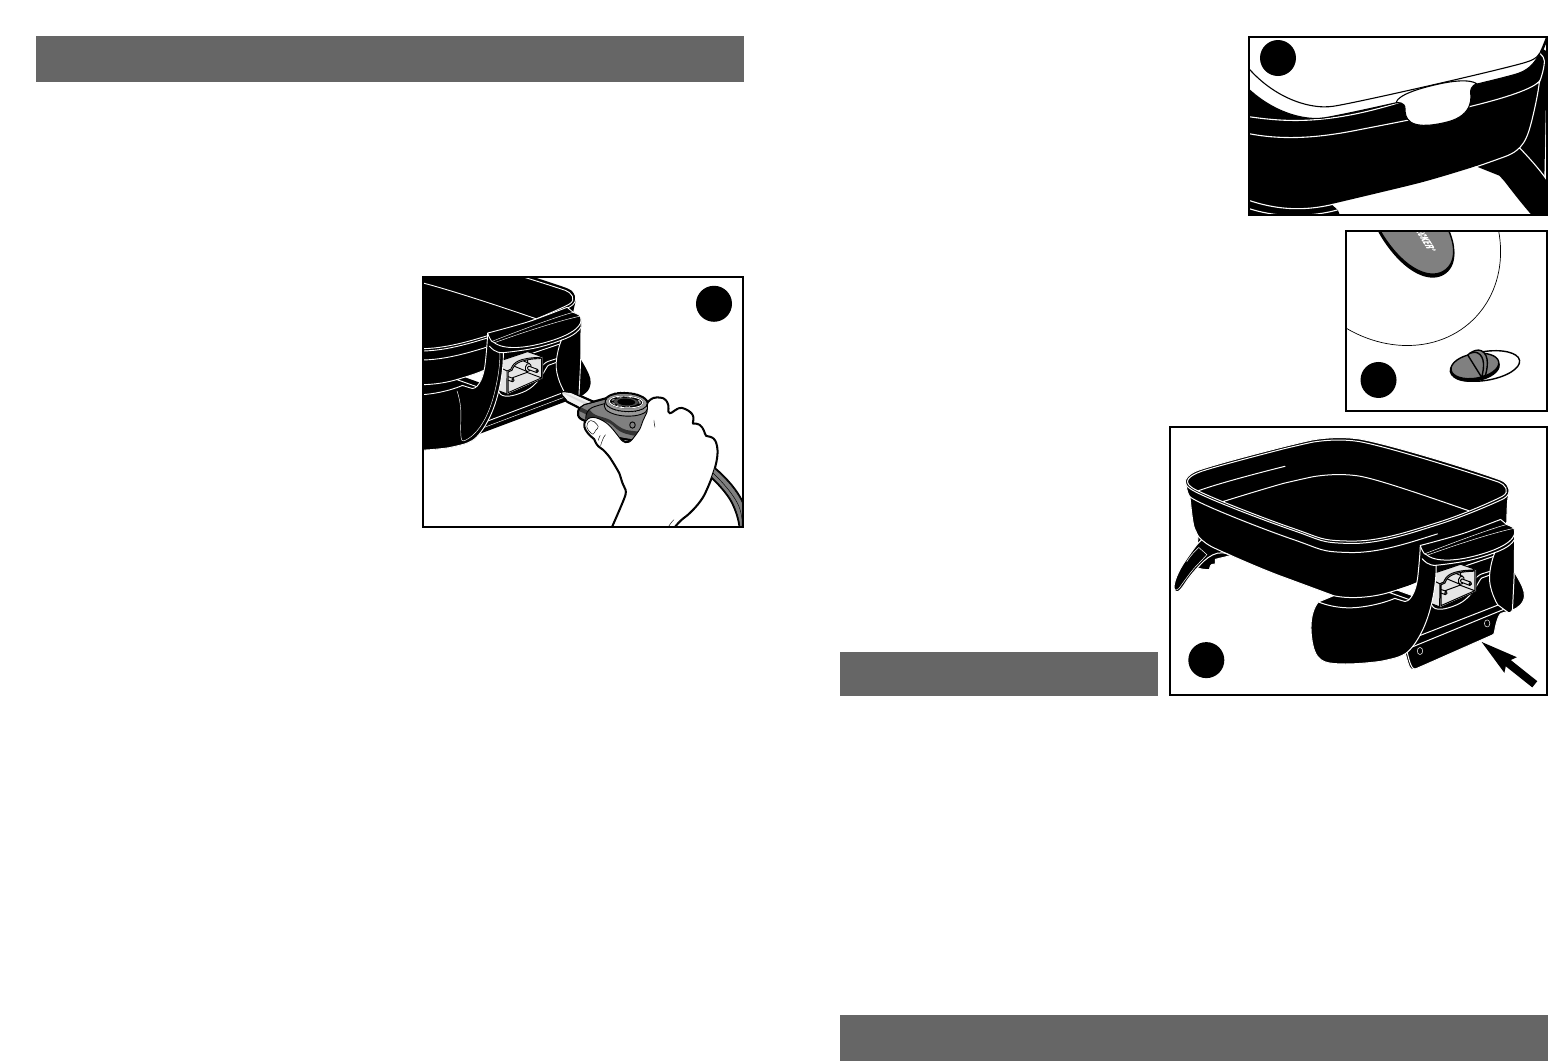
The Lid is designed with an extended piece
featuring slots that fit onto the back or sides of
the Skillet Pan body to position the Lid at an angle
(B). Use this feature as a convenient rest position
for the Lid when you are sautéing, stirring, or
turning food. In the tilted position, splatters and
condensation will drip back down into the Pan.
Carefully lift the Lid up to remove it from the Pan
edge when done for easy placement on the Skillet.
Lid Vent
The Skillet Lid has a built-in Vent. Slide the Vent open to
allow for escaping steam when crisping or browning (C).
CAUTION: Be careful if adjusting the Vent when the Skillet is
on to avoid escaping steam and potential burns..
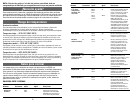
Tilt-Leg Feature (Certain Models Only)
The Tilt-Leg raises one side of the
Skillet slightly so that oils, fats, or other
liquids will drain to the opposite side
as they collect. This feature is great for
pan broiling and basting foods while
cooking. To use, pull the Leg straight
down so that it stands under the
handle. (D) Be careful not to pull too
far. CAUTION: Be careful not to push
down on or strain the Tilt-Leg.
Cleaning
1. Unplug the cord, remove the Temperature Control by pulling it straight out, and allow
the Skillet Pan to cool completely before cleaning. CAUTION: The Control may be
warm after long use so be careful when removing it. WHEN THE TEMPERATURE
CONTROL HAS BEEN REMOVED, the Pan and Lid can be completely immersed in
soapy water or placed in a dishwasher. The Lid is dishwasher-safe — TOP RACK
ONLY. Over time and use, the Lid may discolor: this is normal.
2. If washing by hand, use a sponge or nylon pad with liquid detergent. Do not use any
abrasive cleaners, coarse cleansers, or metal pads as they may damage the non-
stick coated surface. After washing, dry the Pan thoroughly giving special attention to
the Socket area. Do no use metal pads to clean electrical pins.
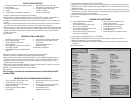
4
How To Use
“Conditioning” The Pan
IMPORTANT: Before first use, remove the Control and wash the Skillet Pan and Lid in
soapy water; dry thoroughly. To preserve the non-stick coating, condition the Pan by
spreading a light coating of cooking oil over the inside surfaces. Wipe away excess oil
with a paper towel. Do not use non-stick cooking spray to condition. You will not have to
re-condition again after first use.
NOTE: Only use the Temperature Control provided with this Skillet. Other controls may
fit but will not provide proper performance.
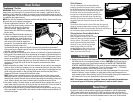
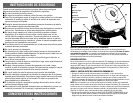
1. Set the Temperature Control to “Off” and
push the Probe firmly into the socket on the
Skillet Pan (A). Be sure the Control is
securely inserted. Always attach the
Control to the Pan FIRST before plugging
into an outlet.
2. Preheat the Skillet Pan before adding any
grease or vegetable oil unless the recipe
says to add fats first. Some foods do not
require Skillet preheating. Use the charts
and recipes in this book as a guide for
procedures. To preheat the Skillet, turn the
Temperature Control Knob to the
recommended setting. When the Signal Light goes out, the Skillet is preheated.
During cooking, the Signal Light will cycle on and off indicating that the temperature
selected is being maintained.
3. Some recipes call for simmering which means to cook foods in liquid just below the
boiling point. The simmer point varies depending on the type of liquid and amount of
food. To simmer, bring the food or liquid to a boil by turning the Temperature Control
Knob to around 350°F (177°C). When the liquid begins to boil, slowly turn the Control
Knob back until the Signal Light goes out. Cover and simmer for the length of time
necessary. The Light will cycle on and off frequently to maintain the simmer
temperature.
4. While the handles and base “feet” are heat-resistant, do not cook on heat-sensitive
surfaces. Once cooking is complete, you can remove the Control to bring the Skillet
Pan to a table for easy serving. To remove, be sure the Control is unplugged and set
at Off. Using a pot holder or mitt, hold the Skillet with one hand and the pull the
Temperature Control out from the Pan with the other.
NOTE: Some counter and table surfaces are sensitive to heat. Take care to avoid
damaging linoleum, vinyl tile, painted or varnished surfaces. Heat-resistant formica
and porcelain enamel surfaces are not affected providing the underside of the pan is
clean. When in doubt, use a heat- resistant pad or hot plate under the Skillet.
5. Use plastic, rubber, non-stick coated, or wood utensils when cooking and serving. If
using metal utensils, take care not to dig into the non-stick finish. Do not cut food on
the surface using a knife to avoid scratching the non-stick coating.
6. To prevent accidental burning, use pot holders when touching the Lid and lift it only
by the top handle. Use pot holders and extreme caution when moving the Skillet if it
contains hot liquids.
A
B
D
C
NOTE:
If the power supply cord is damaged, it must be replaced by the manufacturer
or its service agent or a similarly qualified person in order to avoid a hazard.
Need Help?
For service, repair, or any questions regarding your appliance, call the appropriate
“800” number on the cover of this book. Do NOT return the product to the place of
purchase. Do NOT mail the product back to the manufacturer nor bring it to a service
center. You may also want to consult the website listed on the cover of this manual.