


GENERAL INFORMATION
The appliance must be installed in accordance with all relevant codes laid down by
Electrical Supply Authorities. The original installation and adjustment must be made by a
licensed electrician.
ELECTRICAL CONNECTION
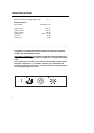
The appliances are provided with a three-pole feeding cable and work with alternate cur-
rent and single-phase voltage indicated on the rating plate of the product and in the
instruction manual and on the product. The grounding conductor of the cable is marked
with the colours yellow/green.
CONNECTION OF THE FEEDING CABLE TO THE MAINS
Connect the feeding cable of the oven to a plug suitable for the load indicated on the
rating plate of the product. In case of a direct connection to the mains (cable without plug),
it is necessary to insert a suitable omnipolar switch before the appliance, with minimum
opening between contacts of 3 mm (the grounding wire should not be interrupted by the
switch).
Before connecting to the mains, make sure that:
• The electrical counter, the fuse, the feeding line and the socket are
adequate to withstand the maximum load required (see rating
plate).
• The supply system is regularly grounded, according to the regula-
tions in force.
• The socket or the omnipolar switch can easily be reached after the
installation of the oven.
• After carrying out the connection to the mains, check that the sup-
plying cable does not come into contact with parts subject to heating.
• Never use reductions, shunts, adaptors which can cause overheating or burning.
The manufacturer is not liable for any direct or indirect damage caused by faulty installa-
tion or connection. It is therefore necessary that all installation and connection operations
are carried out by qualified personnel complying with the local and general regulations in
force.
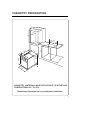
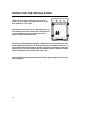
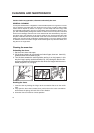
INSERTION AND ASSEMBLY
Insert the oven into the opening of the cabinet, resting it on the base and pushing it as far
as the ledge of the side stanchions against the shoulder of the cabinet. For the dimen-
sions of the oven see cabinet and technical data.
NOTES FOR THE INSTALLATION
9