


Operating your Breville ikon Hemisphere Blender
7
Why is the Breville ikon Hemisphere Blender superior?
6
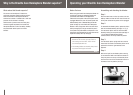
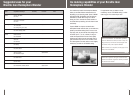
What makes this blender superior?
The secret to the Hemisphere™ Blade is the
continuous movement created inside the pitcher. It
allows the Breville ikon Hemisphere Blender to
combine the functions of a blender with a mini food
processor for the ultimate in versatility.
Combined with a powerful motor and heavy duty
commercial grade components, the Breville ikon
Hemisphere Blender is built for durability, reliability
and professional results superior to all other
blenders.
Before first use
Before using your Breville ikon Hemisphere Blender for
the first time, remove any packaging material and
promotional labels. Make sure the appliance is
switched off at the power outlet and the power cord is
unplugged.Wash the lid, inner lid, blender pitcher and
blade assembly (refer to Disassembling the blender
pitcher on Page 13) of the Breville ikon Hemisphere
Blender in warm, soapy water with a soft cloth. Rinse
and dry thoroughly. You may opt to wash the parts in
the top shelf of any dishwasher and the pitcher in the
base section of the dishwasher.The motor base can be
wiped with a damp cloth. Dry thoroughly.
• When using your Breville ikon Hemisphere
Blender for the first time, you may notice an
odor coming from the motor.This is normal
and will dissipate with use.
• The blending blades are extremely sharp.Avoid
any contact with fingers and hands.
Note
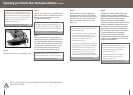
Assembling and attaching the blender
Step 1.
Place the motor base on a flat, dry surface such as a
table top. Make sure that the motor base is turned off
at the power outlet and the power cord is unplugged.
Step 2.
To reassemble the blender pitcher, replace the silicon
seal onto the blade assembly (see Page 14 - Fig 1).
Turn the blender pitcher over and insert the blade
assembly housing into the pitcher base (see Page 14
- Fig 2).Twist the Blade Removal System
counterclockwise until firmly locked into position.
Step 3.
Turn the blender pitcher upright and insert onto the
motor base.The handle of the blender pitcher can be
positioned to the left or right hand side of the
appliance.
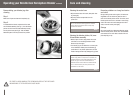
Step 4.
Add food or liquid into the blender pitcher ensuring
not to exceed the ‘MAX’ mark. Place the blender lid
firmly into position on the top of the blender pitcher.
Insert the clear inner lid into the blender lid and turn
clockwise to lock into position. (see Fig 1)
Fig 1