


Care and cleaning
13
Cleaning the motor base
• Wipe the motor base with a soft, damp cloth then
dry thoroughly.
• Wipe any excess food particles from the
power cord.
Do not use abrasive souring pads or cleaners
when cleaning the motor base as they may
scratch the surface.
Note
Cleaning the blender pitcher, lid, inner
lid and blade assembly
• Wash all parts in warm soapy water with a soft
cloth. Use a brush to dislodge stubborn foods.
Rinse and dry thoroughly.
• The blender jug can be washed on a normal cycle
in the dishwasher. Please place the blender jug
upside down. If not placed upside down, the dish
washer heating element may damage the jug base.
Periodically, run a cycle with the jar filled
1
⁄
3
with
warm soapy water to help clean in between the
gaskets/washers of the blade assembly as fruit
juices can get in and act somewhat like an
adhesive which would make the blades difficult
to turn and therefore put extra pressure and
resistance on the motor.
Note
Removing stubborn or strong food stains
Strong smelling foods such as garlic, fish and some
vegetables such as carrots may leave an odor or
stain on the blender pitcher and lid.To remove, soak
blender pitcher and lid for 5 minutes in warm soapy
water.Then wash with a mild detergent and warm
water, rinse well and dry thoroughly.
Storage
Store your Breville ikon Hemisphere Blender upright
with the blender pitcher, lid and inner lid assembled
and inserted on the motor base or beside it. Do not
place anything on top.
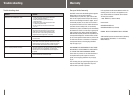
Operating your Breville ikon Hemisphere Blender
continued
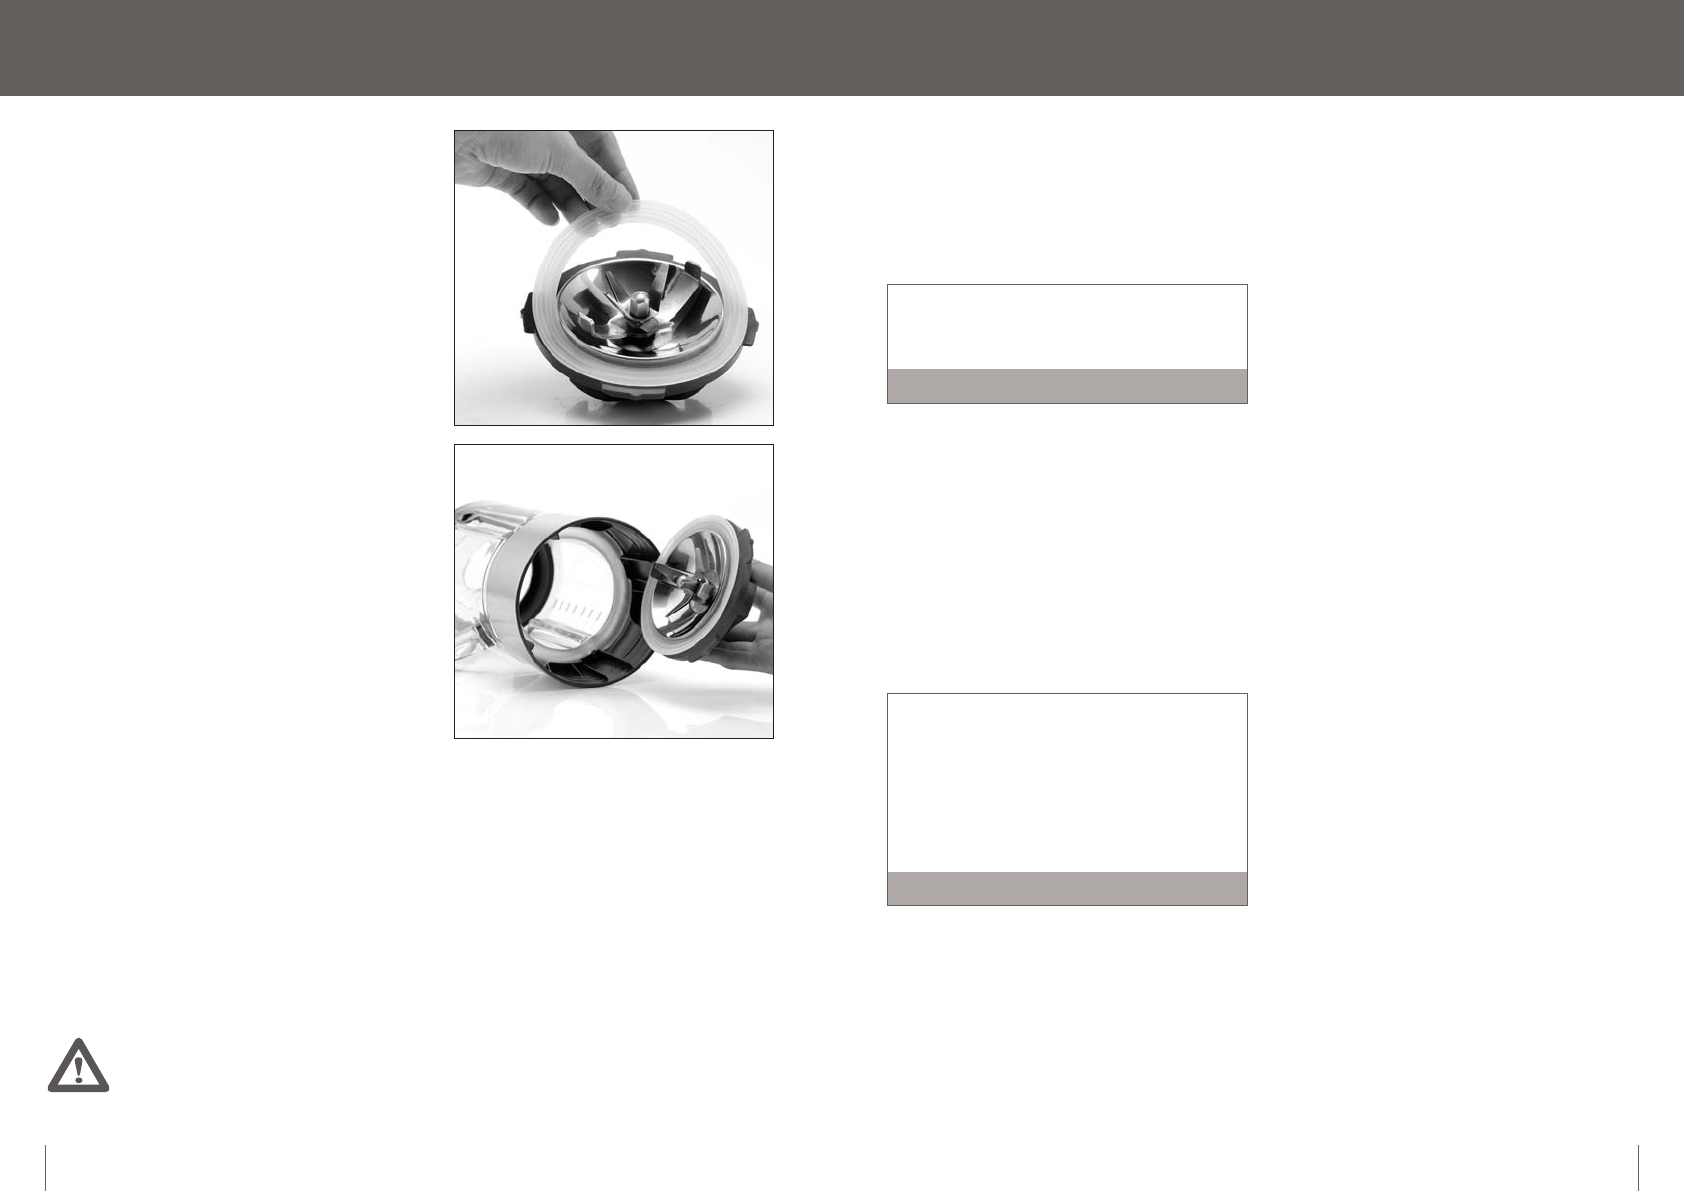
Reassembling your blender jug after
cleaning
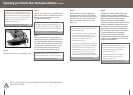
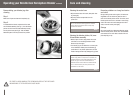
Step 1.
Make sure all parts are clean and completely dry.
Step 2.
To reassemble the blender, replace the silicon seal
onto the blade assembly (see Fig 1).Turn the blender
pitcher over and insert the blade assembly housing
into the pitcher base (see Fig 2).Twist the Blade
Removal System until firmly screwed into position.
12
BE CAREFUL WHEN HANDLING THE BLENDING BLADES AS THEY ARE SHARP.
MISHANDLING OF THE BLADES MAY CAUSE INJURY.
Fig 1
Fig 2
and odors