


11
CLEANING (cont)
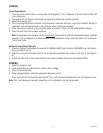
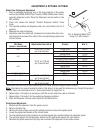
Monthly: Clean Condenser Coils
1. Use a soft bristle brush to clean the build up of dirt in the condenser.
NOTE: Some models include a removable filter that can be cleaned in warm soapy water.
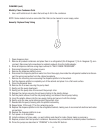
Annually: Replace Pump Tubing
38945 012207
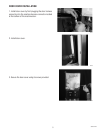
1. Open dispenser door.
2. Remove all product containers and place them in a refrigerated (35-40 degrees F [1.6-4.4 degrees C]) envi-
ronment. Disconnect all connections to ambient products from the bottle adapter.
3. Rinse all dispense stations using steps outlined in “DAILY RINSE PROCEDURE”.
4. Disconnect dispenser from power source.
5. Remove the dispense platform cover.
6. Disconnect the dispense platform water line from the supply line inside the refrigerated cabinet and discon-
nect the wiring connection from the cabinet receptacle.
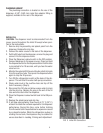
7. Remove the mounting screw securing the dispense platform to the cabinet .
8. Pull the dispense platform completely out of the cabinet and place it on a flat work surface.
9. Close the dispenser door.
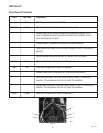
10. Remove the 4 screws securing the pump head.
11. Gently pull the pump head apart.
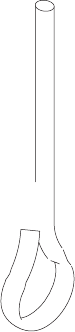
12. Gently pull the pump tube from around the pump’s rotor.
13. Release the clamps securing the old pump tubing to the plastic elbows.
14. Pull the plastic elbows from the old pump tubing, and discard the old pump tubing.
15. Insert the plastic elbows into the new pump tubing and secure it with the clamps.
16. Gently wrap the new pump tubing around the pump’s rotor.
17. Reassemble the pump housing onto the platform assembly.
18. Repeat steps 10 through 17 for the remaining pump.
19. Replace the dispense platform into the refrigerated cabinet, making sure to reconnect all electrical and water
connections.
20. Replace the dispense platform cover.
21. Turn power on to dispenser.
22 Install containers of rinse water, run each station and check for leaks. Repair leaks as necessary.
23. Replace product shelf and product containers. Reconnect any connections to ambient product containers.
24. Prime the pumps as described in “PRIMING” in the Initial Fill Section.