


12
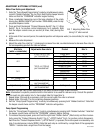
Monthly: Clean Condenser Air Filter
1. Remove the condenser air filter located on the rear of the dispenser.
2. Using a water spray, clean the air filter.
Annually: Replace Pump Tubing
CLEANING (cont)
38218.1 012207
NOTE: High volume applications may require tubing changes every 6 months.
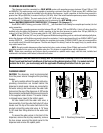
1. Open dispenser door.
2. Remove all product containers and place them in a refrigerated (35-40 degrees F [1.6-4.4 degrees C]) envi-
ronment. Disconnect all connections to ambient products from the bottle adapter.
3. Close the dispenser door and dispense product at each station until the product runs clear.
4. Remove the drip tray assembly and splash panel from the dispenser.
5. Replace the drip tray assembly.
6. Turn the Main Water valve to the 3 o’clock position.
7. Open the dispenser door and remove the product shelf.
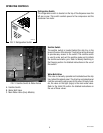
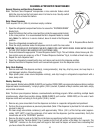
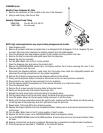
8. Remove the DISPENSE/RINSE knobs Fig 6, all dispense nozzles, the 2 screws securing the cover to the
dispense platform, and the cover.
9. Disconnect the dispense platform’s water lines from the supply lines inside the refrigerated cabinet and
disconnect the wiring connections from the cabinet receptacles.
10. Remove the 2 thumb-screws securing the dispense platform to the cabinet .
11. Slowly pull the dispense platform forward to allow access to the rear wiring harness connector.
12. Disconnect the rear wiring harness connector from its receptacle.
13. Pull the dispense platform completely out of the cabinet and place it on a flat work surface.
14. Close the dispenser door.
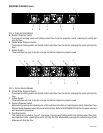
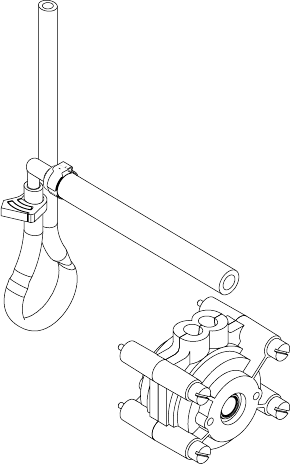
15. Remove the 4 screws securing the pump body to the pump mount.
16. Gently pull the pump tube from around the pump’s rotor.
17. Release the clamp securing the old pump tubing to the plastic elbow.
18. Pull the plastic elbow from the old pump tubing, and discard the old pump tubing.
19. Insert the plastic elbow into the new pump tubing and secure it with the clamp.
20. Gently wrap the new pump tubing around the pump’s rotor, making sure that the elbows and clamps end up
on the top-side of the pump body and don’t protrude through the exit slots.
21. Repeat steps 15 through 20 for the remaining pumps.
22. Replace the dispense platform into the refrigerated cabinet, making sure to reconnect all electrical and water
connections.
23. Turn the Main Water Valve to the 12 o’clock position. Check for leaks.
24. Replace the thumb-screws, cover, DISPENSE/RINSE knobs and dispense nozzles.
25. Turn all DISPENSE/RINSE knobs to the RINSE positions. Close the door and run a rinse at each station. Check
for leaks.
26. Replace product shelf and product containers. Reconnect any connections to ambient product containers.
27. Prime the pumps as described in “PRIMING” in the Initial Fill Section.
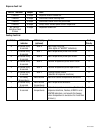
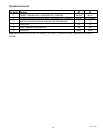
39689.0000 Tube Kit JDF-2S & JDF-4S
39687.0000 Tube Assembly