


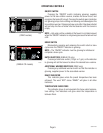
Page 9
BREW VOLUME SET-UP: Use the following steps when the setting is unknown or a different circuit board is being
installed.
1. Place an empty funnel in the funnel rails and an empty decanter/server or graduated vessel beneath the funnel.
2. Place the "ON/OFF" switch in the "ON", upper position.
3. Press and hold the brew start button until you hear the brew solenoid click on-and-off three times
(approximately 10 seconds). Release the button.
4. Allow the cycle to continue until the desired amount of water is dispensed and then turn "OFF" the brewer.
The brewer is now set to dispense this amount of water for each subsequent brew cycle.
To increase the amount of water for each brew cycle place an empty funnel in the funnel rails and an empty
decanter/server or graduated vessel beneath the funnel. Press the "ON/OFF" switch. Press and hold the "BREW"
switch until you hear the solenoid click on-and-off three times (approximately 10 seconds), then release the
"BREW" switch. Momentarily press and release the "BREW" switch once for each ounce (approximate) of water to
be added to the prior setting and allow the brew cycle to finish.
To decrease the amount of water for each brew cycle place an empty funnel in the funnel rails and an empty
decanter/server or graduated vessel beneath the funnel. Press the "ON/OFF" switch. Momentarily press and
release the "BREW" switch once for each ounce (approximate) of water to be removed from the existing setting.
Press and hold the "BREW" switch until you hear the solenoid click on-and-off three times (approximately 10
seconds), then release the "BREW" switch and allow the cycle to finish.
NOTE: For Model SINGLE CD, set 1/2 gallon and 1 gallon separately.
ADJUSTMENTS & OPTIONAL SETTINGS (cont.)
WATER SENSING THRESHOLD ADJUSTMENT PROCEDURE
1. Make sure the tank is full of water to be used for calibration. The water must be in contact with the refill probe.
2. Unplug the brewer from the power source, then press and hold the BREW button while power is reapplied.
3. Continue pressing the BREW button until the READY indicator begins to flash. Release the BREW button and
then press it again momentarily.
4. The new calibration is automatically completed within a few seconds. If the water is too pure for use with the
brewer, the READY indicator will flash very rapidly and the old calibration will be retained.
35582 021604