


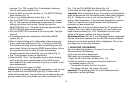
4.Now immerse the frother into the milk (Fig. 14) and turn the
SELECTOR to the Water symbol. Immediately hot steam will
be released into the milk.
With the sleeve pushed down - (Fig. 13) small frothing
bubbles will build up on the surface.
With the sleeve pushed up - steam will heat up the milk
without creating froth.
• When you are finished with frothing/steaming turn the SELECTOR
back to Cup symbol. Steam output will stop immediately. The
SELECTOR light starts blinking again.
• Now remove the pitcher or the cup from the frother.
Please note: As long as the SELECTOR light blinks you can
steam more milk. Once the SELECTOR light turns off you need
to heat up the thermoblock to create steam (see steps 1-4 above).
• Use a cappuccino cup and prepare an espresso or double
espresso (see chapter 9b). Add the hot milk and froth to taste.
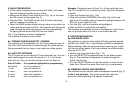
Tips for frothing (Cappuccino):
• The frother tip should not touch the bottom of your pitcher.
Start in the steaming position – sleeve "up" (Fig. 13) – for a
few seconds. Then push the sleeve "down". Milk froth will
build up. This way the froth on top of your milk is also warm.
• Steaming and frothing directly in your cappuccino/latte cup:
With practice, you can steam and froth directly in your
cappuccino cup. First steam and froth the milk, then add your
espresso shot.
• For two cappuccinos or lattes prepare enough froth/steamed
milk, then brew your espressos and add the milk for both.
• Hotter Milk: If the frothed milk is not hot enough, continue to
inject hot steam in the steaming position.
Please note: When you stop steaming the display automatically
highlights the 1-cup Espresso symbol. You can add coffee
immediately after frothing milk. No purging necessary.
12. PREPARING HOT MILK / HOT CHOCOLATE
The steam feature can be used to prepare a cup of hot steamed
milk or hot chocolate. To steam milk and to steam and froth
chocolate milk follow the instruction in chapter 11.
Tip: If you use chocolate powder for your hot chocolate, first
add it to the cold milk and dissolve the chocolate powder, then
steam and froth.
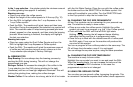
13. CLEANING THE DUAL FROTHER PLUS
Always keep the Dual Frother Plus clean. The two side holes and
the groove of the frother tip must be free of milk deposits (Fig. 16).
If these parts contain hardened milk particles, it will be impossi-
ble to froth milk properly.
Fast cleaning:
• Place a cup underneath the frother and turn the SELECTOR to
the Hot Water/Steam position (Fig. 4). Let hot water run through
the frother for about 3 seconds and then stop.This will flush
out any small milk droplets.
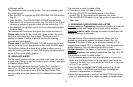
Thorough cleaning:
Remove the Dual Frother from the Steam Nozzle (Fig. 15) and
unscrew the tip from the rod (Fig. 16). Make sure the two side
holes, the bottom opening and the groove in the tip are completely
free of any hardened milk deposits (use hot soapy water and a
cleaning brush). Rinse all parts thoroughly with fresh water and
replace. Make sure the tip is screwed on to the rod properly
16.