


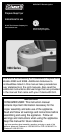


English-11
Care, Maintenance
and Cleaning
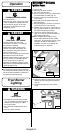
Drip Tray
The drip tray is located below the grill and
should be cleaned periodically to prevent
heavy buildup of debris.
NOTE: Allow the drip tray to cool
before attempting to clean.
Important: Do not leave the grill outside
during inclement weather unless it is
covered (cover sold separately). Rain
water can collect inside of the grill, the
grill cart or the drip tray if left uncovered.
If the drip tray is not cleaned after use and
the grill is left uncovered, the drip tray will
fill with water causing grease and water to
spill into the grill cart. We recommend
cleaning and storing the drip tray after
every use.
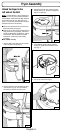
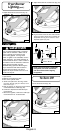
Igniter service:
The igniter for the fryer is a standard piezo
igniter. It does not require a battery. See the
parts list for replacement items for your fryer.
Suggested Cleaning Materials:
• Mild dishwashing liquid detergent
• Hot water • Wire brush
• Paper clip • Nylon cleaning pad
• Soft brass-bristled brush • Soft, dry cloth
Component Cleaning:
■ Make sure cooking oil is sufficiently cool.
■ Carefully remove the oil reservoir from the fryer.
■ Pour the oil into a container with a resealable cap
for storage or to discard.
■
BURNER: Wire-brush loose corrosion from
the burner exterior. Clean clogged gas port
holes with an opened paper clip. Replace
corroded or damaged burners that would
emit excess gas.
■
COOKING SURFACES:
Wash the oil and
food contact surfaces with hot soapy water.
These items include the Wire Basket, Oil
Reservoir, Lid, and the Thermometer.The lid is
removable for cleaning.
Remove stubborn
residue with a mild cleanser and a nylon
cleaning pad. DO NOT use a commercial
oven cleaner. Wipe dry with a soft, dry
cloth.
■
EXTERIOR SURFACES: Clean exterior
surfaces with mild soap and hot water.
Remove stubborn residue with a mild
cleanser and a nylon cleaning pad. DO
NOT use abrasive cleaners. Wipe dry with
a soft, dry cloth.
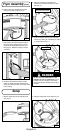
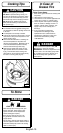
CAUTION
All cleaning and maintenance should be
done only when the fryer and grill are
cool and with the fuel supply turned off at
the cylinder.
REPRESENTATIVE
ILLUSTRATION
Note:
Spiders and small insects can spin webs and
build nests inside the burner tube.This
especially occurs in late summer and fall
before frost when spiders are most active.
These nests can obstruct gas flow and cause
a fire in and around the burner valve. Such a
fire can cause operator injury and serious
damage to the fryer.To help prevent a
blockage and ensure full heat output, clean
and inspect the burner tube often (once or
twice a month). NOTE: Water or air pressure
will not
normally clear a spider web.
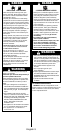
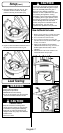
Steps For Cleaning the Burner:
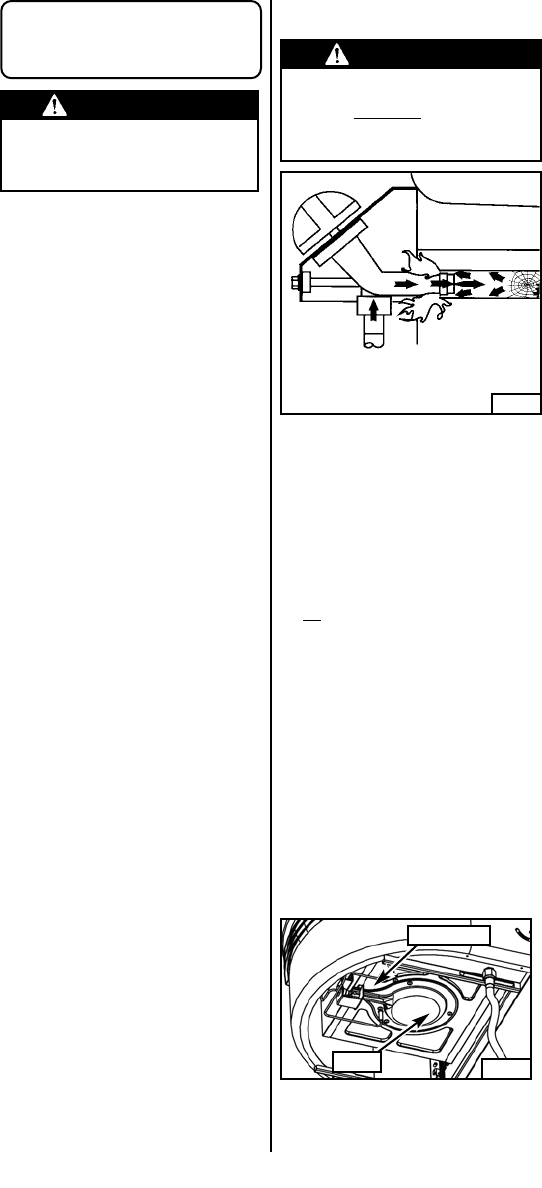
1. The burner is accessed from below the
fryer (Fig. 26). Using a screwdriver,
remove the three screws holding the
burner. Push the burner away from the
valve until it clears the valve. Next, lower
the burner and remove from the fryer.
2. Look inside end of burner tube for nests,
webs or mud.
3. To remove an obstruction, use a flexible
brush or bend a small hook on one end of
a 20-inch long flexible wire.
4. Replace the burner in the operating
position.
5. Make sure the burner tube is properly
positioned over the valve orifice (Fig. 26).
Cleaning the Burner:
WARNING
Spider’s nests or wasp’s mud inside the
burner tube may cause fire at the valve. If a
fire occurs, immediately
turn off the gas
supply at the L.P. cylinder valve (see
representative illustration in Fig. 25).
Fig. 25
Fig. 26
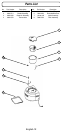
Burner
Burner Tube