


5
5
• When using glass bakeware, reduce the
recipe temperature by 25˚F, except when
baking pies or yeast breads. Follow the
standard recipe baking time for pies and
yeast breads.
7. Place pans carefully on the oven racks.
Turn pans on the racks so that the long
sides run left to right, parallel to the door.
8. Adjustments to recipe times and
temperatures will have to be made
when baking at high altitudes. Consult a
cookbook on high-altitude cooking.
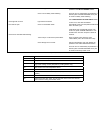
PROBLEM
1. Cookies and biscuits burn on the bottom.
2. Cookies and biscuits are too brown on top.
3. Cakes burn on the sides or are not done in
center.
4. Cakes crack on top.
5. Cakes are not level.
6. Pies burn around edges or are not done
in center.
7. Pies are too light in color on top.
PROBABLE CAUSE
Oven door opened too often
Incorrect rack position being used. Pan too
close to bake element.
Standard Bake or Convection Bake mode being
used.
Rack position being used is too high.
Food was placed in the oven during pre-heat.
Oven was too hot.
Oven temperature was too high.
Oven and/or oven rack was not level.
Oven was too hot.
Dark, heat absorbing pan is being used.
Oven was not hot enough.
Oven and/or rack over crowded.
CORRECTION
Set Minute Timer to shortest recommended
time and check food at this time. Use door
window to check food.
Change rack position. Use Pure Convection™
mode.
Use Pure Convection™ mode.
Change rack position.
Wait until oven is pre-heated
Reduce temperature.
Reduce oven temperature.
Level oven and rack as needed.
Reduce temperature.
Use shiny, reflective pans.
Increase oven temperature.
Reduce number of pans.
Common Baking Problems
Multiple Rack Baking
The uniform air circulation provided by Pure
Convection™ cooking enables the full oven
capacity to be utilized. Many foods, such
as pizzas, cakes, cookies, biscuits, muffins,
rolls and frozen convenience foods can be
successfully prepared on either two or three
racks at the same time. Additionally, complete
meals can be prepared by using multiple racks.
See below for specific recommendations.
Follow the steps in the Oven Modes section to
manually operate the oven, or refer to the Delay
Timed Cooking section below for automatic
operation.
Multiple Rack Baking Tips:
1. Typically, when baking on two racks, use
rack positions #2 and #4 or #3 and #5.
When baking on three racks, use rack
positions #1, #3 and #5.
2. When adapting a single rack recipe to
multiple rack baking, it may be necessary
to add to the baking time. This is due to the
extra mass of food in the oven.
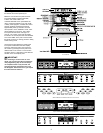
Oven GlideRack™
Dacor’s Oven GlideRack™ is designed to
install effortlessly and glide at a full extension.
Especially when using Dacor’s pizza stone
(model number ABS20), the full extension of the
rack allows you to slide the pizza on and off the
stone with great ease. It is also great for large
roasts in large roasting pans. This easy- slide
rack will allow you to baste more easily and
check temperatures of the food more safely and
quickly.
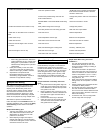
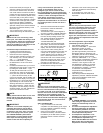
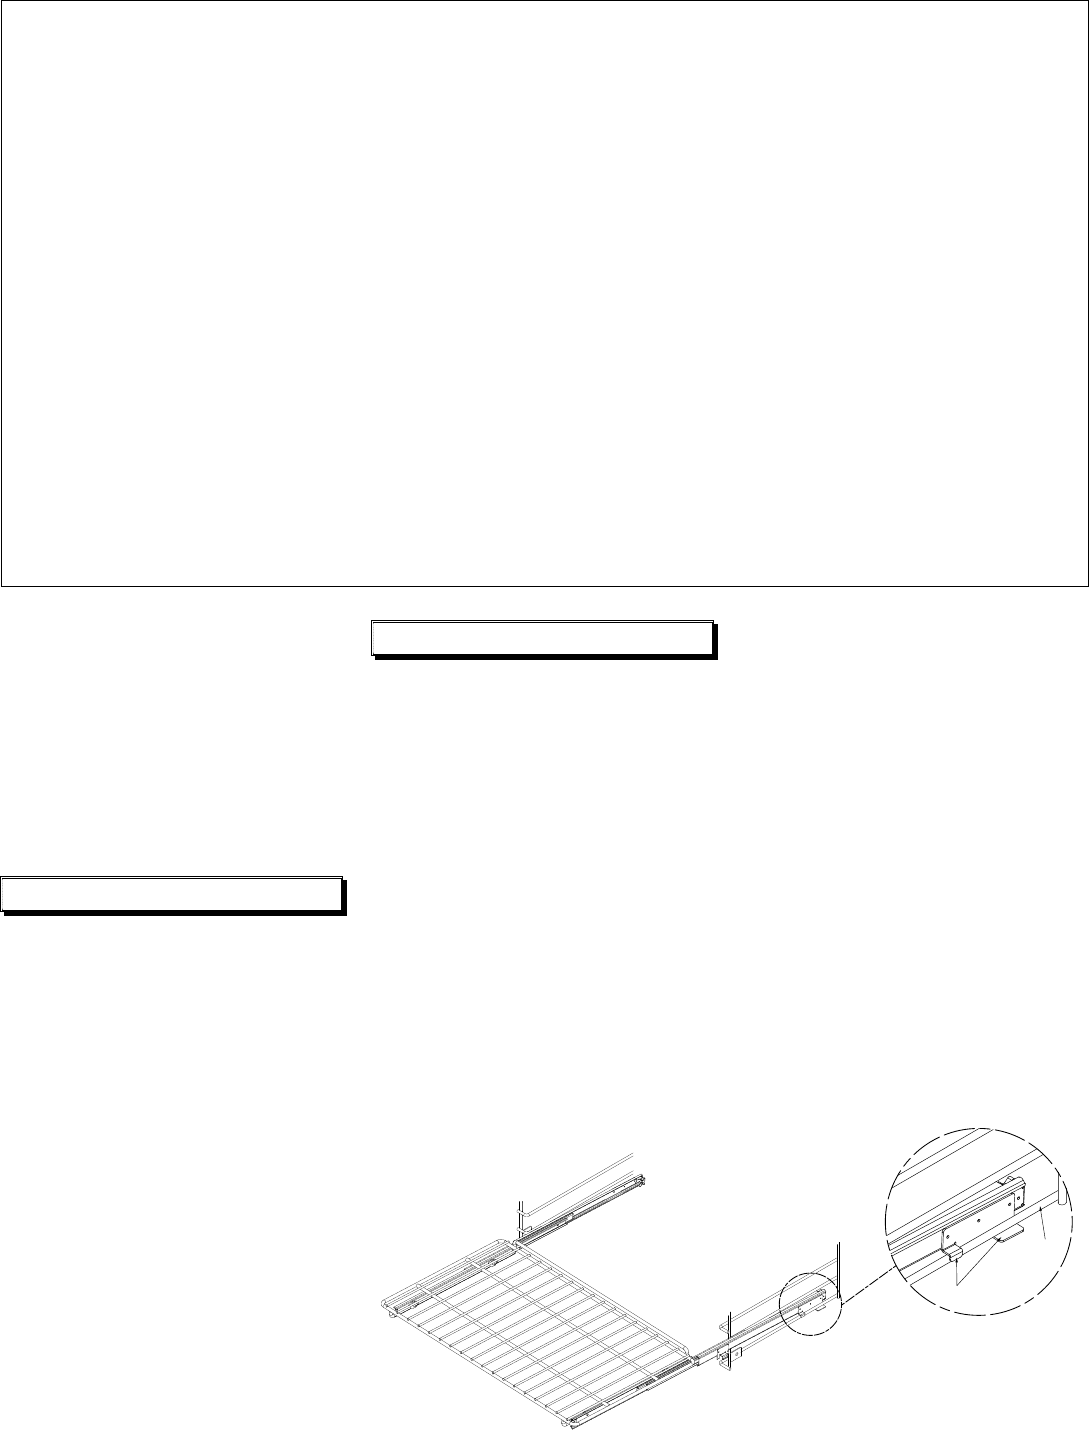
Proper Installation of the Easy slide Oven
Rack:
1. Fully extend the two side guides. Align two
small clips on the bottom at the rear of the
Oven GlideRack™ with the black porcelain
rack guides in the oven.
2. Begin to slide the rack in, then lift up. The
Oven GlideRack™ must be in between the
two clips on the upper and lower side of
the rack rear.
3. Push the rack all the way to the back.
4. Grasp the rack in the front center and pull.
The rack should come forward while the
side guides remain in place.
Helpful Hints When Using Your Oven
GlideRack™:
1. This rack works particularly well with
heavier items, although you can use it
during any baking, broiling or roasting in
your Dacor oven.
2. These racks will need to be spaced out
when using more than one in the oven at
a time. For instance, the racks should be
used on rack positions 1,3, & 5 or 2 & 4,
counting up from the bottom, instead of
using racks 2,3, & 4.
3. When using the rack with Dacor’s ABS20
baking stone, use rack position 1 for best
results.
4. Heavier roasting pans and dishes will also
cook better on Rack position 1.
5. Do not leave the rack in during self- clean.
The rack will become difficult to slide in
and out if it is self- cleaned. Remove all the
racks and the filter in the back of the oven
before self- cleaning..
6. To clean the rack, use hot, soapy water
and the rough side of a sponge.
Glide clips
Oven
rack
Oven GlideRack™