


7
7
1. Avoid using foods that will spoil
while waiting for the cooking cycle
to begin. Typical foods to avoid
include those containing eggs and
dairy products, cream soups, and
cooked or uncooked meats, poultry
and fish stand in the oven for more
than two hours before cooking
begins.
2. If cooking will not begin
immediately, place only very cold
or frozen food into the oven. Most
unfrozen foods should never stand
in the oven for more than two
hours before cooking begins.
3. Do not allow foods to remain in
the oven more than one hour after
completion of the cooking cycle.
When the temperature drops below
140˚, bacteria can develop.
To use Timed Cooking, follow these steps:
(This mode will begin cooking immediately
and turn off at the desired time.)
1. Position oven rack(s) at the proper
height(s).
2. Place the food onto the center of the oven
rack(s).
3. Select the desired cooking mode and
temperature.
4. Press the “COOK TIME” pad and “TIME”
will appear in the clock display. Press the
“TIME•TEMP” “+” pad to set the length
of time that the food will be cooked. The
“COOK TIME” can be set from 5 minutes to
11 hours, 50 minutes.
5. After the “COOK TIME” has expired, the
clock will beep three times, and “Hold” will
be displayed. If cooking in a convection
mode, the convection fan will also turn
off at this time. While in “Hold” mode, the
oven temperature will be maintained at
150˚F for a period of two hours. “Hold”
mode can be cancelled by pressing the
“CANCEL•SECURE” touch pad. The
cooling fan will continue to run depending
upon the length and temperature of the
cooking process.
To use Timed Cooking, follow these steps:
(This mode allows the cooking process to
start at a later time and finish at the desired
time.)
1. Follow steps 1 thru 4 in the previous
instructions for Timed Cooking.
Dehydrating/Defrosting
The oven can be used to dehydrate or
defrost foods at low heat settings in “Pure
Convection™” mode.
Follow these steps to dehydrate or defrost
foods:
1. Position oven rack(s) at the proper
height(s).
2. Place the food onto the center of the oven
rack. (For dehydrating, prepare food as
recommended then place food onto a
drying rack.)
3. Press the “PURE CONVECTION™” pad.
Broiling
Broiling is a quick and flavorful way to prepare
many foods, including steaks, chicken, chops,
hamburgers and fish. Broiling in the oven is
completed with the oven door completely
shut. It is normal and necessary for some
smoke to be present to give the food a broiled
flavor. The broil temperature may be adjusted in
5˚F increments from 135˚F up to the maximum
setting of “HI”. The “HI” setting is equivalent to
555˚F.
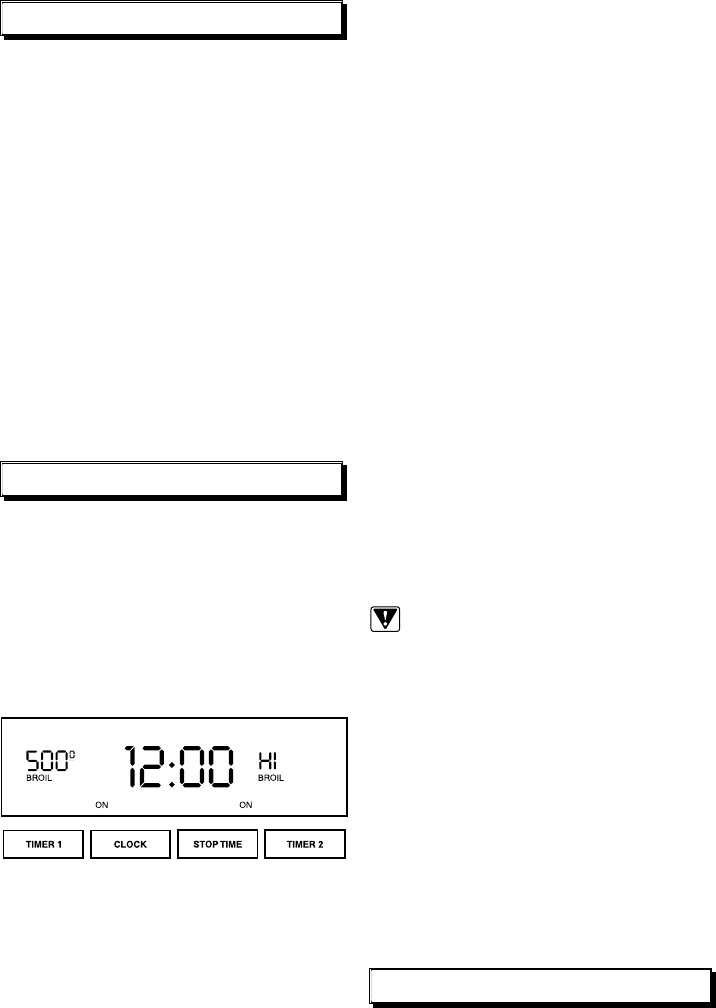
Clock Displaying Broil (double oven)
Follow these steps to operate the oven in
Standard Broil or Convection Broil modes:
1. Close the door tightly.
2. Press the “BROIL” or “CONVECTION
BROIL” pad.
3. Press the “TIME•TEMP” “+” or “–” pad and
the default temperature setting “HI” will be
displayed. “HI” is equivalent to 555˚F.
4. Set the temperature to 135˚F. This is the
minimum temperature that can be set. (For
dehydrating, a higher temperature setting
may be required. Follow the recommended
temperature for the type of food being
prepared.)
5. It is recommended that the user set the
Minute Timer(s) to time the process.
2. Press the “STOP TIME” touch pad, and
“STOP” will appear in the clock display.
Press the “TIME•TEMP” “+” pad to enter
the time of day that you wish the oven to
shut off. “DELAY” will now be displayed.
The oven will calculate the correct “START
TIME.” After the “COOK TIME” has expired,
the clock will beep three times, and “Hold”
will be displayed. If cooking in a convection
mode, the convection fan will also turn
off at this time. While in “Hold” mode, the
oven temperature will be maintained at
150˚F for a period of two hours. “Hold”
mode can be cancelled by pressing the
“CANCEL•SECURE” touch pad. The
cooling fan will continue to run depending
upon the length and temperature of the
cooking process.
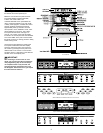
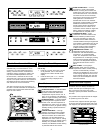
Control Panel
To avoid accidentally turning the oven on while
cleaning the control panel, activate the “Secure”
feature. Press and hold the “CANCEL•SECURE”
pad for approximately three seconds. This will
disable the control panel and allow cleaning
the controls without accidentally starting any
functions. “OFF” will appear in the display when
the control panel has been secured.
4. If a temperature other than “HI” is desired,
press the “TIME•TEMP” “–” pad to reduce
the temperature. Six seconds after setting
the temperature, the “ON” indicator will
light up in the clock display, the broiler
element will begin heating, and the cooling
fan will turn on.
5. It is recommended that the user set
the Minute Timer(s) to time the broiling
process.
6. When the Minute Timer expires
and/or the food is cooked, press the
“CANCEL•SECURE” touch pad to turn off
the oven. The cooling fan will continue to
run for 30 to 45 minutes depending upon
the length and temperature of the broiling
process.
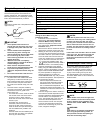
BROILING TIPS:
1. Always use a broiler pan and grill to
provide drainage for excess fat and grease.
This will reduce spatter, smoke and flare-
ups.
2. Pre-heat the broiler for 10 minutes prior to
cooking.
3. Begin with a room temperature broiler pan
for even cooking.
4. Use tongs or a spatula to turn and remove
meats. Never pierce meat with a fork as
this allows juices to escape.
5. Broil food on the first side for slightly more
than half of the recommended time, then
season and turn. Season the second side
just before removing.
6. To prevent sticking, lightly grease the
broiler grill. Excess grease will result in
heavy smoke. For easier cleaning, remove
the broiler pan and grill when the food is
removed. While the pan and grill are still
warm, soak the pan and grill in a solution
of hot water and dishwashing liquid, then
scrub them with an abrasive pad.
7. To prevent sticking, lightly grease the
broiler grill. Excess grease will result in
heavy smoke.
WARNINGS:
1. To avoid electrical shock or burns, turn
off all controls and ensure the oven is
cool before cleaning.
2. Do not use harsh or abrasive cleaning
agents, waxes, polishes, or commercial
oven cleaners to clean the oven.
Read and follow the CARE AND CLEANING
INSTRUCTIONS to ensure that proper oven
operation and appearance will be maintained
throughout the lifetime of the product.
Several materials and finishes are used in
the oven. Each material and finish must be
properly cleaned according to the following
recommendations. Failure to follow these
recommendations may result in permanent
damage to the oven.
DELAYED TIMED COOKING TIPS:
1. Do not use foods containing baking powder
or yeast in Delay Timed Cooking. These
foods will not rise properly.
2. Remember that “COOK TIME” refers to
the length of the cooking cycle. It does not
refer to the start time!
3. The time required to preheat the oven must
be included in the “COOK TIME.” Thus,
the “COOK TIME” should be increased by
about 8 to 12 minutes depending upon the
temperature setting. The top element does
not come on to preheat in the Delay Mode,
so you will not pre-maturely brown foods.