


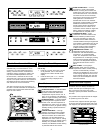
6
6
Setting the Oven When Using the
Temperature Probe:
1. Preheat the oven to the desired
temperature. (Convection Roasting
Guide for Meats, Poultry and Fish)
2. Insert the Temperature Probe into the
food. (See Proper Temperature Probe
Placement above.)
3. After the oven cell has reached the desired
temperature, place the food into the oven.
4. Wearing an oven mitt, lift the probe outlet
cover and plug the Temperature Probe into
the outlet in the oven. (The outlet is located
on the left inside oven wall near the front
of the oven.) Make sure it is pushed all the
way into the outlet. Close the oven door.
5. Press the “PROBE” button. The
Display will flash and beep “PRB” if
the Probe is not inserted properly.
6. Adjust the temperature to the desired
setting using the TIME•TEMPERATURE
buttons. A jump-in temperature of 160˚ will
appear when the TIME•TEMPERATURE
key is first pressed. To change to the
desired temperature, just press the
TIME•TEMPERATURE key until you reach
the desired temperature. The temperature
can be set from 100-200˚.
• After the temperature has been set,
the control panel temperature readout
will default to 95˚F, even if the food
has not reached that temperature. The
temperature readout will increase in 1˚F
increments until the food reaches the set
temperature.
7. The oven will go to the “HOLD” mode for 2
hours after the internal temperature of the
food has reached the desired temperature
and will hold the oven temperature at
150˚F. The residual heat of the oven will
cause the internal temperature of the
food to continue to climb. Use hot pads
to remove the Temperature Probe from
the food. Do not use tongs to pull on the
Probe, it might be damaged.
Minimum Safe Internal Temperatures for Various Foods
Type & Cut Internal Temp. (F)
Pork, ham, sausage and bacon 180
All foods previously served and cooled that are reheated 165 within two hours
All poultry and game birds (turkey, chicken, cornish game hen, duck, etc.) 180
Stuffed meats 165
Stuffing 165
Ground beef and ground pork 165
Fish and most other potentially hazardous food not listed in this table 145
Beef roasts (rare) 145
Beef steaks (rare) 145
Minimum Safe Internal Temperatures
Timed/Delayed Timed Cooking
This function allows the user to finish and/
or start a cooking cycle automatically. It
is especially useful for preparing meals in
advance, or cooking while you are at work
or play. Timed Cooking can only be used
with Standard Bake, Pure Convections and
Convection Bake modes. lt will not function in
the Broil modes.
NOTE:
For the double ovens, both the upper and
lower chambers can be set for Delay Timed
Cooking. However, both chambers must
have the same “COOK TIMES” and “STOP
TIMES”.
WARNING:
Food safety is an important consideration
when using delayed cooking modes. To
avoid potential sickness and spoiling of
food, take the following steps:
Setting the Oven for Delayed Timed Cooking
NOTES:
After meat is pulled out of the oven, it will
continue to cook. Carry-over cooking affects
all foods. The larger the item, the longer
the carry-over. It is best to let the meat rest
after it comes out of the oven for 10 to 15
minutes. This will allow the meat to retain its
juices and continue to set, making it easier
to carve.
If the Probe is left inserted in the oven outlet
when not in use, the control will beep and
flash PRB until the Probe is unplugged.
Unplugging the Probe from the oven turns
the oven off.
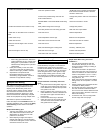
Using the Temperature Probe
For many foods, especially roasts and poultry,
internal food temperature is the best test for
properly cooked food. The Temperature Probe
takes the guesswork out of roasting by cooking
food to the exact temperature you desire.
NOTES:
Double Oven models have a Temperature in the
upper oven only.
IMPORTANT
1. Use of probes other than the one
provide with your wall oven may result
in damage to the probe and/or the wall
oven.
2. Use the handles of the Temperature
Probe and plug when inserting and
removing them from the food and outlet.
3. Do not use tongs to pull the cable
when removing the Probe. Do so could
damage the Probe.
4. Make sure the food is completely
defrosted before inserting the Probe to
avoid breaking the Probe.
5. Never leave the Temperature Probe
inside the oven during Self-Clean mode.
6. To prevent the possibility of burns,
unplug the Temperature Probe using hot
pads.
7. Do not store the Probe inside the oven.
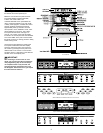
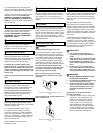
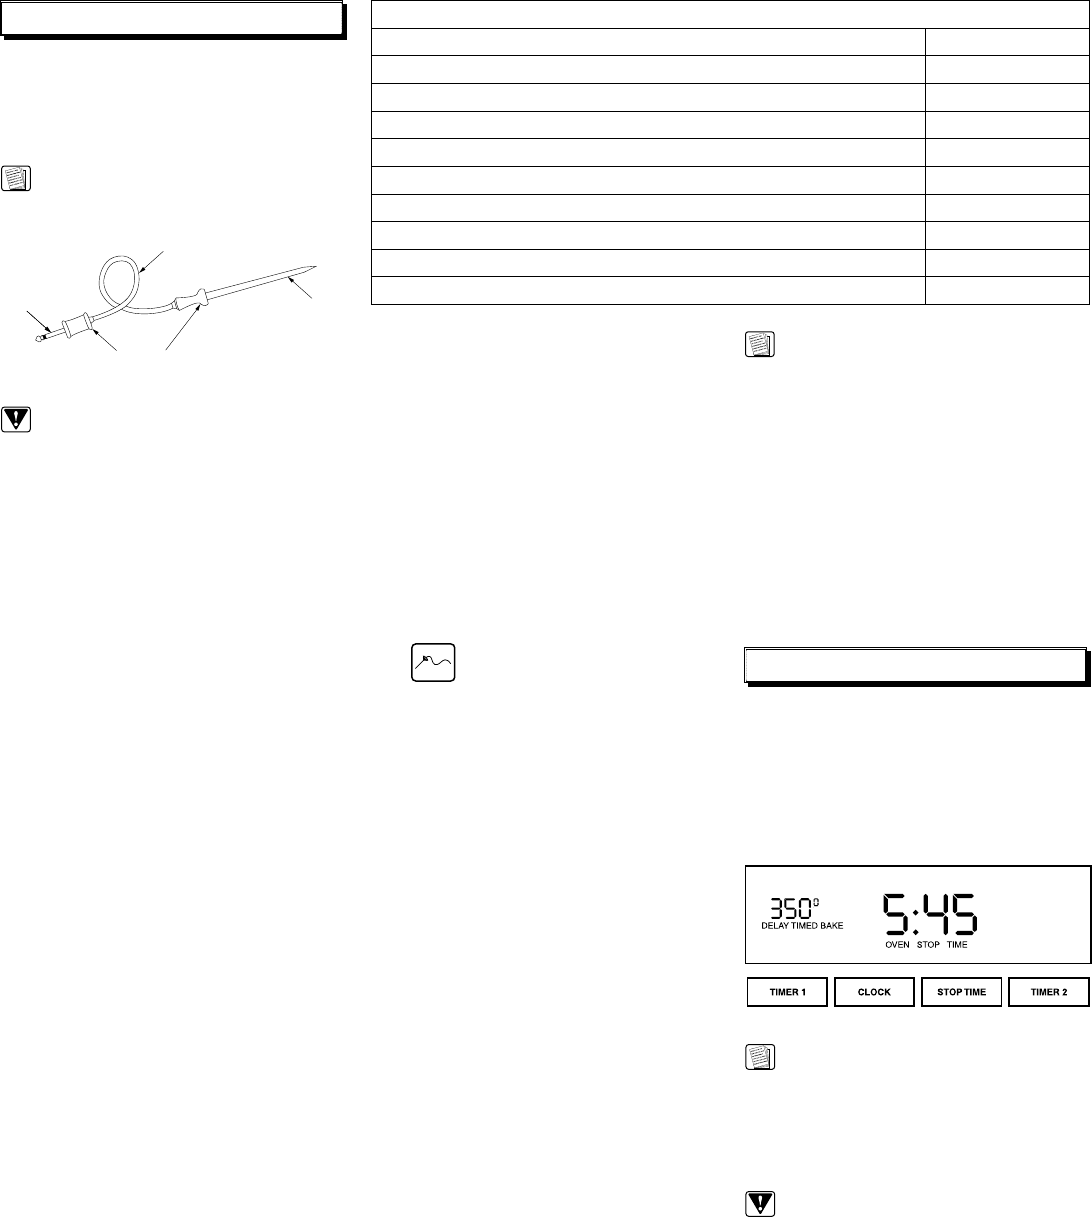
Plug
Cable
Handles
Probe
Temperature Probe
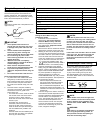
Proper Temperature Probe Placement:
1. Lay the Probe on the outside of the meat
along the top or side and mark with your
finger where the edge of the meat comes
to on the Probe. The point should rest in
the center of the thickest meaty part of the
roast.
2. Insert the Probe to the point marked by
your finger into the meat. The Probe should
not touch the bone, fat, gristle or the
bottom of the pan.
• For roasts with no bone, insert the Probe
into the side of the roast in the center.
For bone-in ham or lamb, insert the
Probe into the center of the lowest large
muscle or joint.
• For dishes such as meat loaf or
casseroles, insert the Probe into the
center of the dish. When cooking fish,
insert the Probe from just above the gill
into the meatiest area, parallel to the
backbone.
• Insert the Probe into the meatiest part of
the inner thigh from below, and parallel
to the leg of a whole turkey.