Page 2
Before installation
Measure the width of the kitchen entrance through which the refrigerator must pass. If it will not
pass through easily without risking damage, then its doors should be removed to reduce the width
and allow free passage. Once the unit is in position the doors can be re-fitted.
• Please ensure that packaging material is disposed of in a responsible manner.
• Plastic bags should be cut up to prevent children playing with them and accidentally suffocating.
• If the appliance is damaged in any way, do not use it. Report the damage to your dealer, who will
take the necessary corrective action.
Introduction
Unpacking
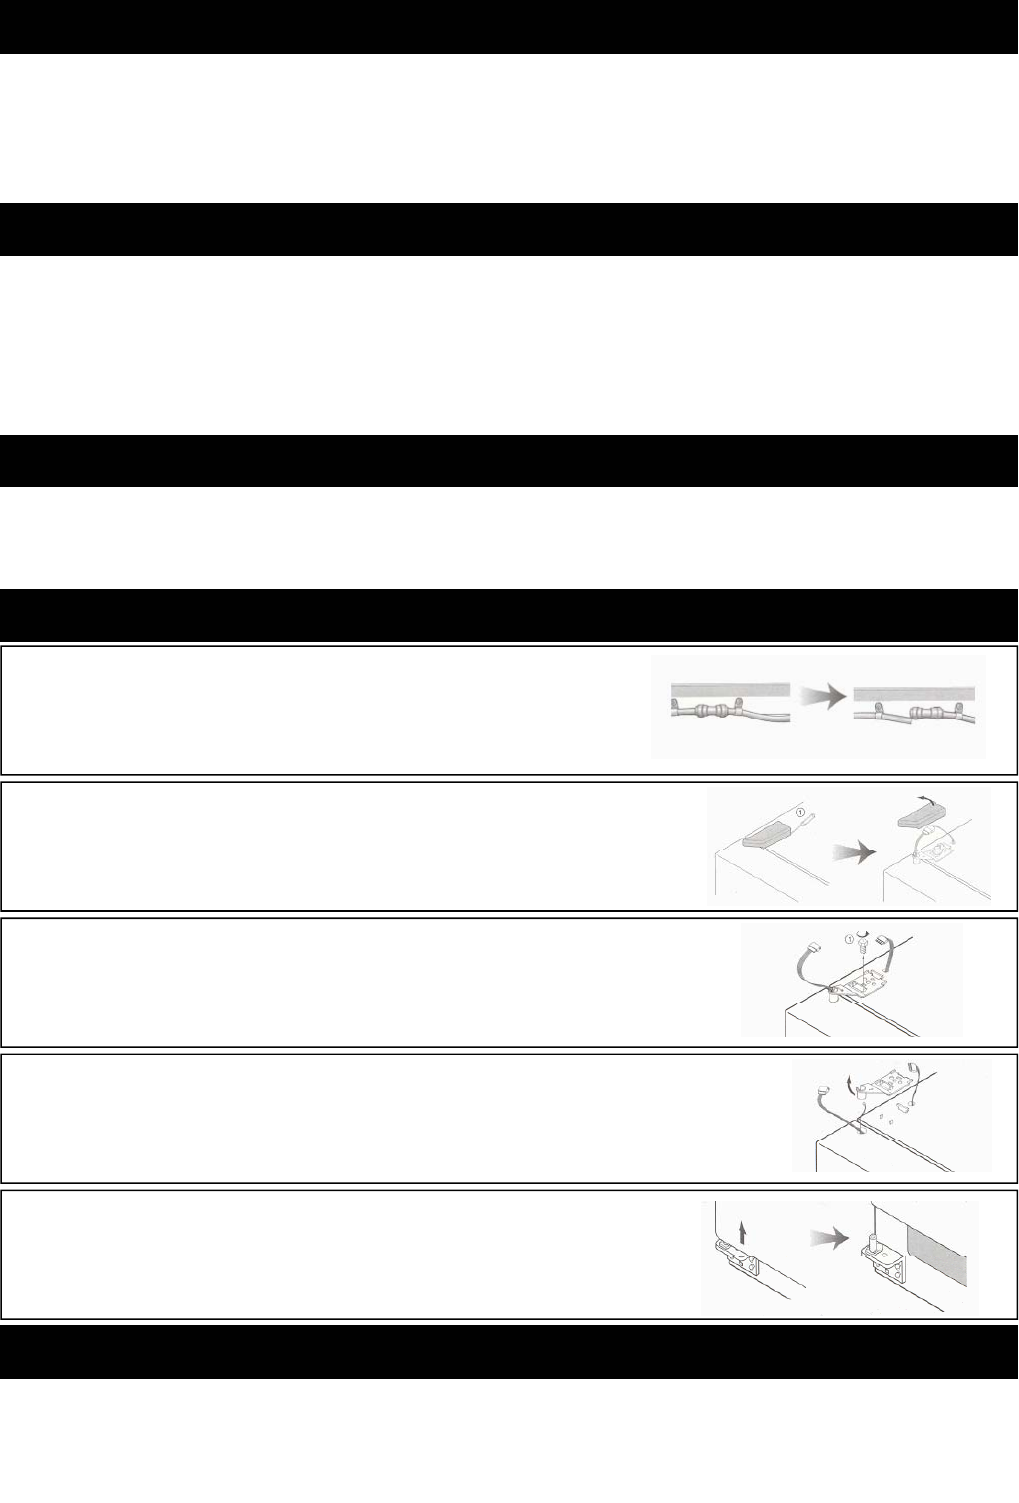
Removing the freezer door
Removing the refrigerator door
To remove the refrigerator door: Repeat steps 2 to 5 as listed above.
Congratulations on the purchase of this quality product.
Please read these instructions carefully before use. They will provide you with information on how
to operate and care for your refrigerator, in order that you gain the maximum benefit from it and enjoy
many years of trouble free use.
Unscrew and remove the bottom plinth.
This exposes the water tube.
Slide the left collar coupling to the right and pull the left water
tube free.
Unscrew the top hinge cover.
Insert a blade or small flat screw driver into the side groove of
the hinge cover and pry it loose.
Remove the hinge cover.
Turn the top hinge fastener 3 to 4 times in an anti-clockwise
direction.
Disconnect the wiring harness.
Remove the hinge by lifting the front and pulling it free. Be
sure to hold the door securely as the top is now no longer se-
cured.
Lift the door free of the bottom hinge pin.
1
2
3
4
5


