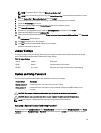
3. On the boot menu screen, select the Diagnostics option.
The Enhanced Pre-boot System Assessment window is displayed, listing all devices detected in the computer. The
diagnostics starts running the tests on all the detected devices.
4. If you wish to run a diagnostic test on a specific device, press <Esc> and click Yes to stop the diagnostic test.
5. Select the device from the left pane and click Run Tests.
6. If there are any issues, error codes are displayed.
Note the error code and contact Dell.
Troubleshooting Your Computer
You can troubleshoot your computer using indicators like Diagnostic Lights, Beep Codes, and Error Messages during the
operation of the computer.
Power LED Diagnostics
The power button LED located on the front of the chassis also functions as a bicolored diagnostic LED. The diagnostic
LED is only active and visible during the POST process. Once the operating system starts to load, it is no longer visible.
Amber LED blinking scheme – The pattern is 2 or 3 blinks followed by a short pause then x number of blinks up to 7. The
repeated pattern has a long pause inserted in the middle. For example 2,3 = 2 amber blinks, short pause, 3 amber blinks
followed by long pause then repeats.
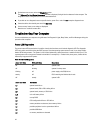
Table 14. Power LED Diagnostics
Amber LED State White LED State Description
off off system is OFF
off blinking system is in sleep state
blinking off power supply unit (PSU) failure
steady off PSU is working but failed to fetch code
off steady system is ON
Amber LED State Description
2,1 system board failure
2,2 system board, PSU or PSU cabling failure
2,3 system board, memory or CPU failure
2, 4 coin-cell battery failure
2,5 corrupt BIOS
2,6 CPU configuration failure or CPU failure
2,7 memory modules are detected, but a memory failure
3,1 possible peripheral card or system board failure
3,2 possible USB failure
3,3 no memory modules are detected
42


