12
Do not use a steam cleaner
because the moisture can get into
the appliance thus make it unsafe.
GENERAL RECOMANDATION
✓ Important: Before any operation of cleaning and maintenance disconnect the
appliance from the electrical supply.
✓ It is advisable to clean when the appliance is cold and especially for cleaning the
enamelled parts.
✓ Avoid leaving alkaline or acidic substances (lemon juice, vinegar, etc.) on the
surfaces.
✓ Avoid using cleaning products with a chlorine or acidic base.
The oven must always be cleaned after every use, using suitable products and
keeping in mind that its operation for 30 minutes on the highest temperature
eliminates most grime reducing it to ashes.
✓ The use of suitable protective clothing/gloves is recommended when handling,
cleaning this appliance.
ENAMELLED PARTS
✓ All the enamelled parts must be cleaned with a sponge and soapy water only or
other non-abrasive products.
Dry preferably with a chamois leather.
STAINLESS STEEL, PAINTED AND ALUMINIUM PARTS AND
SILK-SCREEN PRINTED SURFACES
✓ Clean using an appropriate product. Always dry thoroughly.
IMPORTANT: these parts must be cleaned very carefully to avoid scratching and
abrasion. You are advised to use a soft cloth and neutral soap.
ONLY SOAP/WARM WATER MUST BE USED TO CLEAN THE STAINLESS
STEEL SURFACES.
INSIDE OF OVEN
This must be cleaned regularly.
Remove and refit the side runner frames as described on the next chapter.
With the oven warm, wipe the inside walls with a cloth soaked in very hot soapy
water or another suitable product.
Side runner frames, lower panel and rack can be removed and washed in the sink.
cleaning and maintenance
ᕤ
Before any operation of maintenance
disconnect the appliance from the
electrical mains supply.
WARNING
VERY IMPORTANT
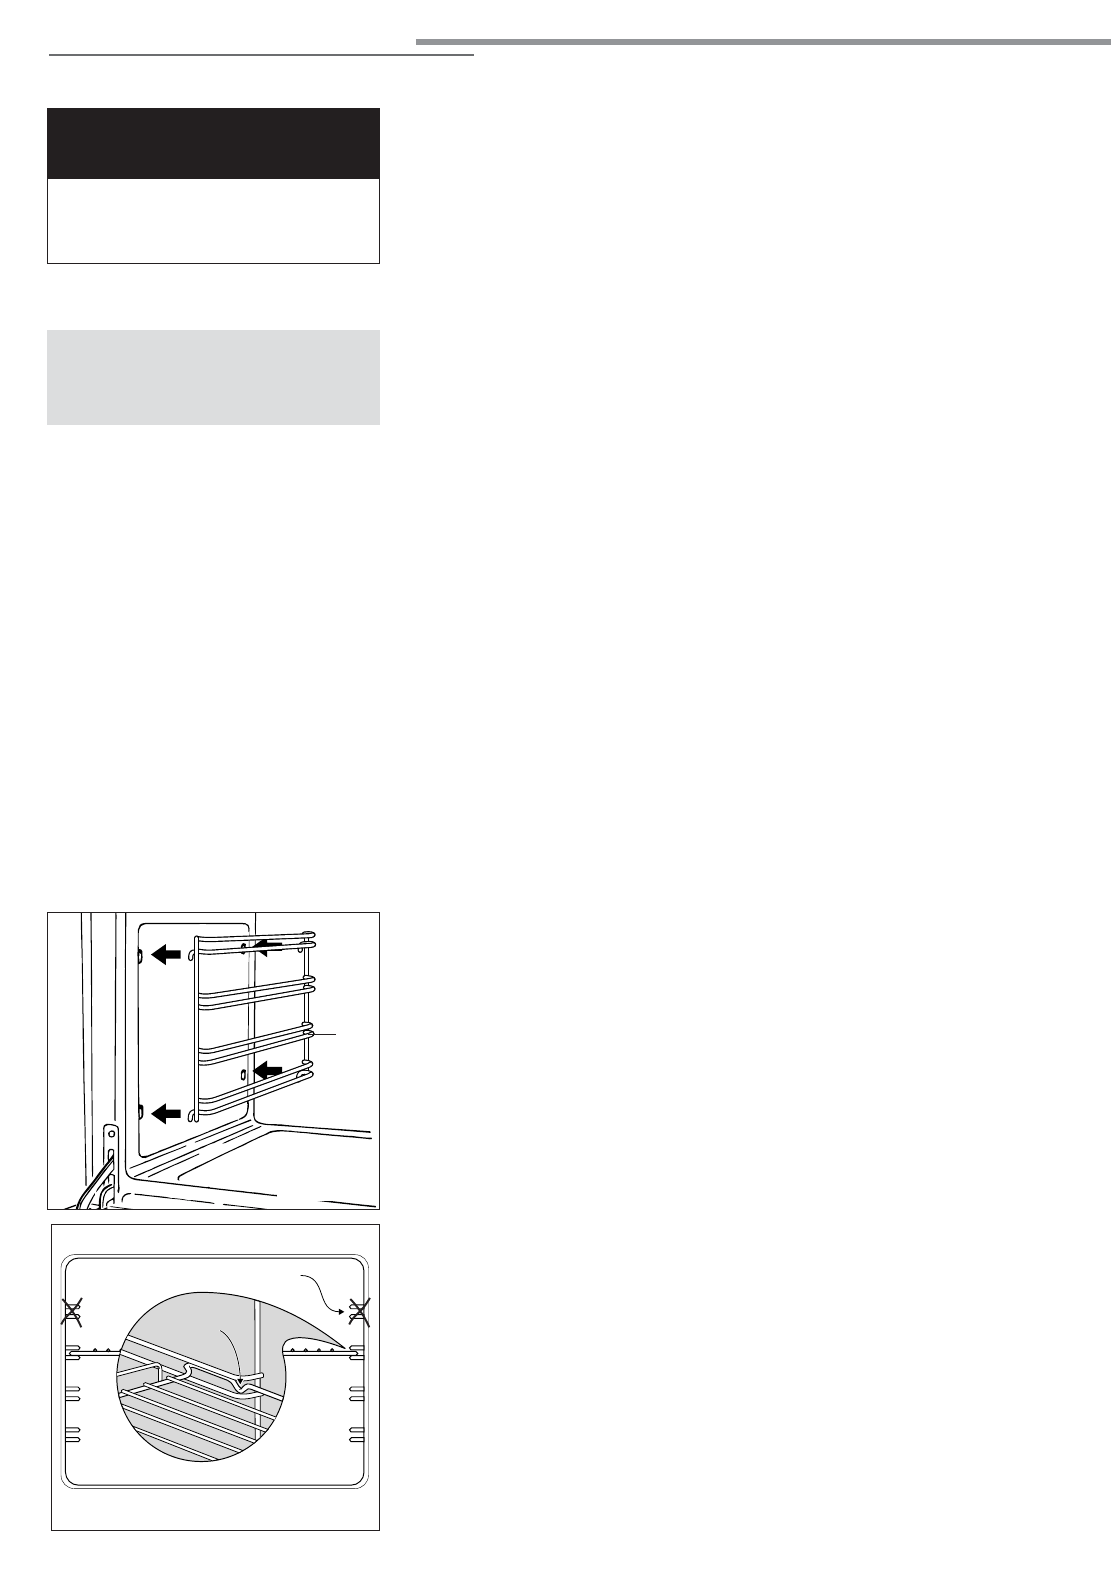
Fig. 4.1
OVEN ACCESSORIES INSTALLATION AND REMOVAL
– Hang up the wire racks “G” on the oven walls (fig. 4.1).
– Slide in, on the guides, the shelf etc. (fig. 4.2).
The rack must be fitted so that the safety catch, which stops it sliding out, faces the
inside of the oven.
– Position the broiler pan above the oven shelf.
–To dismantle, operate in reverse order.
Safety
catch
Do not use this step
Fig. 4.2
G


