


4-3
Component Teardown
Exterior Components
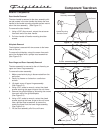
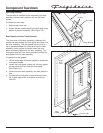
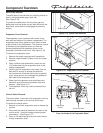
Door Handle Removal
The door handle is secured to the door assembly with
two set screws in the door handle that clamp the door
handle to the handle mounting shoulder screws mount-
ed on the door assembly. (See Figure 5-1)
To remove the door handle:
1. Using a 3/32” allen wrench, extract the set screw
from each end of the door handle.
2. Pull door handle off handle mounting shoulder
screws.
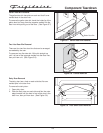
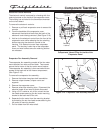
Kickplate Removal
The kickplate is secured with two screws to the lower
front of the unit.
To remove the kickplate, extract the screw from each
end of the kickplate with a phillips head screwdriver.
(See Figure 5-2)
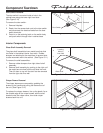
Door Hinge and Door Assembly Removal
The door assembly is secured to the unit frame by an
upper and lower hinge assembly.
To remove the door assembly:
1. Make sure electrical plug is disconnected from the
wall outlet.
2. Gently lay freezer on its back on a soft clean
surface.
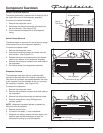
3. Lift plastic cover off upper hinge assembly.
(See Figure 5-3)
4. Using a 3/8” socket or wrench, extract hex head
screws securing the upper hinge to the unit frame.
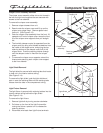
5. Remove the grille/kickplate by extracting the screws
from each end of the grille/kickplate.
(See Figure 5-2)
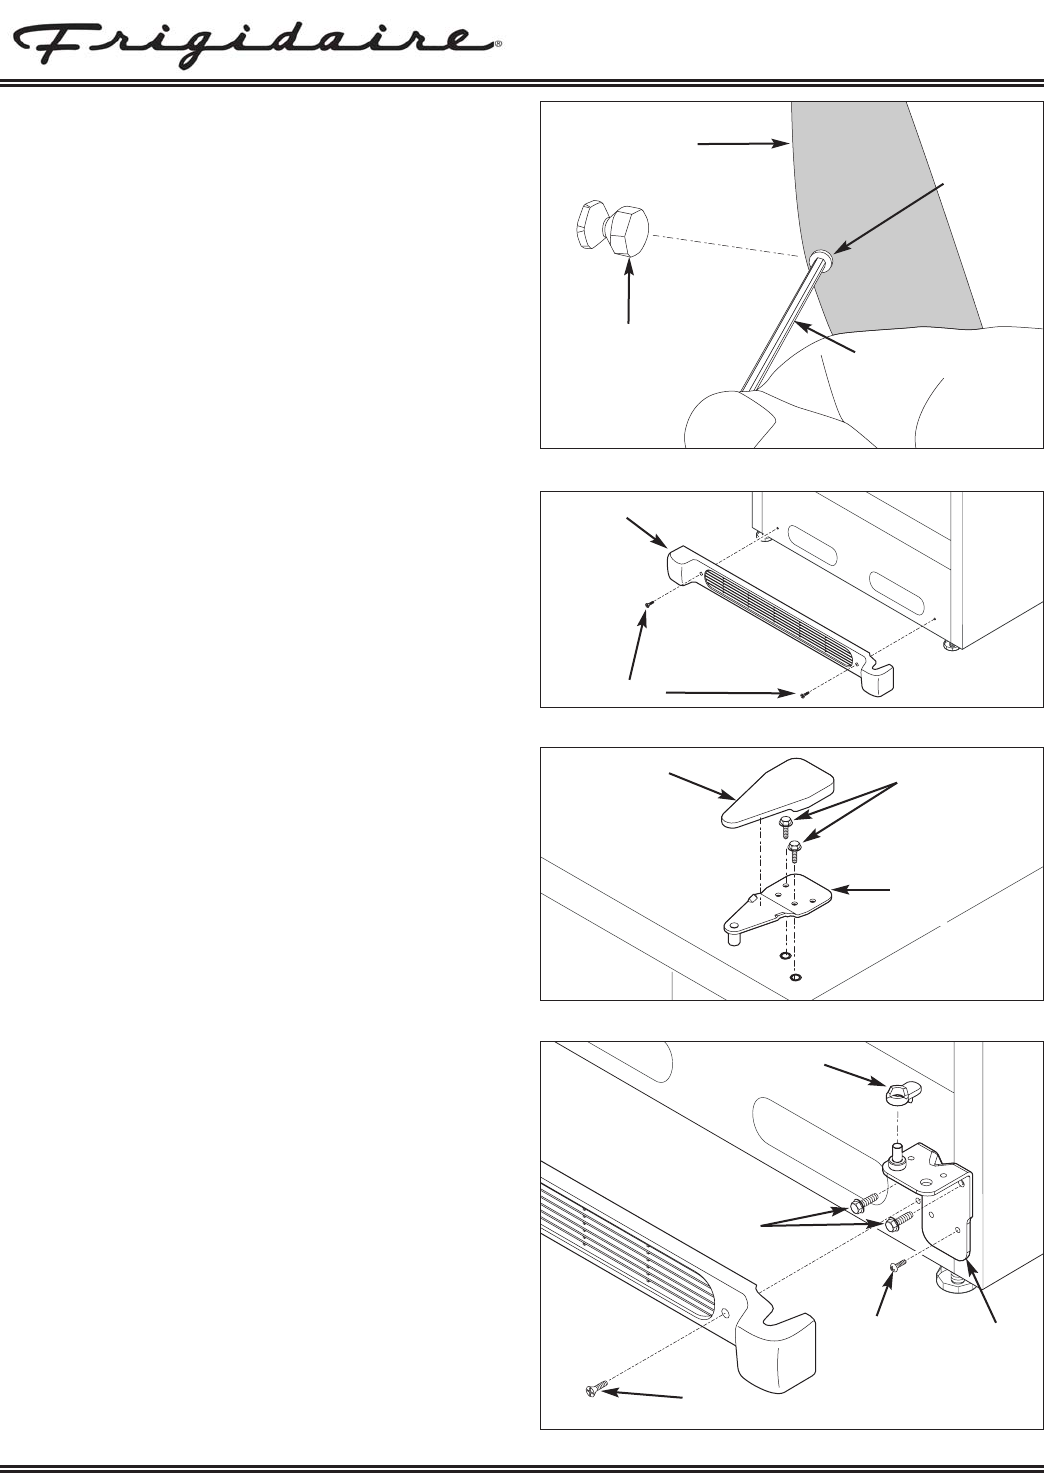
6. Using a 3/8” socket or wrench, extract hex head
screws securing the lower hinge to the unit frame.
Use a phillips head screwdriver to extract the
remaining screw from the lower hinge assembly.
(See Figure 5-4)
7. Lift the door assembly off of the unit frame.
Figure 5-1. Handle Removal
Figure 5-2. Kickplate Removal
Kickplate
Set Screw
3/32” Allen Wrench
Handle Mounting
Shoulder Screw
Handle
Assembly
Screws
Figure 5-4. Lower Hinge Removal
Figure 5-3. Upper Hinge Removal
Hex Head
Screws
Hex Head
Screws
Upper
Hinge
Lower
Hinge
Hinge
Cover
Screw
Door Closer
Screw