4-9
Component Teardown
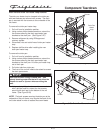
Electronic Control Removal
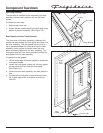
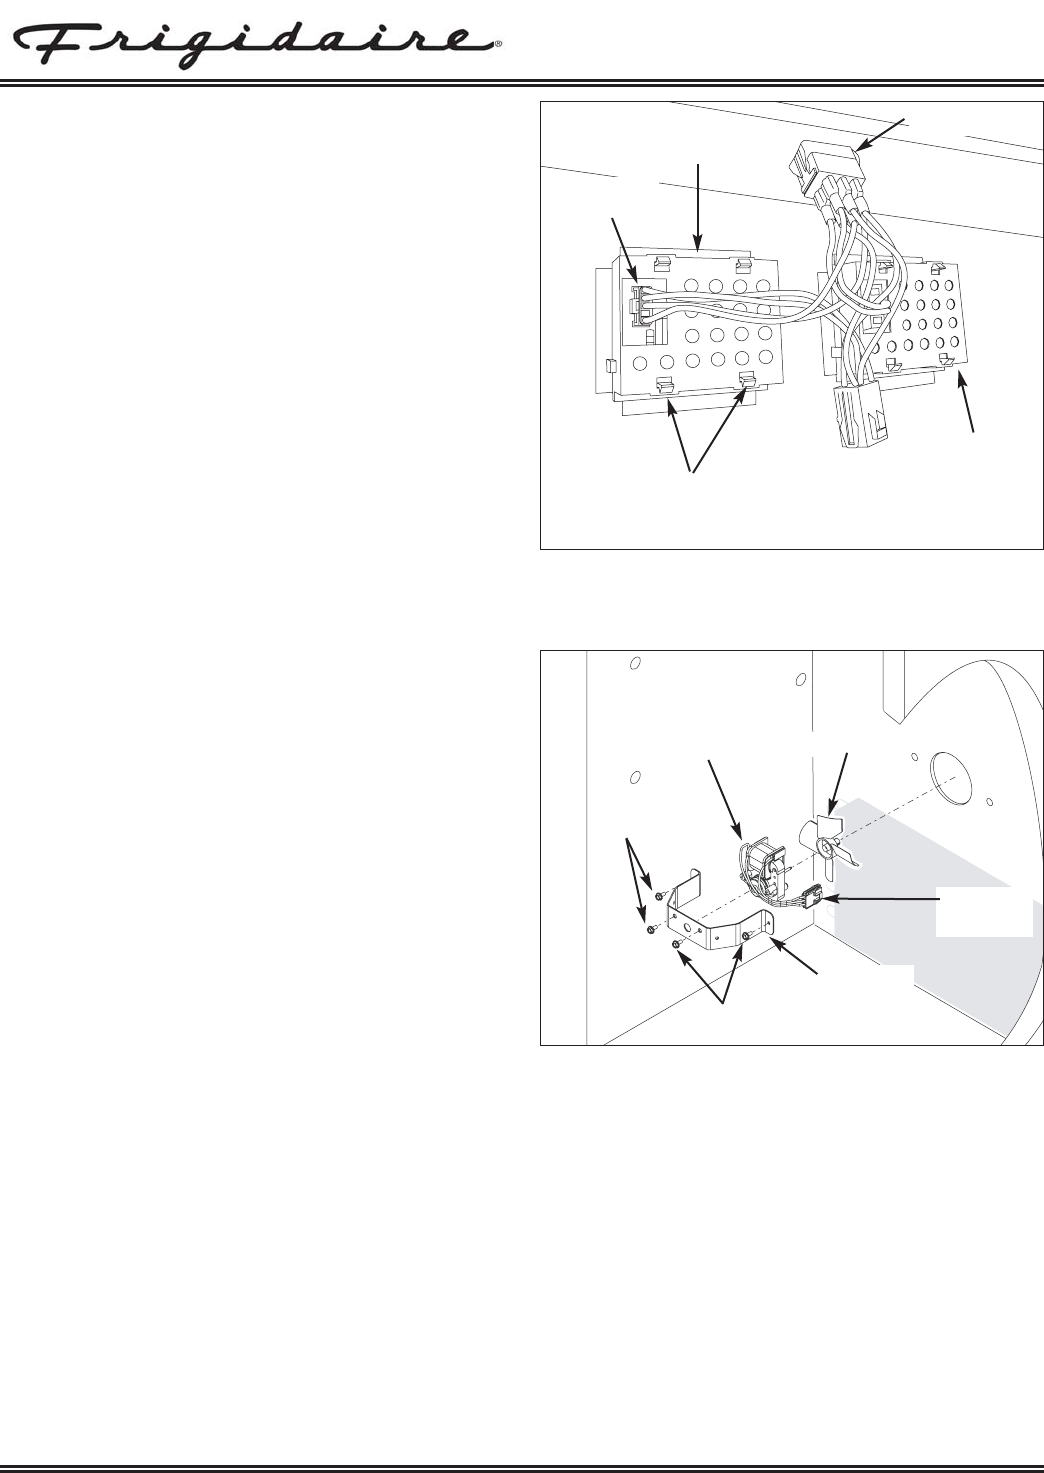
The electronic control is secured to a housing with four
retaining latches on the inside of the evaporator cover.
The housing has air holes for the thermistors mounted
on the circuit board.
To remove the electronic controls:
1. Remove or pull back evaporator cover to access the
controls.
2. From the backside of the evaporator cover,
disconnect the electrical leads from the back of the
electronic control being removed. (See Figure 5-18)
3. Hold on to the electronic control from the front of the
evaporator cover while releasing the four retaining
latches securing the electronic control to the
housing. Pull electronic control from evaporator
panel. The housing is also free of the evaporator
cover and wire harness once the retaining latches
are released.
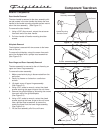
Evaporator Fan Assembly Removal
The evaporator fan assembly consists of the fan motor
mount bracket, fan motor and fan blade. Two screws
secure the fan motor to the fan motor mount bracket.
The evaporator fan assembly is then secured with two
screws to the back wall of the freezer compartment.
(See Figure 5-19)
To remove the evaporator fan assembly:
1. Remove the bottom two glass shelf assemblies.
2. Remove crisper drawers, crisper cover and
supports.
3. Remove the evaporator cover.
4. Remove wires from retaining clips. Disconnect the
electrical leads of fan motor at quick disconnect.
5. Using a 5/16” socket or nut driver, extract the two
hex head screws securing the fan motor mounting
bracket to the back wall of the unit.
6. Separate the fan motor from the mounting bracket
by extracting the two hex head screws securing the
fan motor to mounting bracket.
7. Pull fan blade from fan motor shaft.
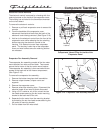
Figure 5-19. Evaporator Fan Assembly Removal
Figure 5-18. Removing Electronic Control
Components Viewed From the Inside of the
Evaporator Panel
Screws
Screws
Fan Motor
Fan Blade
Electrical
Connection
Fan Motor
Mounting
Bracket
Control Switch
Retaining
Latches
Disconnect
Here
Refrigerator
Control
Freezer
Control


