


10
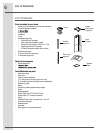
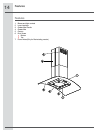
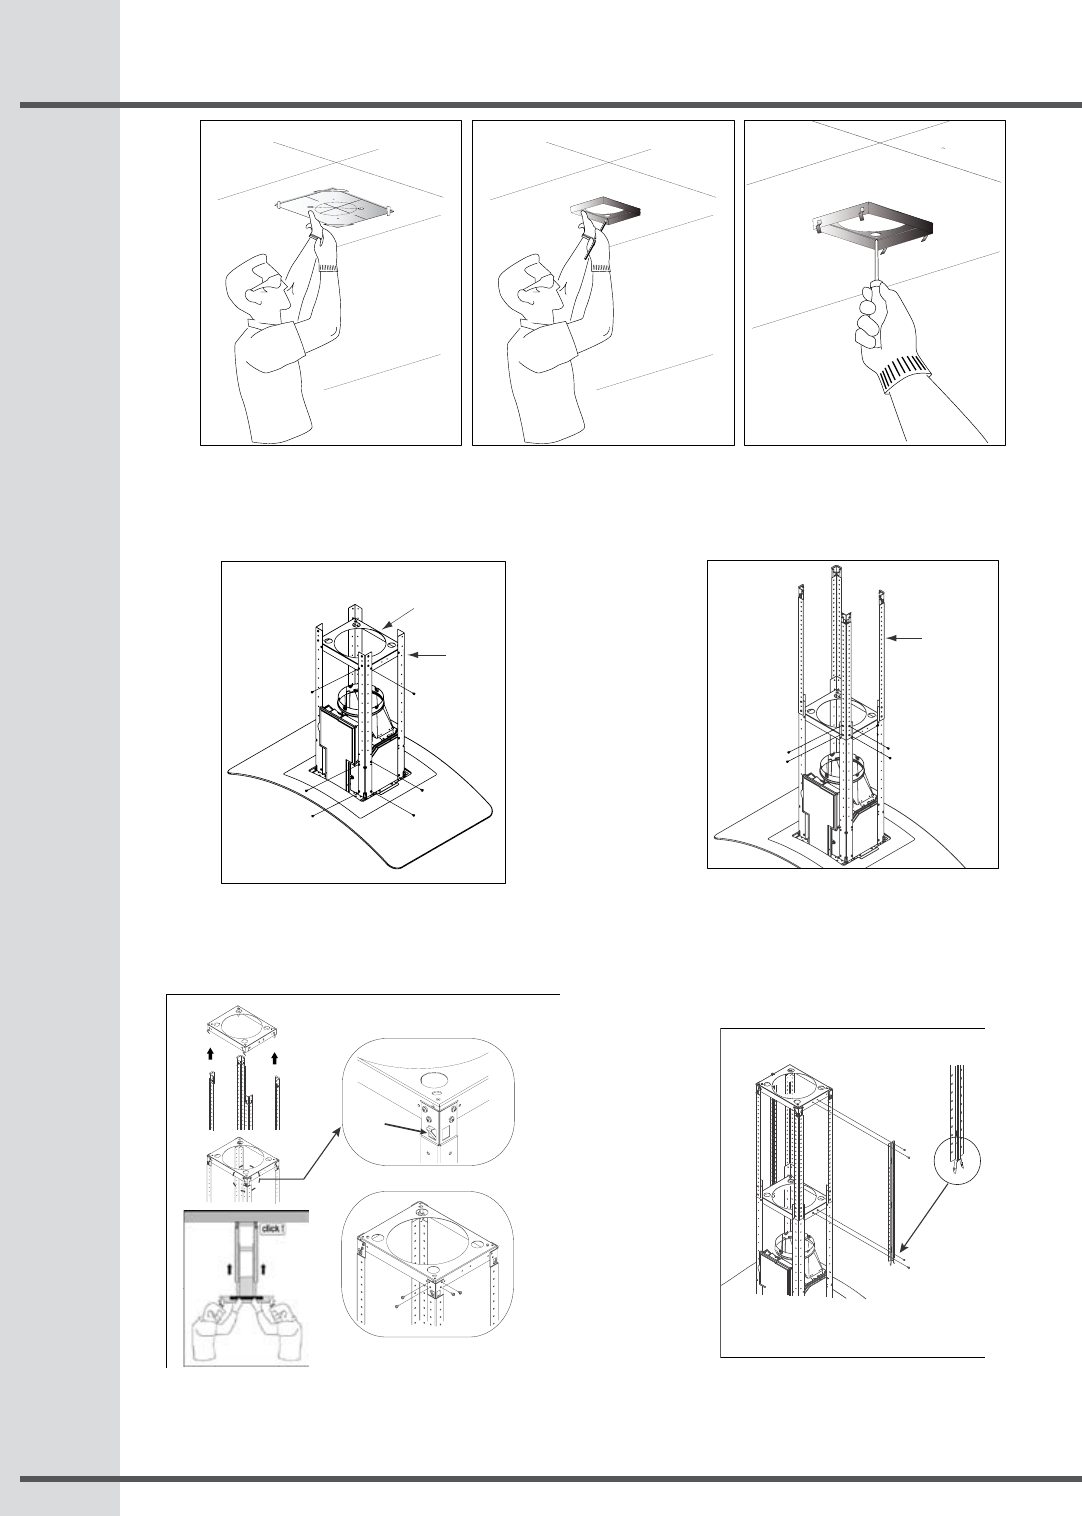
Installing the hood
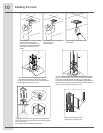
Place the template on to ceiling considering
the instructions for ceiling support
structures. Always consider the “front of
hood” legend when placing the template
on the ceiling. It will dene the control’s
location.
Mark with a pencil the hole locations for
screws in the ceiling.
Remove template.
Secure the upper horizontal support with
4 wood screws.
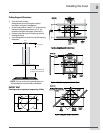
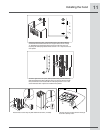
Place the hood over a table protecting the glass Attach the
4 lower vertical supports (A) to the hood with 16 assembly
screws (4 per corner). Then attach the lower horizontal support
(B) with 8 assembly screws (2 per corner).
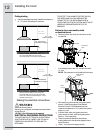
The upper vertical supports’ position will determine the hood’s total height.
Refer to the maximum and minimum extensions line drawing to determine
which is the most suitable dimension according to your ceiling’s height.
Always take into consideration the minimum installation heights declared in
this manual. Position the upper vertical supports (C) at the proper height and
attach them with 16 assembly screws (4 per corner).
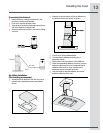
Carefully lift the assembly until the upper vertical supports are locked
with the 4 upper horizontal support’s springs. Secure with 16 assembly
screws (4 per corner).
Note: At least 2 persons are needed for this operation.
Attach the stainless steel duct cover
supports using 4 assembly screws.
A
B
click!
C