15
ENGLISHENGLISH
ENGLISHENGLISH
ENGLISH
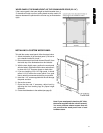
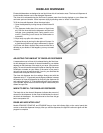
INSTALLING A CUSTOM WOOD PANEL
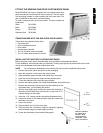
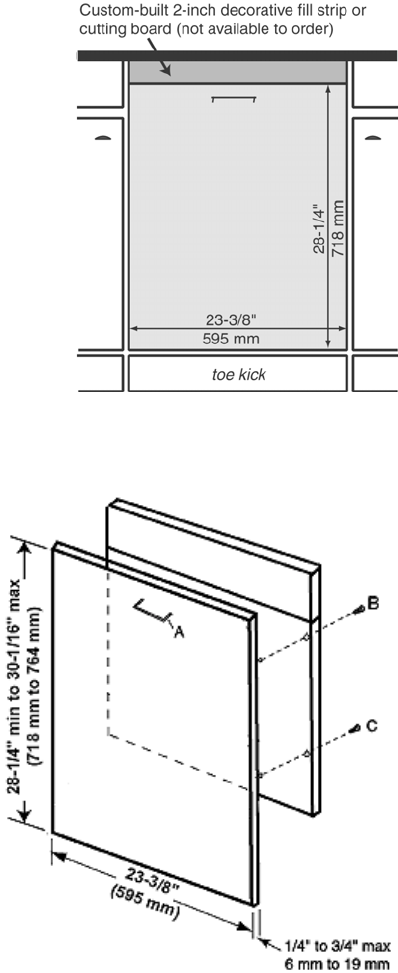
To install the custom wood panel, follow the steps below.
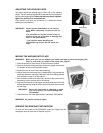
1. Attach the handle (A) to the wood panel. (It is best to
use a handle instead of a knob.)
2. Remove the second and fourth screws (B and C) from
the inside top of the dishwasher door and discard.
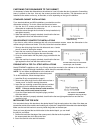
3. With the door slightly open, position the wood panel
with the holes in alignment with the door and secure it
in place with 2-12” squeeze clamps on both sides.
4. If you are installing a 30-1/16” high panel, it should
extend 1-13/16” above the control panel. It’s a good
idea to take this measurement before you proceed.
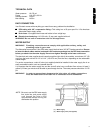
5. Insert the 1-1/2” screws supplied with the unit through
the panel and door.
6. Secure the screws.
7. Close the door and, if necessary, adjust level by
adjusting the front levelling legs for proper height
clearance.
8. Fasten the dishwasher to the cabinet (see page 9).
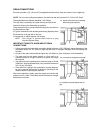
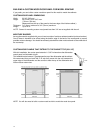
WOOD PANELS THE SAME HEIGHT AS THE DISHWASHER DOOR (23-1/4”)
If the custom panel is the same height as the dishwasher door, a
2” decorative fill strip or pull-out cutting board must be used to fill
the area between the panel and the counter top (as illustrated at
right).
Note: If your wood panel is less than 3/4" thick,
the screws supplied with the unit will not work.
You must purchase shorter screws that will
not puncture the wood panel from a local
hardware store.


