


- 41 -
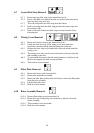
6.20 Exhaust Valve Removal
Note: This component maybe serviced by two Methods.
6.20.1 Method 1: Remove tub assembly as per instructions in 6.11.
6.20.2 Method 2: Remove lower kick strip as per instructions in 6.7.
6.20.3 Remove the clip pegs from the slide retainers.
6.20.4 Slide the dishdrawer from the cavity to allow servicing from the rear.
6.20.5 Remove the screw securing the rear service panel.
6.20.6 Fit a screwdriver through the hole in the rear service panel and
lift or tap the shaft of the screwdriver up so to disengage the panel
from its retainers.
6.20.7 The service procedures from now on are the same for both
directions.
6.20.8 Lift the exhaust valve up to disengage the mounting from the
chassis.
6.20.9 Disconnect the air plumbing from the exhaust valve.
6.20.10 Remove the exhaust valve from the rubber mount (be careful not to
lose the steel core which will fall out of the exhaust valve. The
exhaust valve core is fitted with the rubber end upper most).
6.20.11 Disconnect the wiring connection from the exhaust valve.
6.20.12 Refit in reverse manner. Ensure the pump hangers are correctly
located.
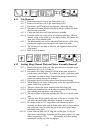
6.21 Water Valve Removal
6.21.1 Remove the lower tub as per instructions in 6.11.
6.21.2 The water valve is located at the rear on the lefthand side.
6.21.3 Disconnect the wiring connections to both solenoids. Release the
locking tabs for the connectors with a blade screwdriver while doing
this.
6.21.4 Disconnect the inlet hose connection.
6.21.5 The water valve may now be slid forward off the mounting bracket.
6.21.6 Disconnect the two fill hoses off the valve noting which hose goes to
the top and tub and which goes to the bottom tub.
6.21.7 Refit in reverse manner.
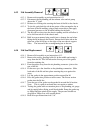
6.22 Flood Switch Removal
6.22.1 Remove the lower tub as per instructions in 6.11
6.22.2 The flood switch is located on the base of the chassis.
6.22.3 Remove the wiring connections to the switch noting each connection
location.
6.22.4 The switch is released from the chassis by squeezing together the
pins on the legs of the switch with a fine blade screwdriver.
6.22.5 Refit in reverse manner.