29
Water filter (Ice & Water models only)
All the water to your refrigerator is filtered to remove impurities through a filter cartridge located
in a position of your choice outside the refrigerator. This will need changing approximately every
6months.
There is a replacement indicator icon on the internal control panel and external display
which will appear when the filter needs replacing. It will flash, as a reminder, when water is
dispensed.
Replacement filter cartridges are available from your Fisher & Paykel Authorised Repairer. The
details of the replacement filter cartridge are on the label on the cartridge.
Changing the water filter cartridge
It is not necessary to turn off the water supply before attempting to change the water
filtercartridge.
1
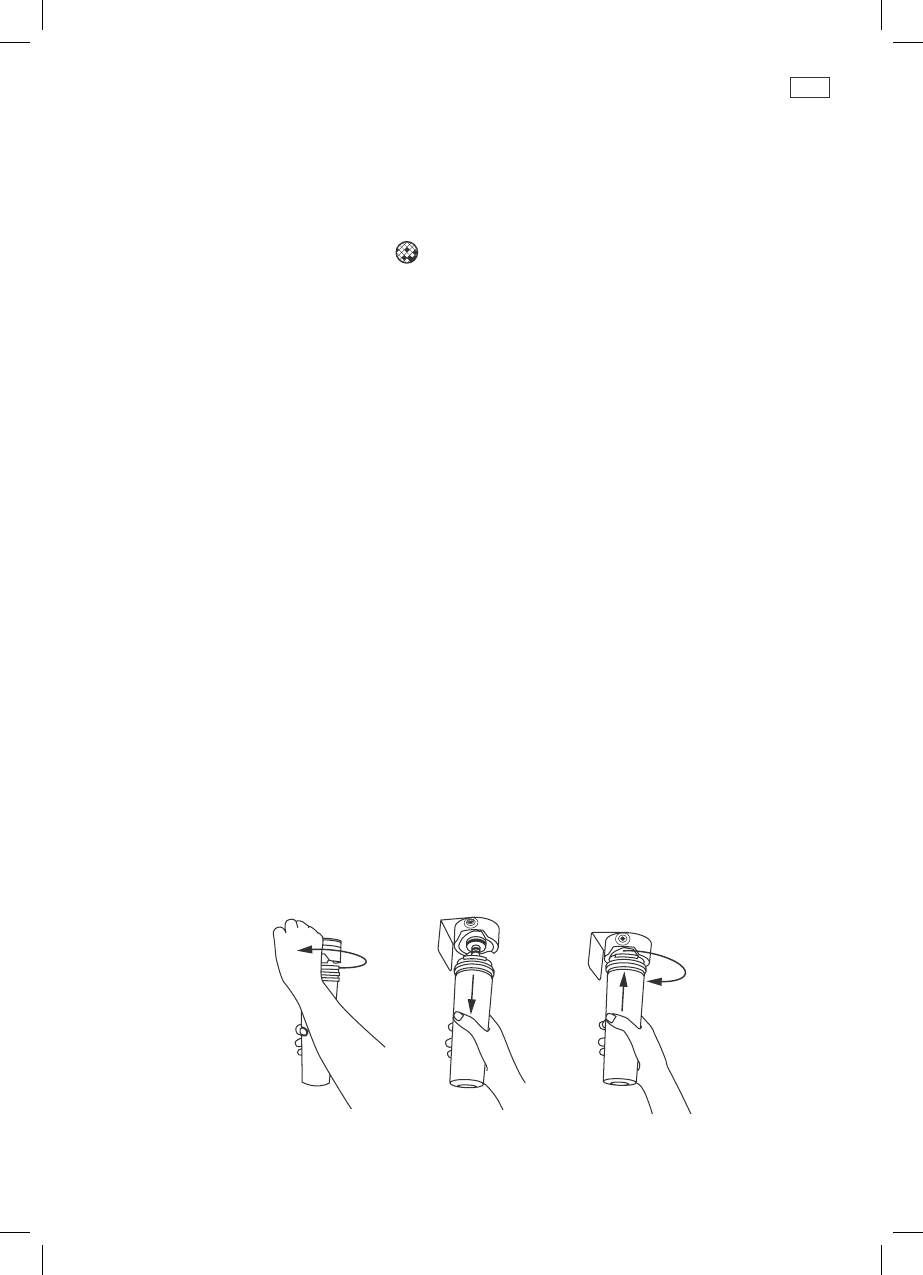
Grasp and firmly twist the cartridge in an anticlockwise direction (to the left when installed in
the recommended orientation) as shown in Diagram 1.
2
Pull the cartridge away from the filter head (down when installed in the recommended
orientation) as shown in Diagram 1 of Fig 22 below.
– It is not unusual for a few drops of water to be present when the filter is removed.
3
Discard the old filter.
4
Filter installation:
– Remove protective cap on spigot on head.
– Push the cartridge up towards filter head while rotating it in a clockwise direction (to the
right when installed in the recommended orientation) as shown in Diagram 3.
5
Reset filter indicator icon on the display (this will remind you when the filter is due to be
replaced again). Refer to page 30.
6
To flush the water filter of any trapped air, harmless carbon fines and to also check for leaks,
disconnect the tubing from the back of the refrigerator, aim the end of the tubing into a bucket,
turn isolating tap on and run at least 10 litres (10 qt) of water through. Once complete turn
isolating tap off. Reconnect the tubing.
7
A few drips may appear out of the dispenser over the next few days as the remaining trapped air
is cleared.
Diagram 2Diagram 1 Diagram 3
Fig.22 Changing the water filter cartridge


