


3-5
3.7 SYSTEM INSTALLATION INSTRUCTIONS (CONT.)
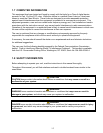
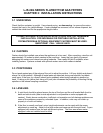
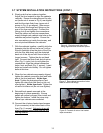
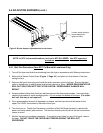
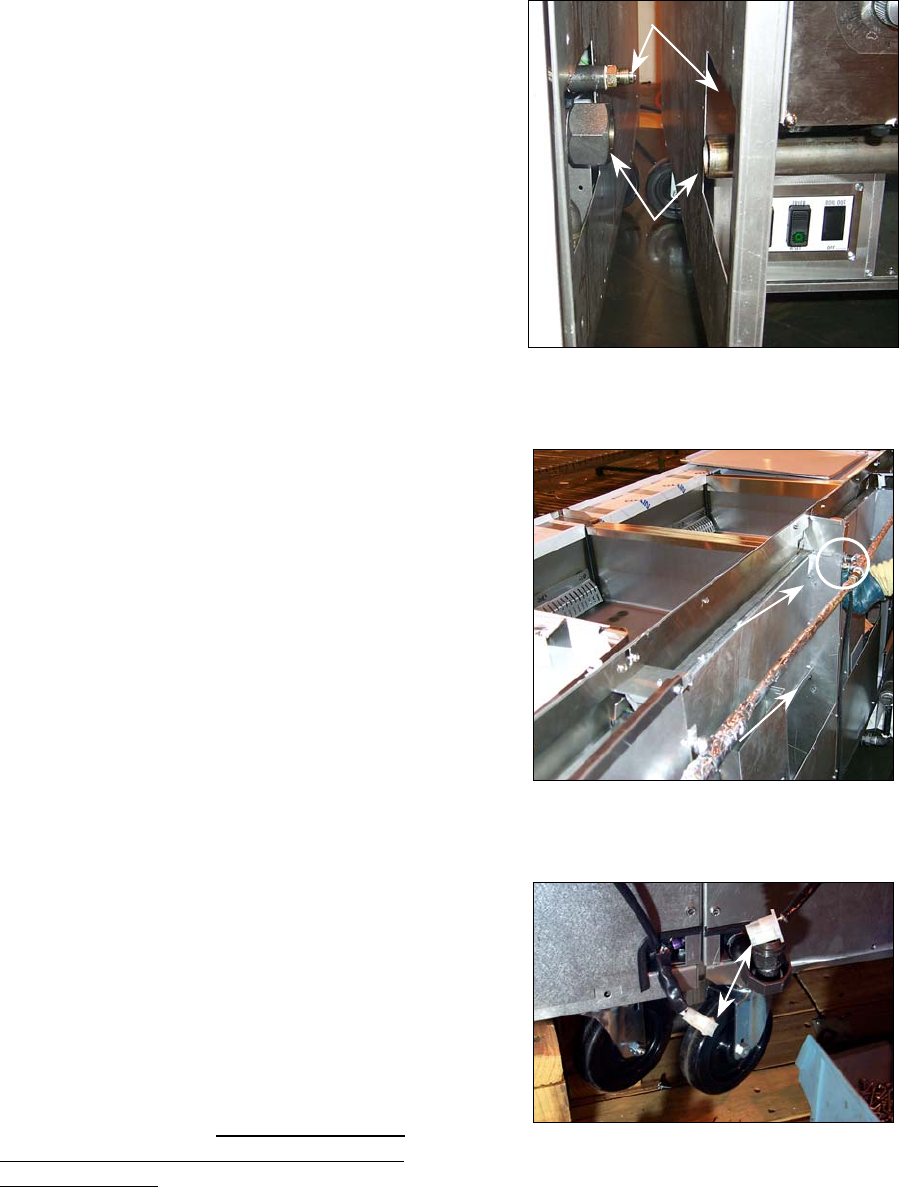
6. Slowly push the two systems together.
Adjust the front casters to align the cabinets
vertically. Ensure the drainpipe and the slip-
nut (lower set of arrows in Fig. 4) are aligned
and that the drain-flush lines (upper set of
arrows in Fig. 4) are aligned. Also ensure
the oil-return line flange and fittings on the
rear of the fryer are aligned. Connect the
fittings, but do not tighten the connections.
Feed the yellow and red wire connections
evenly through each cabinet wire hole as the
cabinets are pushed together. Ensure the
wire connections go inside the wireway, and
are not pinched between the cabinets.
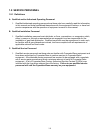
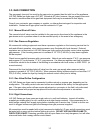
7. With the cabinets together, carefully slide the
drainpipe into the slip-nut as far as it will go.
Shine a flashlight down the drain of the fryer
with the filter and slowly pull the drainpipe
back out of the slip-nut until its end can no
longer be seen. Tighten the slip-nut hand
tight. Connect the drain-flush and oil-return
lines (Fig. 5, circle), but do not tighten the
connections. Align the cabinet connection
holes, front and back (Fig. 5, arrows). Insert
bolts and install nuts loosely. Do not tighten
bolts at this time.
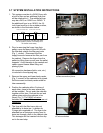
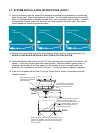
8. When the two cabinets are properly aligned,
tighten the cabinet connection nuts and bolts
and at the front and back. At the fryer
front: Tighten the drainpipe slip-nut and
tighten the drain-flush line flare-nut (do not
over-tighten). At the fryer back: Tighten the
oil-return line flare-nut (do not over-tighten).
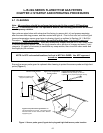
9. Reinstall back panels removed at the
beginning of system assembly. Ensure
panels are properly aligned, then install and
tighten the screws. Install the joiner strip
where fryer cabinets are connected.
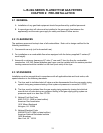
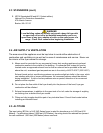
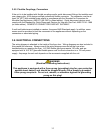
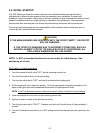
10. Connect the oil-return heater-tape harness
(6-pin connector) at the bottom back of the
fryer (Fig. 6, arrows). Failure to do so will
result in clogged return lines after the first
filtering session.
Figure 4. Drainpipe and drain-flush
fitting alignment and connection points.
Figure 5. Rear cabinet connection holes.
Note oil return line fittings.
Figure 5. Connect oil-return line heater-
tape connectors.