4-2
4.2 INITIAL STARTUP
LJS 24G Series gas fryers are tested, adjusted, and calibrated before leaving the factory.
Adjustments to assure proper operation may be necessary upon installation to meet local
conditions, low gas pressure, differences in altitude, variations in gas characteristics and to correct
possible problems caused by rough handling or vibrations during shipment. Gas component
adjustments after receiving the fryer should be performed by authorized service personnel.
Gas component adjustments are the responsibility of the customer and/or dealer and are not
covered by the Frymaster/Dean warranty.
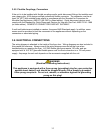
CAUTION
IF THE MAIN BURNERS ARE OPERATED WITH THE FRYPOT EMPTY, THE FRYPOT
WILL BE DAMAGED.
IF THE FRYPOT IS DAMAGED DUE TO INCORRECT OPERATION, SUCH AS
HEATING AN EMPTY FRYPOT OR WHOLE BLOCKS OF SHORTENING, ALL
APPLICABLE WARRANTIES WILL BE VOIDED.
NOTE: In KFC co-branded locations do not use water for initial startup. Use
shortening or oil only.
Pilot Light or re-light procedure:
1. Turn the manual shut-off valve "OFF" on the incoming service line.
2. Turn the Thermatron dial to the lowest setting.
3. Turn the gas valve dial to "OFF" and wait 5 minutes before lighting pilot.
4. Fill the frypot with oil or water (for testing). Fill to the appropriate oil level line scribed in the
back of the frypot (see store operational procedures for appropriate fill level).
NOTE: In KFC co-branded locations, oil must be used in place of water for burner testing.
5. Open the manual shut-off valve on the incoming service line.
6. Apply a lit match or taper to the pilot burner orifice.
7. Turn the gas valve dial to "PILOT". Depress and hold until the pilot stays lit (approximately 1
minute).
8. Turn the Thermatron controller to any "ON" setting and ensure the main burners ignite from the
pilot.


