4–2
melting blocks of shortening. When in the melt-cycle mode, the fryer will cycle on and off until
the frypot temperature reaches 180°F (82°C) or the melt-cycle mode is cancelled by the operator.
DANGER
Do not cancel the melt-cycle mode if using solid shortening!
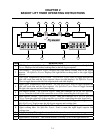
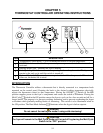
During the melt-cycle, the Heating Mode light will alternately illuminate and go out as the fryer
cycles on and off.
4. Once the frypot temperature reaches 180°F (82°C), or the melt-cycle mode is cancelled, the fryer
will automatically go into the heating mode to bring the frypot temperature to that set on the
temperature control knob and will maintain it at that temperature. When the fryer is heating, the
Heating Mode light will be illuminated. When the frypot has reached the temperature set on the
control knob, the Heating mode light will go out, indicating the unit is ready for frying.
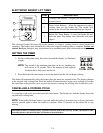
TROUBLE INDICATOR LIGHT
On gas fryers equipped with electronic ignition, the Trouble Indicator light will illuminate if there is
an ignition failure. To reset the controller after an ignition failure, place the power supply rocker
switch in the OFF position for at least 30 seconds, and then place it back in the ON position.
For all fryers, the Trouble Indicator light will also illuminate whenever the controller senses a
problem with the probe or high-limit thermostat circuit.
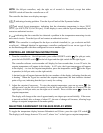
CALIBRATING THE CONTROL KNOB
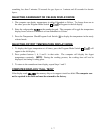
1. Bring the frypot to frying temperature in accordance with the procedures above.
2. Insert a thermometer or pyrometer probe into the frypot near the fryer temperature-sensing
probe.
3. Let the heating mode light cycle automatically three times to ensure the cooking oil/shortening
temperature is uniform. Stir, if necessary, to get all cooking oil/shortening in bottom of frypot
melted.
4. Whenthe heating mode light illuminates for the fourth time, the pyrometer reading should be
within 5°F (2°C) of the temperature control knob setting. If it is not, calibrate the knob as
follows:
a. Loosen the setscrew in the temperature control knob until the outer shell of the knob will
rotate on the insert inside the knob.
b. Rotate the outer shell of the knob until the index line on the knob aligns with the mark that
corresponds to thermometer or pyrometer reading.
c. Hold the knob and tighten the setscrew.


