


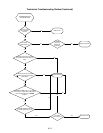
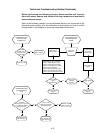
6-8
8. Assemble the replacement faucet to the mounting bracket and complete the procedure by
reversing Steps 1-6.
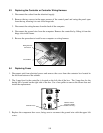
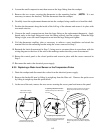
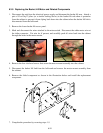
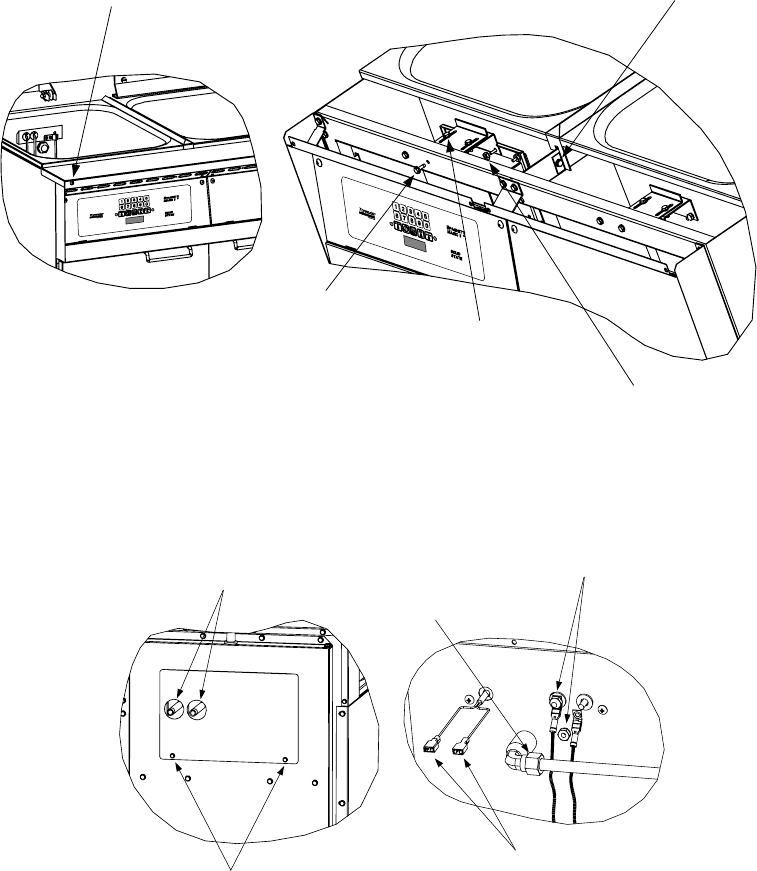
6.3.8 Replacing the Cookpot or Rinse Tank
1. Disconnect the unit from the electrical power supply and from the water supply.
2. Remove the cover from the component box, mark the element leads, disconnect them from the
contactors, and pull them out of the component box.
3. Remove the top cap to expose the pot hold-down bracket assembly. Remove the two Keps nuts
attaching the assembly to the cookpot or rinse tank. Loosen but do not remove the screws in the
top of the bracket. Remove the two screws attaching the bracket to the cabinet frame and
remove the bracket assembly from the unit. On units with a rinse tank, remove the screw
securing the connecting strip.
Remove screw in each
corner and remove top cap.
Remove Keps nuts.
Loosen screws in
top of bracket.
Remove screws.
Remove screw from
connecting strip.
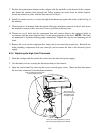
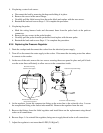
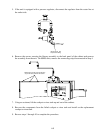
4. At the rear of the unit, disconnect the incoming water lines (and any attached quick-disconnect
fittings) from the nipples protruding from the upper access panel. Remove the panel and
disconnect the water level sensor and temperature probe leads. If the cooker is equipped with the
Autofill feature, disconnect the Autofill water line at the frypot end.
Disconnect incoming
water lines from nipples.
Remove these two screws and
remove the access panel.
Remove Keps nuts to
disconnect the sensor leads.
Mark the wiring harness leads and
disconnect the probe leads at the
push on connectors.
Disconnect Autofill water
line at this fitting.