


Wipe off spilt food immediately, thus ensuring that
it cannot burn in on the hob.
Caution! The burner gets very hot during
operation!
Never use abrasive or caustic cleaning agents.
Keep the air inlet openings on the rear of the
panel unblocked and clean.
You should only clean the control panel and the
control knobs with detergent and a a soft cloth.
To ensure perfect functioning, keep the thermal
sensor and the spark plug clean.
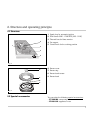
Please thoroughly clean the appliance before
operating it for the first time and after every
use.
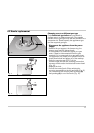
– Wait until the appliance has cooled down.
– Remove the pot grid.
– Remove the burner cover and the burner ring.
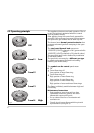
– Clean the hob, the burner covers and the pot
grid with commercially available cleaning
agents (not in a dishwasher!), e.g. with warm
soap solution and a dishwashing brush.
– Whenever required, clean the burner head with
a moist cloth.
– Soak burnt-in remainders in a little water and
detergent. This loosens even the most stubborn
of soiling. Do not use any abrasive agents and
abrasive sponges.
– As the result of heat development, slight dis-
coloration can appear on the stainless steel
surface. Do not attempt to scrape away such
discoloration. This damages the surface.
Distribute stainless steel care agents uniformly
and thinly on the hob (not on the control panel!).
This will ensure an even surface and will keep
your hob in a good condition for a long period of
time.
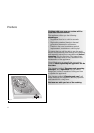
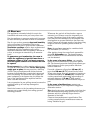
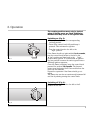
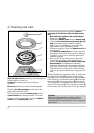
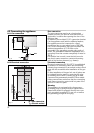
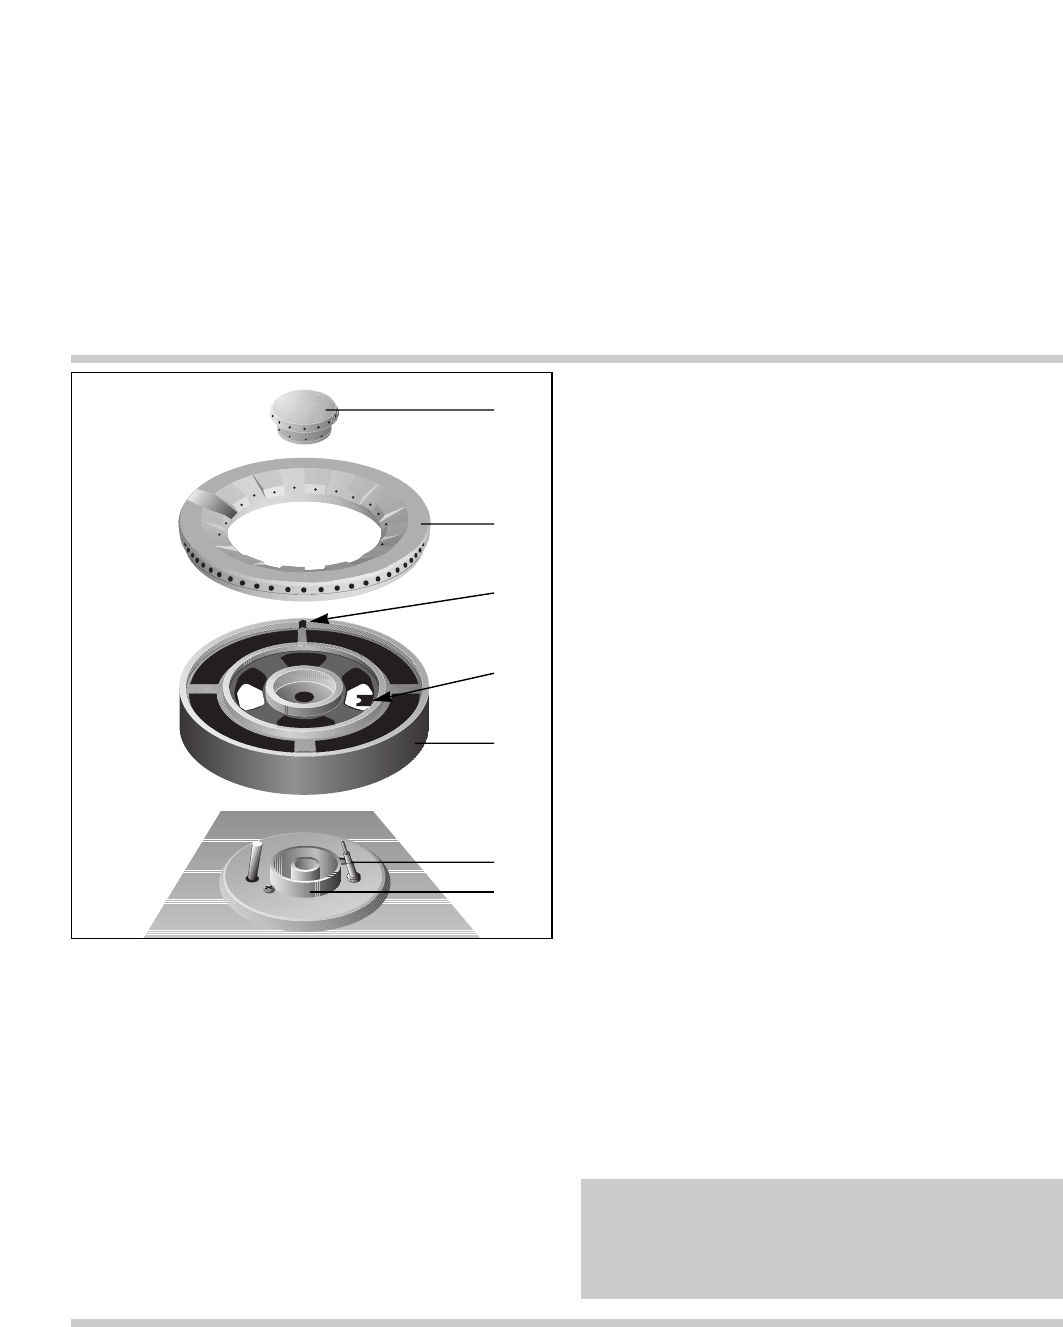
When assembling the appliance (Fig. 7), make sure
that the burner head (5) is placed on the burner
base (7) in such a way that the twist protector (4) is
held in place by the thermal element (6). Place the
burner ring (2) on the burner head (5) from above.
The locking lug on theunderside of the burner ring
must fit in the recess (3). Place the burner cover (1)
in the centre of the burner head. Fit the pot support.
4. Cleaning and care
Caution:
Never use high-pressure or steam jet units to
clean your appliance because otherwise the
electrical safety of the appliance will no longer be
guaranteed.
10
Fig. 7
1
2
3
5
4
6
7