


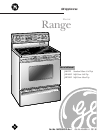


Operating Instructions
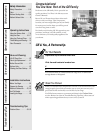
Congratulations!
You Are Now Part of the GE Family
Welcome to the GE family. We’re proud of our
quality products. You’ll see it in this easy-to-use
Owner’s Manual.
Best of all, you’ll experience these values each
time you use your range. That’s important,
because your new range will be part of your family
for many years. And we hope you will be part of
ours for a long time to come.
We thank you for buying GE. We appreciate your
purchase, and hope you will continue to rely
on us whenever you need quality appliances for
your home.
Safety Information
Safety Precautions . . . . . . . 3–6
Oven . . . . . . . . . . . . . . . . . . . 4, 5
Surface Cooking Units . . . . . 5, 6
Radiant Surface Units . . . . . . . 6
Operating Instructions
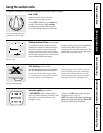
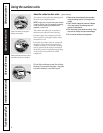
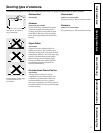
Using the Surface Units . . . 7–9
Using the Oven . . . . . . . . 10–17
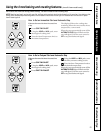
Using the Clock and Timer . . 14
Timed Baking and Roasting . . 15
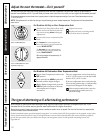
Oven Thermostat . . . . . . . . . . 16
Care and Cleaning
Lift-Off Oven Door . . . . . . . . . 20
Oven Light Replacement . . . . 21
Broiler Pan and Grid . . . . . . . 21
Surface Units . . . . . . . . . . . . . 22
Cleaning the Glass Cooktop . . 23
Installation Instructions
Before You Begin . . . . . . . . . . 24
Prepare the Opening . . . . . . . 25
Electrical Connection . . . . 25, 26
Anti-Tip Bracket . . . . . . . . . . . 27
Leveling the Range . . . . . . . . 28
Troubleshooting Tips
Problem Solver . . . . . . . . 29–32
Inside you will find many helpful hints on how to use and maintain your
range properly. Just a little preventive care on your part can save you a
great deal of time and money over the life of your range.
You’ll find many answers to common problems in the
Problem Solver
section. Review our chart of Troubleshooting Tips first; it lists causes of
minor operating problems that you can correct yourself.
Read this Manual
GE & You, A Partnership.
For Your Records
Staple sales slip or cancelled check here.
Write the model and serial numbers here:
#
#
You can find them on a label behind the range door or behind the
storage drawer or kick panel.
2
Safety Instructions
Care and Cleaning
Installation InstructionsTroubleshooting Tips