Installation Instructions
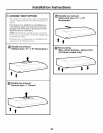
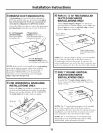
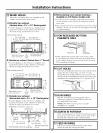
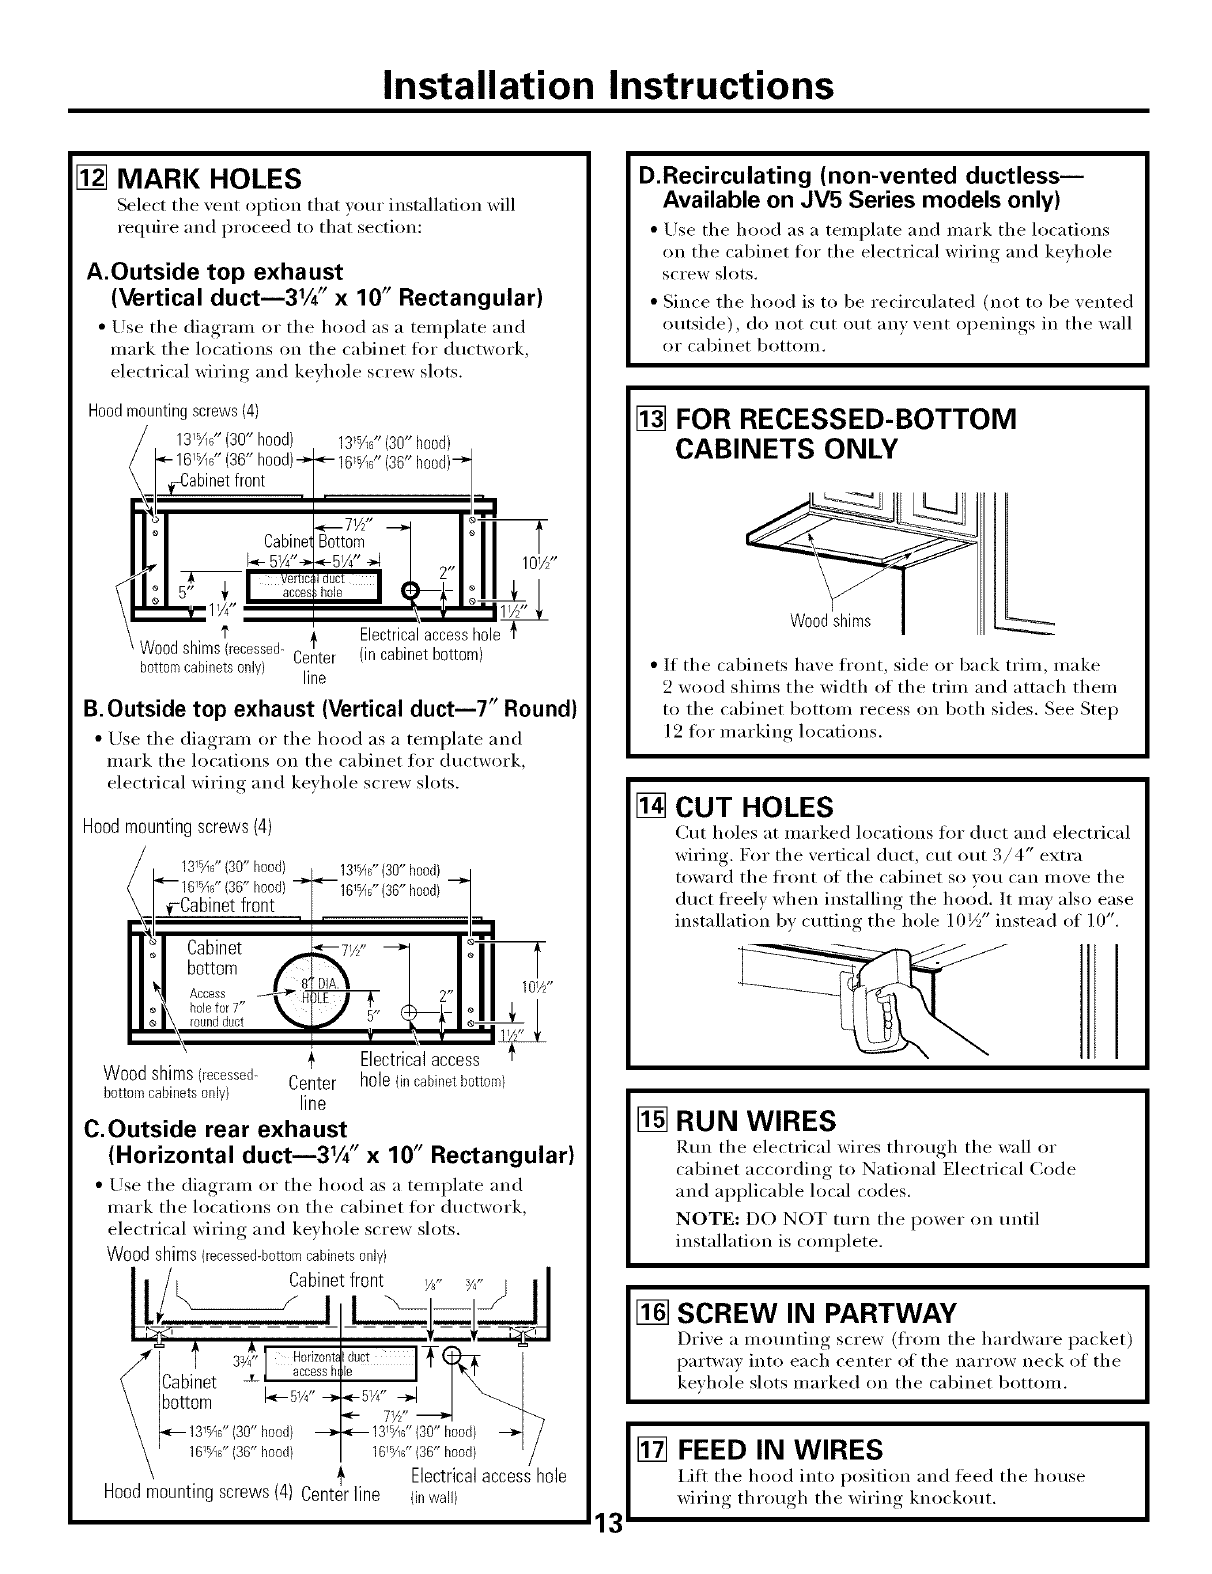
[] MARK HOLES
Select the xent option that _our installation will
require and proceed to that section:
A.Outside top exhaust
(Vertical duct--31/4" x 10" Rectangular)
• Use the diagran_ or the hood as a template and
mark the locations on the cabinet for ductwork,
electrical wiring and keyhole screw slots.
Hood mounting screws (4)
131_6" (30" hood)
(36"
I' Electricalaccesshole {
Woodshims(recessed- _"
Center (incabinetbottom)
bottomcabinetsonly) line
B.Outside top exhaust (Vertical duct--T' Round)
• Use the diagram or the hood as a template and
mark the locations (m the cabinet for ductwork,
electrical wiring and keyhole screw slots.
Hoodmountingscrews(4)
131_6"(30" hood) 131%d' (30" hood)
hood)
101//'
Electrical access
Wood shims (recessed- Center hole (incabinetbottom}
bottom cabinets only) line
C.Outside rear exhaust
(Horizontal duct--31/4" x 10" Rectangular)
• "Use the diagram or the hood as a template and
mark the locations on the cabinet for ductwork,
electrical wiring and keyhole sc_'ew slots.
Wood shims (recessed-bottomcabinetsonly)
[!_Cabinetl I"_--_fr°nt y¢'_/4"j___i___ '
7--7 ........
/'[ t >'1 ,o_,zo,,r_,_octITq_:_ I
flCabinet ±' accessh,le I I_ I
\ [bottom _51/4" _ _--51/4" -_ I "--4
15 _ _ 15
\ _--13 >6"(30"hood) 13/16"(30"hood) _,_ /
\ -- 16_6"(36"hood} 161_16"(36"I_ood) '
\ Electrical access hole
Hood mounting screws (4) O0wall)
D.Recirculating (non-vented ductless--
Available on JV5 Series models only)
• Use the hood as a template and mark rite locations
on the cabinet for the electrical wiring and keyhole
screw slots.
• Since the hood is to be recirculated (not to be vented
outside), do not cut out am xent oi)enings, in the wall
or cabinet bottom.
[] FOR RECESSED-BOTTOM
CABINETS ONLY
• If the cabinets have fl'ont, side or back trim, make
2 wood shims the width of the trim and attach them
to the cabinet bottom recess on both sides. See Step
12 for marking locations.
[] CUT HOLES
Cut holes at marked locations for duct and electrical
wiring. For the vertical duct, cut ()tit 3/4" extra
toward the fl'ont of the cabinet so you can move the
duct fl'eely when installing the hood. It may also ease
installation by cutting the hole 10½" instead of 10".
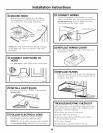
[] RUN WIRES
Run the electrical wires through the wall or
cabinet according to National Electrical Code
and applicable h)cal codes.
NOTE: DO NOT mrn the power on until
installation is complete.
[] SCREW IN PARTWAY
Drixe a mounting screw (from the hardware packet)
partwa) into each center of the narrow neck of the
keyhole slots marked on the cabinet bottom.
[] FEED IN WIRES
I,ifl the It()()(] into position and feed the house
IviI'i ng throuoh_ the wirin,,_ knockout.


