


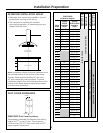

12
Installation Instructions
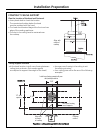
INSTALLATION – VENTED TO THE OUTSIDE
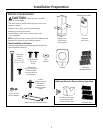
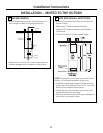
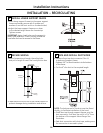
INSTALL UPPER SUPPORT FRAME
• Secure the upper support frame to the ceiling
joists and/or cross framing with the 4 screws
provided. For maximum rigidity and strength, the
screws must be driven into the center of the joists
and/or cross-framing.
• Check to be sure the support frame is level,
vertically and horizontally.
2
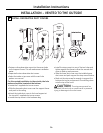
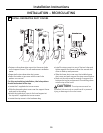
INSTALL LOWER SUPPORT FRAME
• Insert lower support frame into the upper support
frame and loosely secure with 8 screws and
washers (4 on the front and 4 on the back sides).
• Adjust the lower support frame up or down
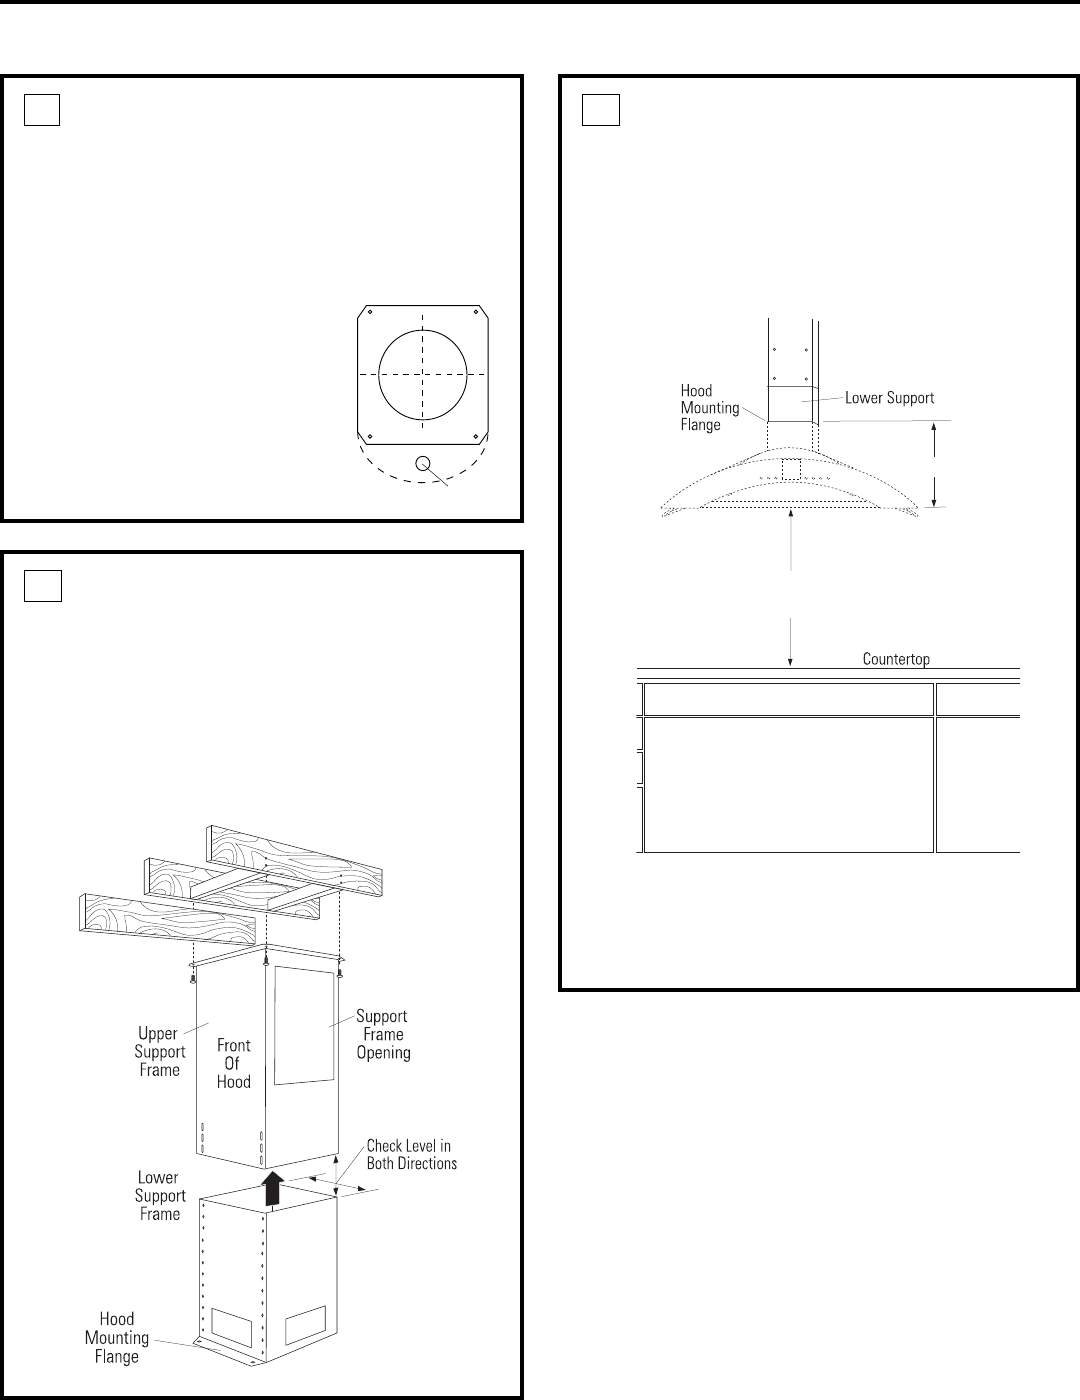
to the desired height above the countertop.
Tighten screws.
IMPORTANT: Again, check to be sure the support is
level in both directions. There is no way to level the
hood after the hood is secured to the frame.
3
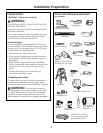
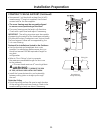
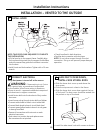
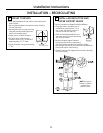
MOUNT TEMPLATE
• Align the template with the marks on the ceiling and
tape in place.
– Be sure the template is oriented correctly, with the
front of the hood.
•
Use a plumb to be sure the mounting holes will provide
parallel alignment with the countertop below.
• Center punch all hole locations.
• Drill pilot holes in the 4 screw
locations. Use a 5/32″ bit and drill
approximately 1-1/2″ deep.
• Cut wire access hole
approximately 1″ dia.
• Cut the 6-1/2″ duct opening
through the ceiling.
1
658Dia28
Wire Access Hole
Front of Hood
13-5/8
″
24″ Minimum
30″ Maximum