


JX827WN
installation
Installation
Microwave Oven
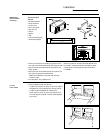
Tools and materials
required:
•Accessory kit JX827WN for
in-wall installation of
ZEM200WV
•2 Phillips head screwdrivers
(#1 & #2)
•Drill and 3/32" drill bit
•Centerpunch or nail
•Pencil and ruler
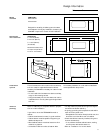
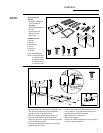
JX827WN Parts List
1. Base Pan
2. Rear Duct
3. Side Covers (2)
4. Top Trim
5. Bottom Trim
6. Side Trims
7. Rear Holddown Brackets
Screws A (9 required 1 extra)
B (4 required 1 extra)
C (10 required 2 extra)
D (4 required 1 extra)
E (4 required 1 extra)
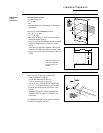
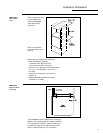
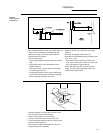
• Slide two rear holddown brackets into slots in the
rear of base pan. Tongues should be sticking into
the base pan and centered in the slot.
• Mark and drill four 3/32" holes.
• Mount both brackets.
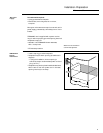
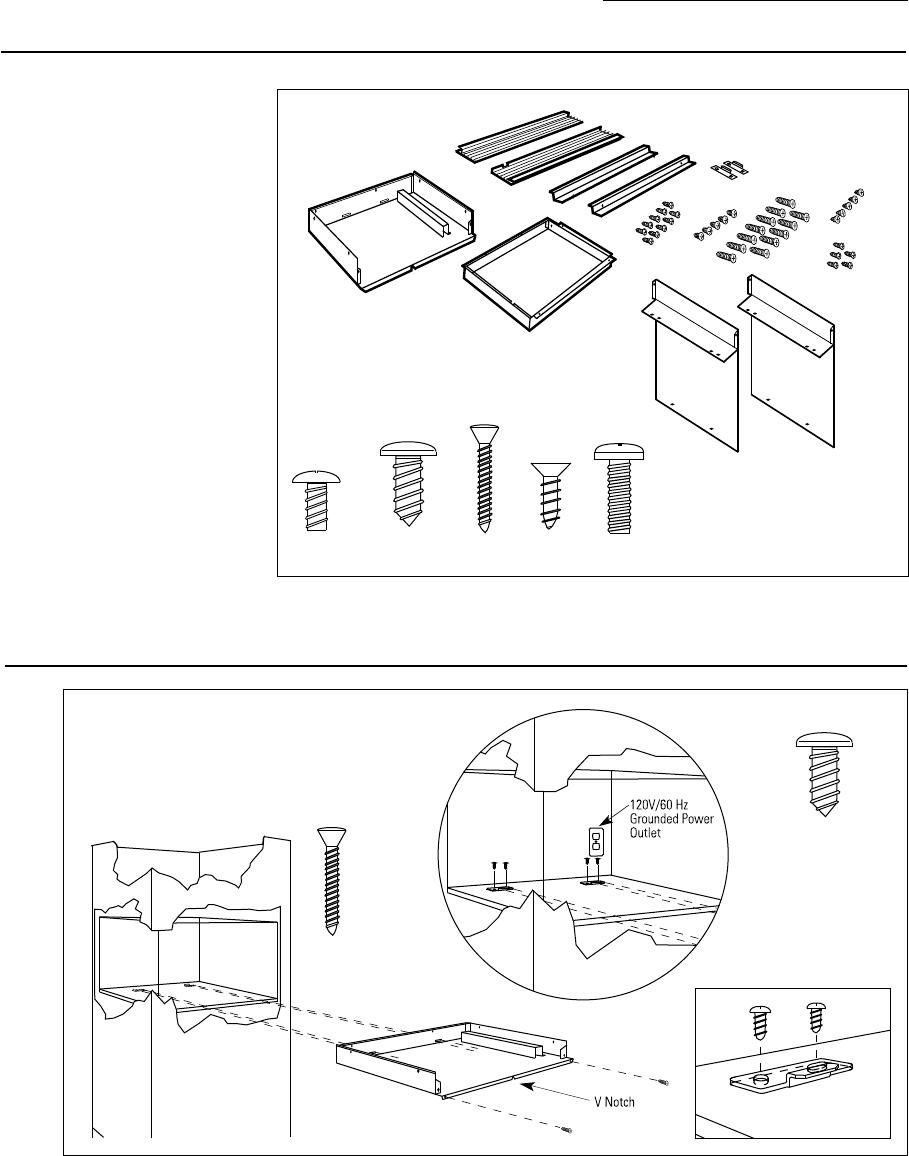
• Remove two screws in the base pan front flange and
slide the base pan straight out.
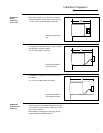
• Set the base pan into cabinet cutout and center left
and right. Front flange should be pushed back
against front wall, flush with opening.
• Mark the opening precisely at the center line.
• Drill two 3/32" diameter holes into the base
supporting structure, using the two holes in the base
pan front flange as a guide.
• Drive two screws into the base pan front flange to
temporarily hold in place.
8
Screw A Screw B
Screw EScrew DScrew C
1
Parts Inventory
B
2
4
5
6
C
A
E
D
7
3
3
Screw B
Screw C