


12
Model GGH2O
®
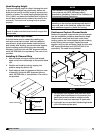
6. Fasten the back supply to the wall, going through
the lower back supply wall.
• These fasteners are to help maintain the location
of the Back Supply, and are not intended to hold
the weight of the back supply unit.
• The fasteners should not interfere with the
removable air diffusers.
• The 31.25 in. (79.375 cm) height is based upon
the canopy hood hanging height of 78 in.
(198.12 cm)
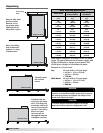
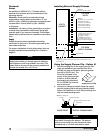
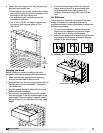
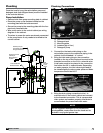
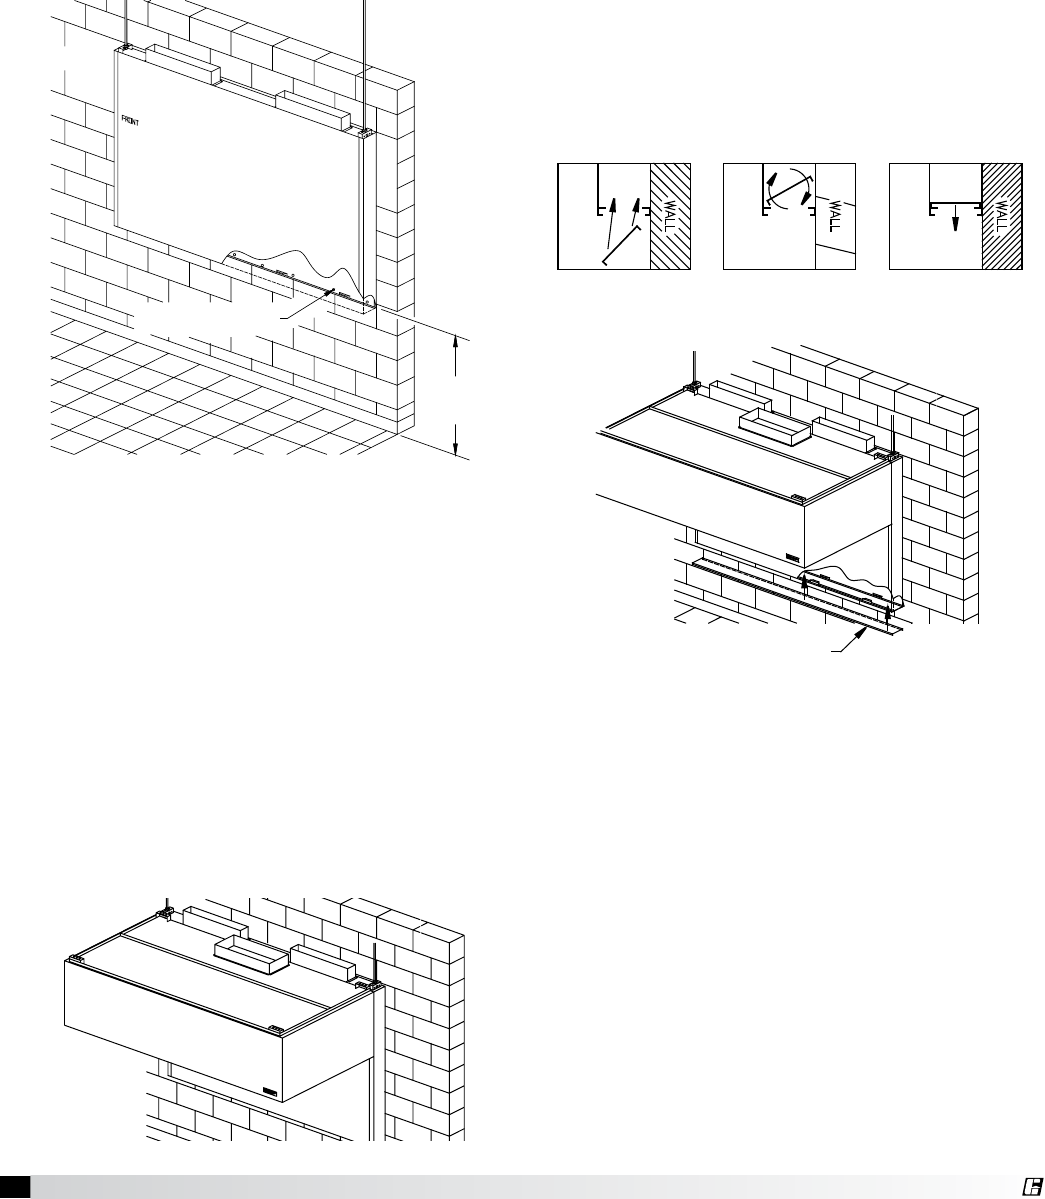
STEP 3
Furnished by Others
0.500 in. Threaded &
0.500 in. Threaded Nuts
(Furnished by Others)
Hanger Bracket Detail
1) Hang Backsupply Modules from the
ceiling (the example shows the module
being supported with threaded rod)
The backsupply is to be 31.25 in. from the
floor. This is measured from the lowest
rear edge of the backsupply module to the
finished floor.
2) Fasten backsupply to wall through the
lower backsupply wall. These fasteners
are to help maintain location of the
backsupply, and are NOT intended to hold
any weight of the unit. Fasteners should
not interfere with the removable air diffuser.
31.25 in.
Critical
Dimension
Fasteners holding the
back supply to the wall
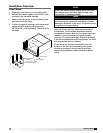
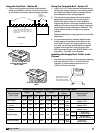
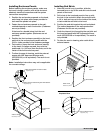
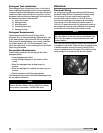
HANG THE HOOD
EYEBROW STYLE HOOD
CANOPY STYLE HOOD
INSTRUCTIONS, THE HOOD MAY BE FASTENED TO THE BACKSUPPLY.
SEAMS/SURFACES OF THE BACKSUPPLY, THE HOOD, AND THE WALL.
5. CONNECT REMAINING DUCTWORK FOR THE BACKSUPPLY AND THE
HOOD. CAULK IS RECOMMENDED TO BE APPLIED AT THE MATING
4. LIFT THE HOOD; POSITION IT SO THE TOP OF THE
HOOD IS LEVEL WITH THE TOP OF THE BACKSUPPLY; AFTER
THE HOOD IS HUNG FROM THE CEILING AS PER IT'S INSTALLATION
1. THE HOOD IS TO BE HUNG AS PER THE HOODS INSTALLATION
SHOULD BE CONNECTED BEFORE THE HOOD IS HUNG.
3. DUCTWORK FOR THE BACKSUPPLY; IF IT WILL NOT INTERFERE,
2. BEFORE THE HOOD IS HUNG THE BACKSUPPLY MUST BE SECURED
INSTRUCTIONS AND THE FOLLOWING.
PROPERLY, AS DESCRIBED IN "STEP 3 in.
STEP 4
5. Connect the remaining ductwork for the back
supply and the hood. It is recommended that
caulk be applied at the mating seams and
surfaces of the back supply, the hood, and the
wall.
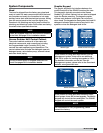
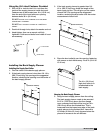
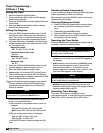
Air Diffusers
The air diffusers, located at the bottom of the back
supply, will need to be cleaned as often as the
application dictates. Inspect periodically to determine
the cleaning schedule.
1. To clean the air diffusers, unfasten the screws.
Remove the air diffusers from the back supply
unit, and wash in the sink or dishwasher.
2. Insert the air diffusers at an angle from the bottom,
and rotate so the forms are downward. Rest the
diffuser on the internal angles.
3. Refasten with the stainless steel screws.
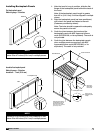
Canopy Style Hood
Removable Air Diffusers
Step 5 / Air Diffusers
a. Insert the air diffusers at an angle from the bottom.
b. Rotate the diffusers so teh forms are downward.
c. Rest the diffuser on the internal angles.
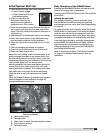
Proximity Style Hood
Hanging the Hood
Before hanging the hood according to the hood
installation instructions, please check the following:
1. Make sure the back supply plenum is properly
secured, as described in steps 5 and 6.
2. If the ductwork for the back supply plenum will not
interfere with the hood installation, it should be
connected now.
3. Any filler panels should be attached to the hood
before the hood installation.
4. Lift the hood, and position it so the filler panels
are resting lightly on the top outside edges of the
back supply. The back supply is used to position
the hood only. It is not intended to hold any hood
weight.
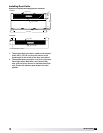
Canopy Style Hood
Removable Air Diffusers
Step 5 / Air Diffusers
a. Insert the air diffusers at an angle from the bottom.
b. Rotate the diffusers so teh forms are downward.
c. Rest the diffuser on the internal angles.
Proximity Style Hood