


Microwave
Magnetron:36 Months
Comprehensive: 12 Months
Product:12 Months
U S E R G U I D E F O R W A S H I N G M A C H I N E S F R O M
FO R MODEL: XPB65-113S
XPB65-114D
XPB65-116S
B-1/A-14, Mohan Co-ope rat ive Industrial Estate, Mathura Road, New Delhi-110044.
Tel: 011-30674000/5000. Fax: 011-269715 62. Email: info @ha ierindia.com Website: www.ha ierindia.com
Haier Appliances (India) P. Limited
HAIER APPLIANCES (INDIA) PVT. LTD. (hereinafter referred to as “the Company”) hereby
offers the following warranty to the original domestic purchaser commencing from the date
of the purchase. The Company, at its sole discretion, will free of charge repair or replace
any defective part or parts which prove to be defective in workmanship and/or materials
and not due to abnormal or improper usage.
HAIER WARRANTY
Customer Name................................................................... Address...........................................................................
Serial No..............................................................Date of purchase.............................................Model No.......................
Dealer Seal.......................................................................................................................................................................
1) This warranty will automatically terminate on the
expiry of the warranty period from the date of
delivery.
2) The Company is not liable for any delay in
servicing due to reasons beyond the control of
the Company or any of its authorised service
centres.
3) Parts replaced or repaired under this warranty
are warranted throughout the remaining of the
original warranty period.
4) It is entirely left to the Company’s discretion to
repair/replace parts at the site of installation or
at the authorised service centre of the
Company.
5) This warranty shall be strictly limited to the
repairs or replacement of defective parts
specified in the warranty. This warranty shall not
cover any consequential or resulting liability.
6) This warranty shall not, in any case, extend towards payment of any monetary consideration whatsoever or replacement
or return of the product.
7) The Company may repair/supply parts free of cost during the warranty period. This warranty does not cover any Excise
duty, Central or Sales tax, Octroi and other local taxes or levies on the components/parts.
8) The parts shall be replaced by functionally operating equivalent material only and not with brand new ones and are likely
to be different from the one originally fitted. The parts thus removed shall be taken back by the Company.
9) The Company reserves the right to retain any part or component replaced at its sole discretion during the warranty
period.
10) In no event the Company or its authorised service centre be liable for any consequential damages or resulting liability,
damage or loss arising directly or indirectly out of any defect in the product.
11) This warranty is not valid in case of the following events:
a) If the Product has been Installed/Serviced/Repaired/Opened or Tampered by any unauthorised personnel.
b) If defects arise/caused by accidents, alteration, misuse, neglect, substitution of original components with
spurious/non-genuine components, attacked by household pest / rodents, fire, flood, earthquake, lightning
and/or any other act of God/natural calamities.
c) The product is shifted outside India.
12) For any service under this warranty beyond city/town/municipal limits from the Company/authorised service centre, a
fixed charge of Rs. 50 will be collected from the customer in addition to the actual to and fro charges by the shortest
route.
13) Any change of location or change in the ownership during the warranty period must be intimated in writing to the
Company.
14) The Company’s employees or its authorised representatives have no authority to vary the terms of this warranty.
15) This warranty is effected in New Delhi and claims, if any, shall be made only before the courts having jurisdiction in New
Delhi and no claim shall be made against the Company outside New Delhi notwithstanding that the Appliance may
have been sold or delivered elsewhere.
CONDITIONS OF WARRANTY
Customer Name................................................................ Address......................................................................................
Serial No..........................................................Date of purchase.........................................Model No...................................
Dealer Seal...........................................................................................................................................................................
HAIER APPLIANCES (INDIA) PVT. LTD., B-1/A-14, Mohan Co-operative Industrial Estate, New Delh i-44
Ph: 3067400 0/5000. Fax: 011-26971562
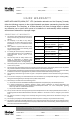
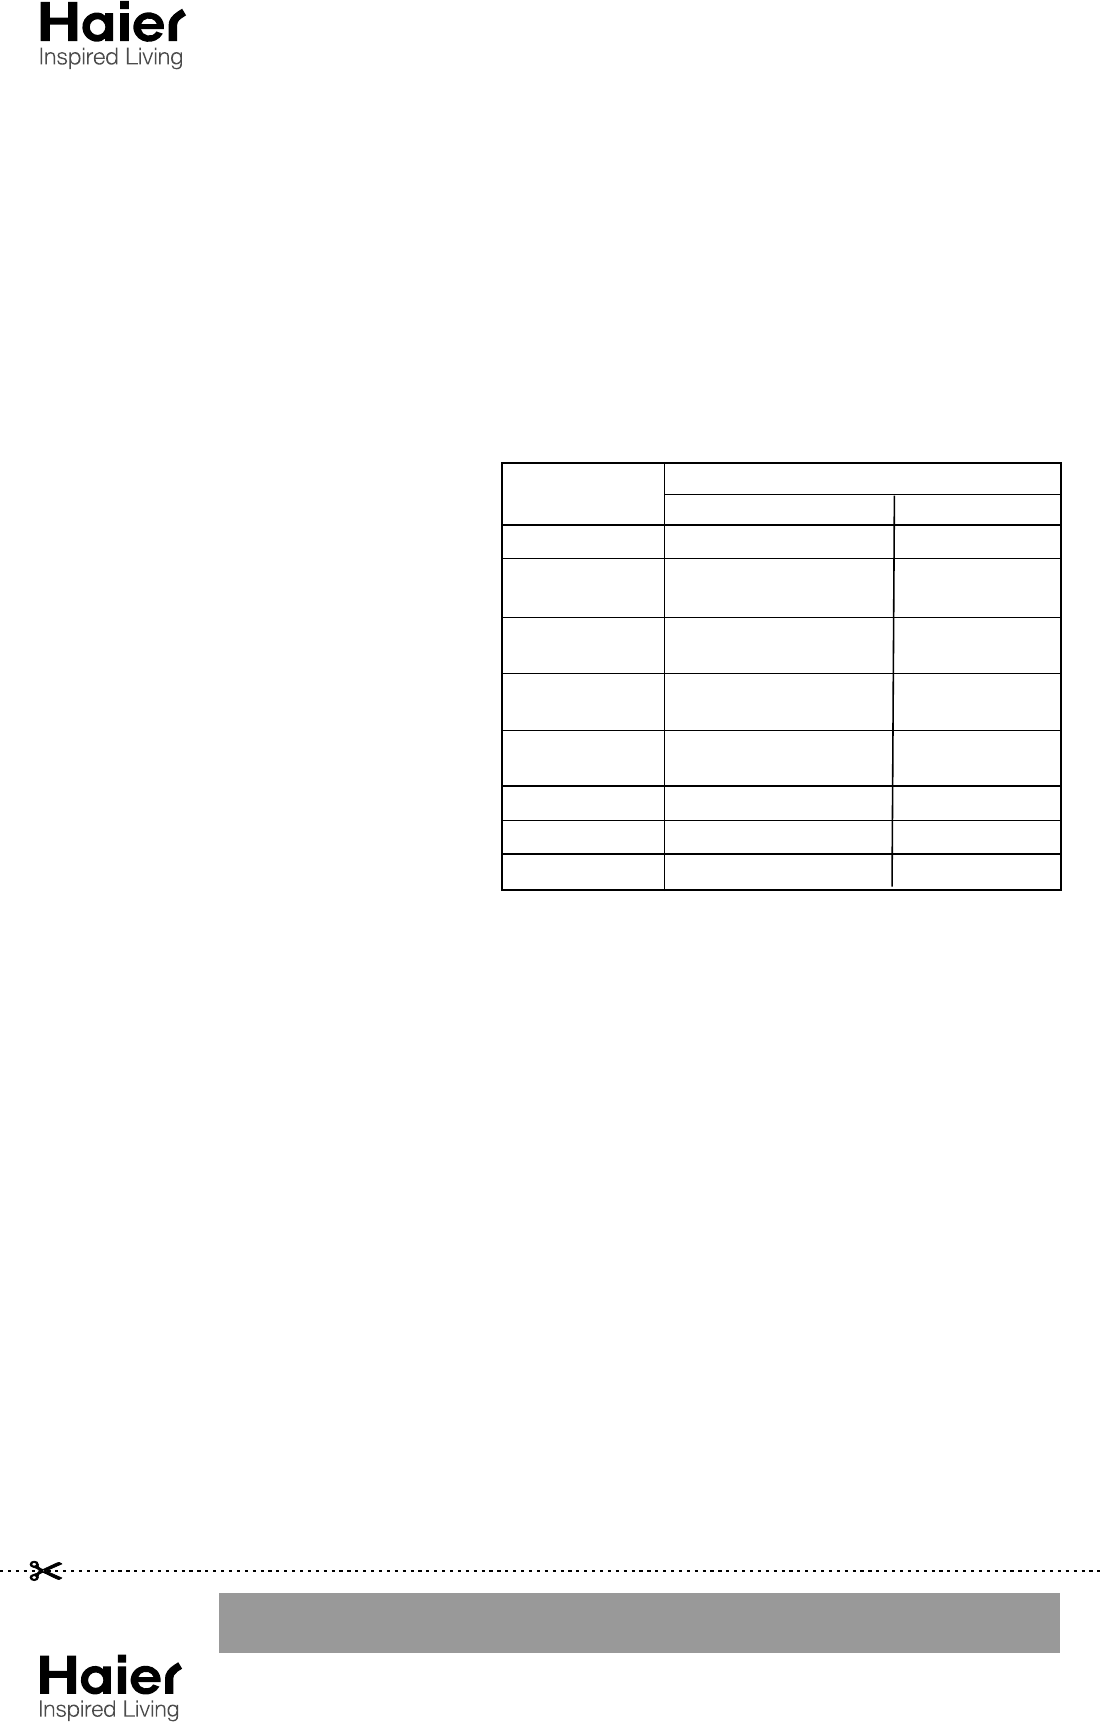
Product
Colour TV
Refrigerator
Washing Machine
Airconditioner
Dishwasher
Cloth Dryer
DVD
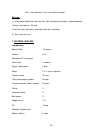
Parts not coveredPeriod
Warranty
12 Months
Comprehensive: 12 Months
Compressor: 60 Months
Comprehensive: 24 Months
Motor: 60 Months
Compressor: 60 Months
24 Months
12 Months
12 Months
Plastic, Glassware,
Light Bulb
Remote, Cabinet
Top Lid, Outer
Casing
Air Filter, Front Grill
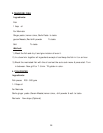
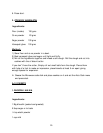
RINSE WITH STORED WATER
1. Put the laundry into the wash tub. Select
suitable speed according to the laundry.
2. Fill water to preset water level.
3. Rinse:
Adjust the wash timer to 2-3 minutes to
do rinsing.
When the laundry quantity is below 2.4 kg.,
please use "Standard" speed. If you use
"Strong" speed, water may splash.
To do spinning and draining or rinsing
with water-filling together, please first
do spinning for around 1 minute, then
do draining or rinsing with water-
filling. Otherwise the spinning will stop
owing to too much water stored in the
spin tub.
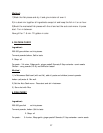
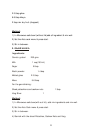
1. Put the laundry into the spin tub evenly and smoothly.
2. Press the gland in the tub properly. Close the inner and outer cover of the spin tub.
3. Spin:
Select suitable spin time according to the laundry, and do the spinning. During
spinning, if there is any abnormal sound, it is generally owing to slanting placement
of the laundries. Please stop the machine and rearrange the laundry properly.
• In spinning, it will pause the work if you open the outer cover of the spin tub. Close
it to resume the spinning.
SPINNING
DISPOSAL AFTER WASHING
• After using, please clean the lint and foreign materials of the lint filter and overflow
filter in time. Otherwise it may influence your using the machine.
• Please first pull off the power plug from the receptacle before cleaning.
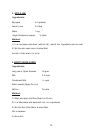
CLEANING THE LINT FILTER
• The lint filter must be used during washing.
• It must be cleaned in time after each use.
Put hand at the indicated position. Push down
to take it off. (See Figure 1)
Put it in wate r and cle an while it is still we t.
(See Figure 2)
After cleaning, insert the bottom of the lint filter
(marked with "down side") into the overflow
filter, then push the upper part of the filter in
(marked with "up side"). (See Figure 3)
1. TAKE OFF THE LINT FILTER
2. CLEAN THE LINT
3. INSTALL THE LINT FILTER
Figure 2
Figure 3
Figure 1
11
The machine does
not start
• Is there power failure?
• Is the power plug loose?
• Is the pulsator twisted by foreign materials?
• Is the drain hose put down?
• Is the drain hose frozen?
• Is the drain hose blocked by foreign
material?
• Is the laundry falling to the outer side of
the spin tub?
The draining does
not work
• It is the water remaining from factory
inspection of performance?
T h er e m a y b e
s o m e w a t e r
flowing out of the
drain hose in the
first use of t he
machine
• Is the machine slanting?
• Is the gland pressed evenly?
• Is the laundry falling to the outer side of the
spin tub?
• Is the laundry in spin tub too much in
quantity?
There's abnormal
sound and violent
vibration during
spinning
• Are there hair pins, coins or metal items
inside the tub?
There's abnormal
s o u n d d u r i n g
washing
TROUBLE-SHOOTING (cont.)
(If there's a breakdown, please pull off the power plug before checking). The
following phenomena do not necessarily mean breakdowns sometimes. Please
confirm again before sending it for repair. If there are real breakdowns, please
come to the special maintenance department or after-sales service department of
our company. Do not attempt to repair it by yourself.
PHENOMENA
POSSIBLE CAUSES
14
Outer cover of
The spin tub
Inner cover of
The spin tub
The laundry
is slanting
Gland
Push
Proper
Push
Proper
No gland
SPIN
WASH
1. Put the laundry into the spin tub evenly and smoothly.
2. Spin
(1) Put the gland in properly, even if the laundry quantity is small.
(2) Close the inner and outer cover of the spin tub.
(3) Spin for 1-2 minutes.
3. Run the foam-removing spin.
(1) Open the outer cover of the spin tub.
(2) Set the water-filling selector control rod
at the "SPIN" side. Fill water for about 1
minute. If the water quantity filled is too
large, the water may flow out from the
wash tub side. Please twist the water tap
to limit the water level.
(3) Close the outer cover of the spin tub.
Spin for 1-2 minutes.
MIDWAY SPINNING
RINSING
RINSE WITH WATER-FILLING
1. Put the laundry into the wash tub. Select
suitable current according to the laundry.
2. Adjust the water level. Set the water level
adjusting lever according to the quantity of
laundry. Then fill suitable quantity of water
continuously.
3. Rinse:
Adjust the wash timer to 5-7 minutes to do
rinsing.
(Repeat the midway spinning and
rinsing with stored water 2-3
times).
OVERFILL
If you find water
flowing out here,
please twist the water
tap to limit the water
level.
10
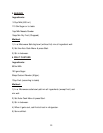
CLEANING THE OVERFLOW FILTER
• Too much lint on the overflow filter will
influence the normal usage of the machine.
Please clean it every two months.
1. Take off the overflow filter. As indicated in
the figure, nip the elastic fixing claw and
pull it to the direction of the arrow to take it
off.
2. Take off the corrugation pipe. Dismantle
the upper part of the corrugation pipe
inside the overflow filter (as indicated in
Figure 1).
3. Clean the lint around the filter and flush with
tap water.
4. Install the overflow filter.
(1) Install the corrugation pipe.
(2) Insert the mounting plate at the bottom
of the filter into the valve cover.
(3) Hang up the hook at the left upper side.
(4) Push the upper part in as indicated in
Figure 2.
Elastic fixing
claw
DISPOSAL OF THE COMPLETE UNIT
Hook
Figure 2
Corrugation
Pipe
Figure 1
Water level
adjusting lever
• After washing, dismount the water
inlet hose.
• Do not store water in the tub for a long
per iod. Disch arge t he wa ter
immediately after each use.
• Pull off the power plug and hang up
the power cord.
• Hang up the drain hose. Wipe off the
water drops on the surface and inside
the tub with a clean soft cloth.
• Open the cover of the wash tub and
the inner/outer cover of the spin tub
for some time (about one hour), then
close them.
• Wipe the complete unit with soft
cloth twisted dry.
• Wipe with neutral detergent if too
dirty.
• Do not wash it directly with water.
Thinner
Alcohol
Petrol
12
TROUBLE-SHOOTING
IF THE LAUNDRY FALLS TO THE
OUTER SIDE OF THE SPIN TUB
WHEN THE REMAINING WATER IS FROZEN
If the laundry falls to the outer side of the spin tub,
please take it out immediately.
As indicated in the figure, pull the spin tub frame
obliquely upwards to dismantle it.
After installing the back edge of the spin tub
frame to proper position, push the frame at four
locations as indicated to reset it.
Please check carefully. The laundries may fall to
the lower part of the outer side of the spin tub (as
indicated in the figure).
If the laundry fall to the outer side of the spin tub,
during spinning the drain will get blocked and the
rotation speed of the spin will reduce.
1. DISMANTLE
2. INSTALL
Spin tub
Laundry
Spin tub frame
• Prevent the freezing (be sure to discharge
the water completely after using)
After complete draining, set the "WASH
S E L E C T O R " t o " S T R O N G " o r
"STANDARD". If it is set at "DRAIN", it will
be difficult for the frozen water to melt.
• When the water is frozen, pour hot water
O
below 50 C into the wash tub to soak it
completely. Then turn the pulsator gently
with your hands. Please confirm that the
drainage is working normally before next
use.
2~3L
Below 50 c
13
NAME
PACKING LIST
• User's manual
• Warranty manual
• Water inlet hose
• Lint filter
• Water-filling jointer
• Gland
• Twin-tub washing machine
QUANTITY
• One piece
• One piece
• One piece
• One piece
• One piece
• One piece
• One set
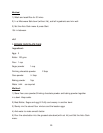
Water level/Water quantity (about)
Injection pressure(MPa)
Rated washing/spinning capacity(kg.)
SPECIFICATIONS
Maximum/55L Medium/46L Minimum/36L
0.02~0.2
6.5 / 6.0 (weight of standard dry cloth)
15
,Bulb
Glass,Turn table,
Bulb