


– 4 –
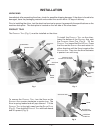
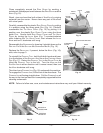
PRODUCT TRAY
The P
RODUCT TRAY (Fig. 1) must be installed on the slicer.
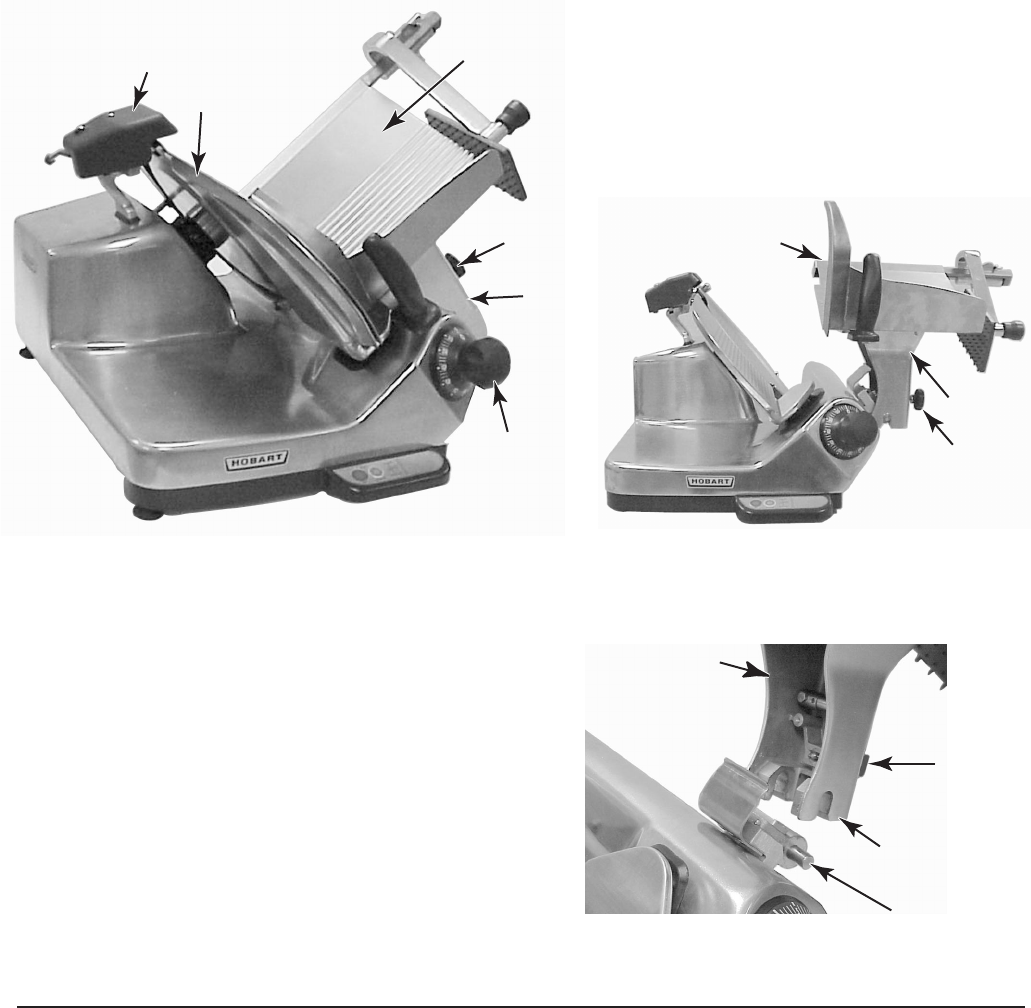
To install the P
RODUCT TRAY on the slicer,
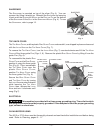
lower the bottom of the S
UPPORT ARM onto
the C
ARRIAGE HINGE PINS (Fig. 3). Tilt the
P
RODUCT T RAY toward the GAUGE P LATE. Press
the K
NOB on the SUPPORT ARM and rotate it in
either direction until the K
NOB is against the
S
UPPORT ARM. Then, turn the KNOB clockwise
a quarter turn until snug.
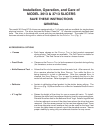
INSTALLATION
UNPACKING
Immediately after unpacking the slicer, check for possible shipping damage. If the slicer is found to be
damaged, save the packaging material and contact the carrier within 15 days of delivery.
Prior to installing the slicer, test the electrical service to assure it agrees with the specifications on the
machine data plate. The data plate is located on the left side of the slicer base.
Fig. 1
Fig. 2
Fig. 3
SUPPORT ARM
CARRIAGE
HINGE PIN
BOTTOM OF
SUPPORT ARM
KNOB
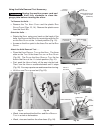
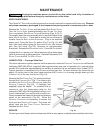
PRODUCT TRAY
TILTED TO THE RIGHT
KNOB
SUPPORT
ARM
To remove the PRODUCT TRAY, turn the KNOB on the
S
UPPORT ARM counter-clockwise a quarter turn. The
K
NOB is spring-loaded and will pop outward. Tilt the
P
RODUCT TRAY to the right, away from the GAUGE PLATE
(Fig. 2). Then hold the PRODUCT TRAY with both hands
and lift upward (Fig. 3).
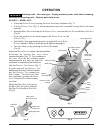
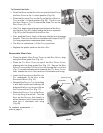
GAUGE PLATE
SUPPORT
ARM
SHARPENER
PRODUCT
TRAY
KNOB
INDEX
KNOB