


INSTRUCTIONS 5101512
2. THICKNESS OF SLICE:
The
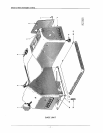
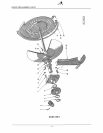
knob or dial (4, Fig. 1) adjusts the
thickness of the slices cut. The numbers on the
dial indicate actual measurements in
.lo". For
example when setting dial at
.25, slice would be
114" thick.
3. SAFETY PRECAUTIONS:
When not actually slicing, turn the slice ad-
justment knob clockwise as far as it will go. The
gage plate will cover the edge of the cutting knife
and guard it.
4. SLICING FOOD:
This machine has been designed so a minimum
effort is required to hold and slice, pieces of
various shapes and sizes. The shape of the carriage
and inclined position make it unnecessary to use
holding devices for large items of regular shape,
such as cold boiled ham, loaf meats and picnic
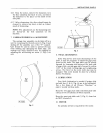
cuts. For holding odd shapes or short end pieces,
use the meat grip (1, Fig. 1). Hold the handle in
your right hand, and press the grip down on the
meat at a convenient location. The carriage can
then be moved back and forth with the same hand
that holds the grip. The left hand is then free to
receive the slices as they come from the knife. The
slices may be stacked on the tray surface which is
easily kept clean. Other trays or platters may be
used if so desired. The slicer is turned
"ON"
and
"OFF" by the switch (5, Fig. 1) (pull to start,
push to stop).
After a few slices have been cut
and the end of the
piece is squared off, the meat will usually feed
without help from the grip. For safety reasons
when cutting a short end piece, ALWAYS place
the grip behind the item being sliced. This method
also allows cutting down to the last slice. The grip,
when not in use, may be stored to its
in-operative
position in the rear and underneath the carriage
tray.
5. CLEANING
&
SANITIZING:
UNPLUG ELECTRICAL POWER CORD and
clean the surface of the machine daily. Make sure
the knife guard is in place and the slice adjusting
knob is turned clockwise as far as it will go when
performing this operation.
WARNING: Observe the same care while working
around the knife that you would use with any
razor sharp-edged tool.
PROCEDURE:
5.1 Materials required:
5.1
.I
Small plastic two compartment pail.
5.1.2 Clean cloths.
5.1.3 Cleaner ("Soilax" All Purpose Cleaner).
5.1.4 Sanitizer ("Mikro-Klene" iodophor
sani-
tizer).
5.2 Cleaning (using
"Soilax" and "Mikro-Klene"):
5.2.1 Add two ounces of
"Soilax" All Purpose
Cleaner to a gallon of hot water in wash side
of two compartment pail.
5.2.2 Mix rinse solution by adding two
teaspoons of "Mikro-Klene" in one gallon of
cool water in rinse side of pail.
5.2.3 Wipe off large scraps of meat soil.
5.2.4 Dip cloth into cleaning solution, then
wring out cloth. Wipe the entire outside of
slicer with cloth. Be sure to CAREFULLY
wipe the gage plate.
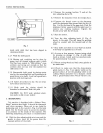
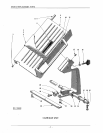
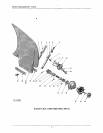
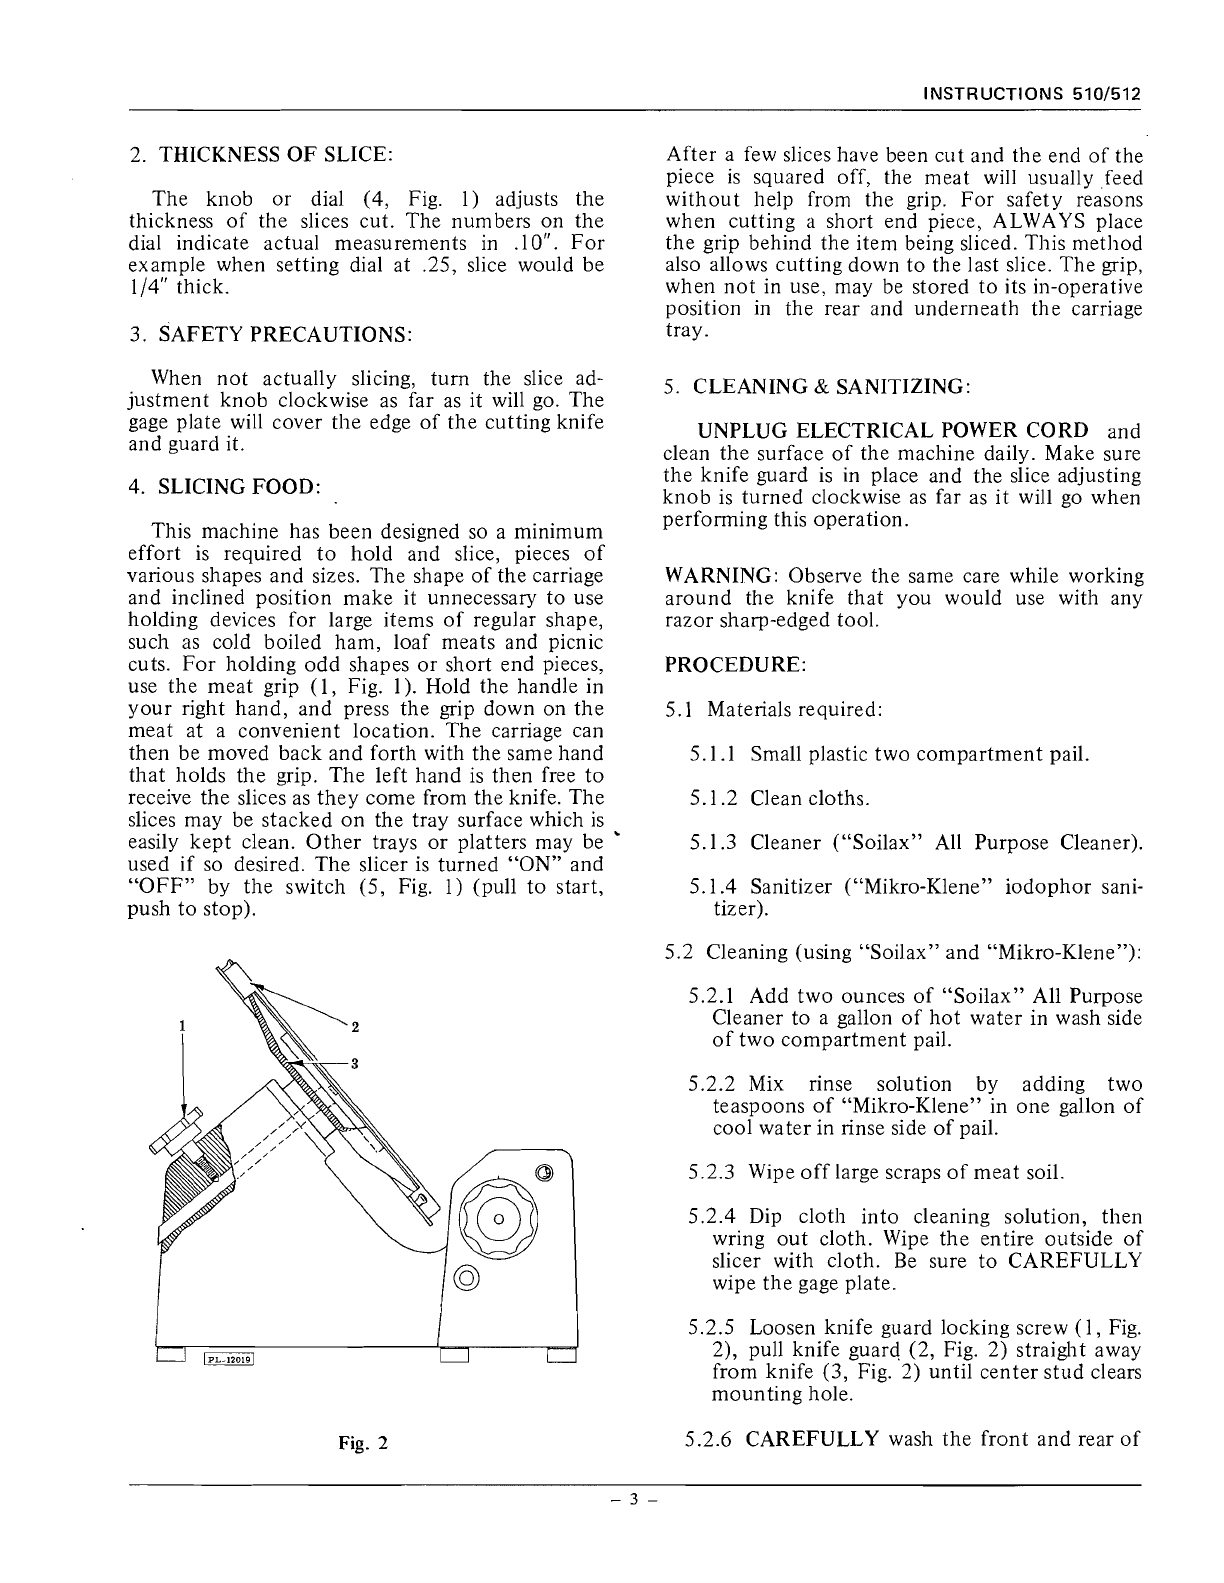
5.2.5 Loosen knife guard locking screw
(1, Fig.
2), pull knife guard (2, Fig. 2) straight away
from knife (3, Fig. 2) until center stud clears
mounting hole.
Fig.
2
5.2.6 CAREFULLY wash the front and rear of