


6
GB
PLEASE PHONE US TO REGISTER YOUR APPLIANCE AND ACTIVATE YOUR PARTS GUARANTEE ON 08448 24 24 24
c)c)
c)c)
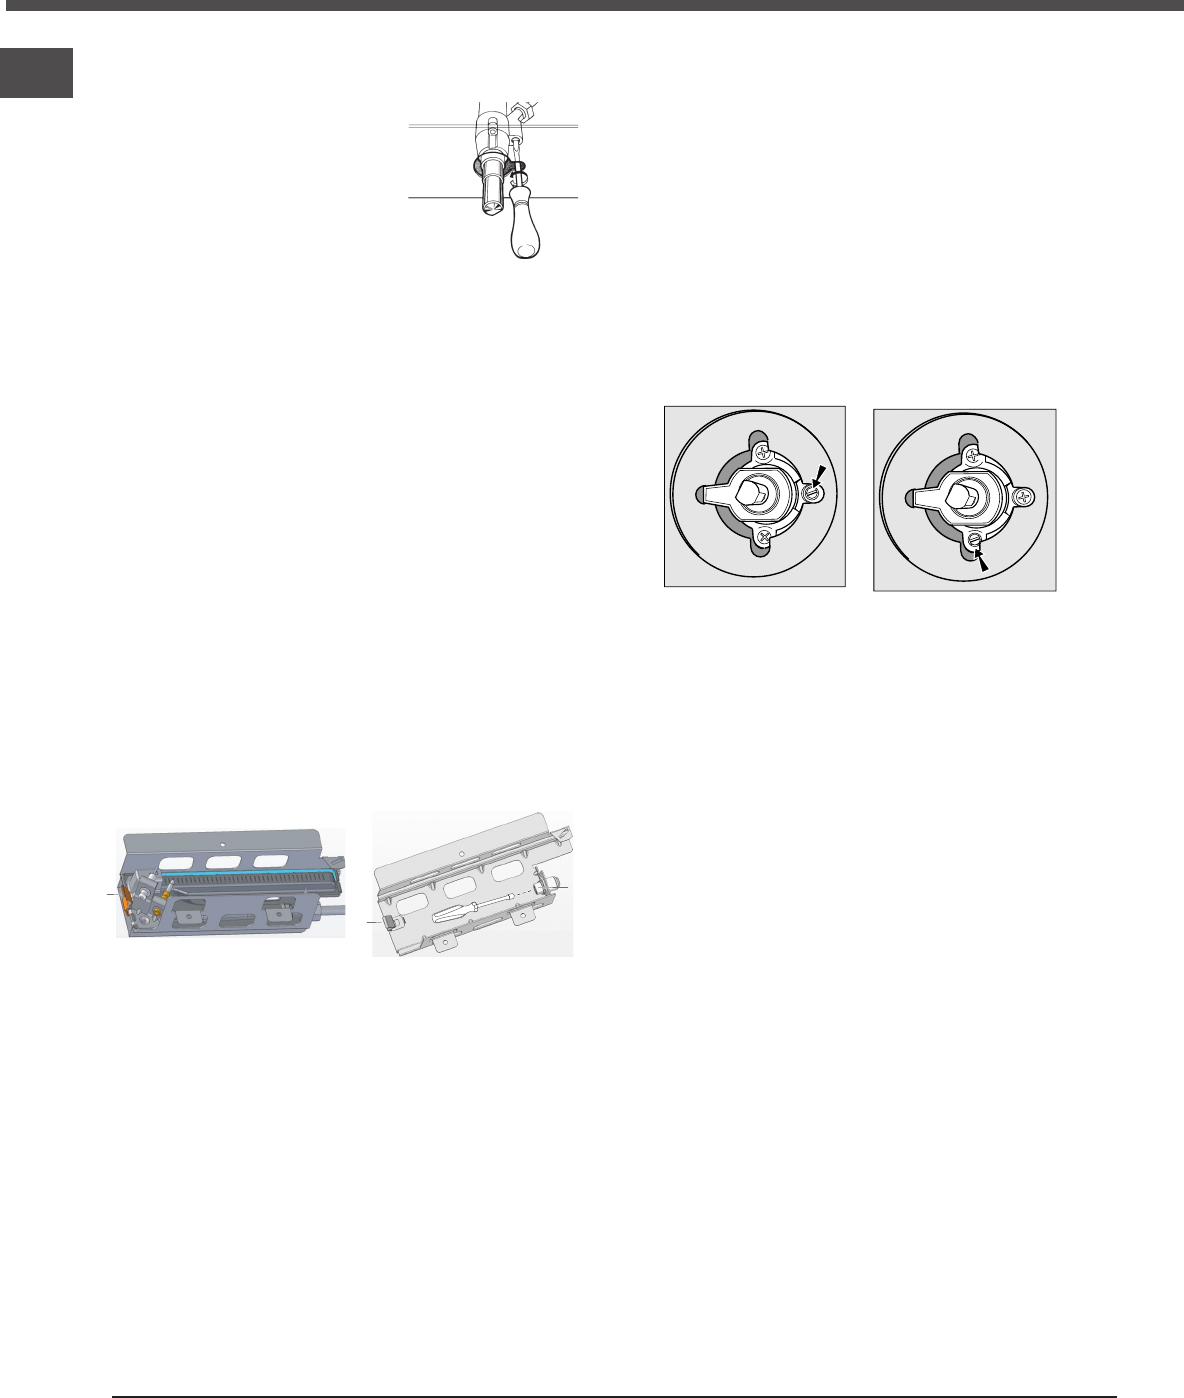
c) Minimum regulation of the hob burners:
• turn the tap to minimum;
• remove the knob and adjust
the regulation screw, which is
positioned in or next to the tap
pin, until the flame is small
but steady.
! !
! !
! In the case of liquid gas, the
regulation screw must be screwed in to the bottom.
• check that the flame does not turn off when
you turn the tap quickly from high to low.
d)d)
d)d)
d) Regulating the primary air of the burners:
The primary air of the burners requires no regulation.
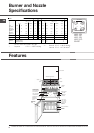
Adapting to different types of gas (main and top
oven)
In order to adapt the oven to a different type of gas
with respect to the gas for which it was
manufactured (indicated on the label), follow these
simple steps:
a)a)
a)a)
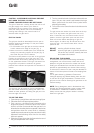
a) Replacing the oven burner nozzle
• open the oven door fully
• pull out the sliding oven bottom
V
V
Z
• Pry the fixing tab “V” and remove the oven burner
• Unscrew the oven burner nozzle using the socket
spanner for the nozzles
“Z”“Z”
“Z”“Z”
“Z”, or a 7 mm socket
spanner, and replace it with a nozzle suited to the
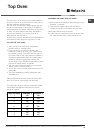
new type of gas (see Table 1).
Take particular care handling the spark plugTake particular care handling the spark plug
Take particular care handling the spark plugTake particular care handling the spark plug
Take particular care handling the spark plug
wires and the thermocouple pipes.wires and the thermocouple pipes.
wires and the thermocouple pipes.wires and the thermocouple pipes.
wires and the thermocouple pipes.
• Replace all the parts, following the steps
described above in the reverse order.
b)b)
b)b)
b) Minimum regulation of the main and top gas
oven burner with thermostat:
• light the burner as described in the
paragraph the oven knob” of the
instruction booklet.
• turn the knob to
MaxMax
MaxMax
Max for about 10 minutes
and then turn the knob to the
MinMin
MinMin
Min
setting;
• remove the knob;
• regulate the screw positioned outside the
thermostat pin until the flame is
small but steady.
! !
! !
! In the case of liquid gas, the regulation screw
must be screwed in to the bottom.
• check that the burner does not turn off
whenwhen
whenwhen
when
you turn the knob from Maxyou turn the knob from Max
you turn the knob from Maxyou turn the knob from Max
you turn the knob from Max
to Minto Min
to Minto Min
to Min and and
when you open and close the oven door quickly.
Adapting the gas grill to different types of gas
Replacing the nozzle of the grill burner:
• Remove the enamelled baffle at the front of
the grill (2 screws).
• Remove the screw on the right hand side of the
burner and gently slide the burner off the injector.
• Using a 7mm socket, replace the grill injector as
appropriate (see table 1).
• Re-assemble the burner and baffle.
!On completion of the operation, replace the old
rating sticker with one indicating the new type of gas
used. This sticker is available from our Service
Centres.
NoteNote
NoteNote
Note
Should the pressure of the gas used be different (or
vary) from the recommended pressure, it is
necessary to fit a suitable pressure regulator onto
the inlet pipe in compliance with current National
Regulations relative to “regulators for channelled
gas”.
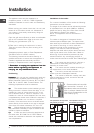
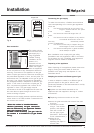
Installation
unscrew the two screws and take off the shield
protecting the burner (in main oven burner only).