GB
11
PLEASE PHONE US TO REGISTER YOUR APPLIANCE AND ACTIVATE YOUR PARTS GUARANTEE ON 08448 24 24 24
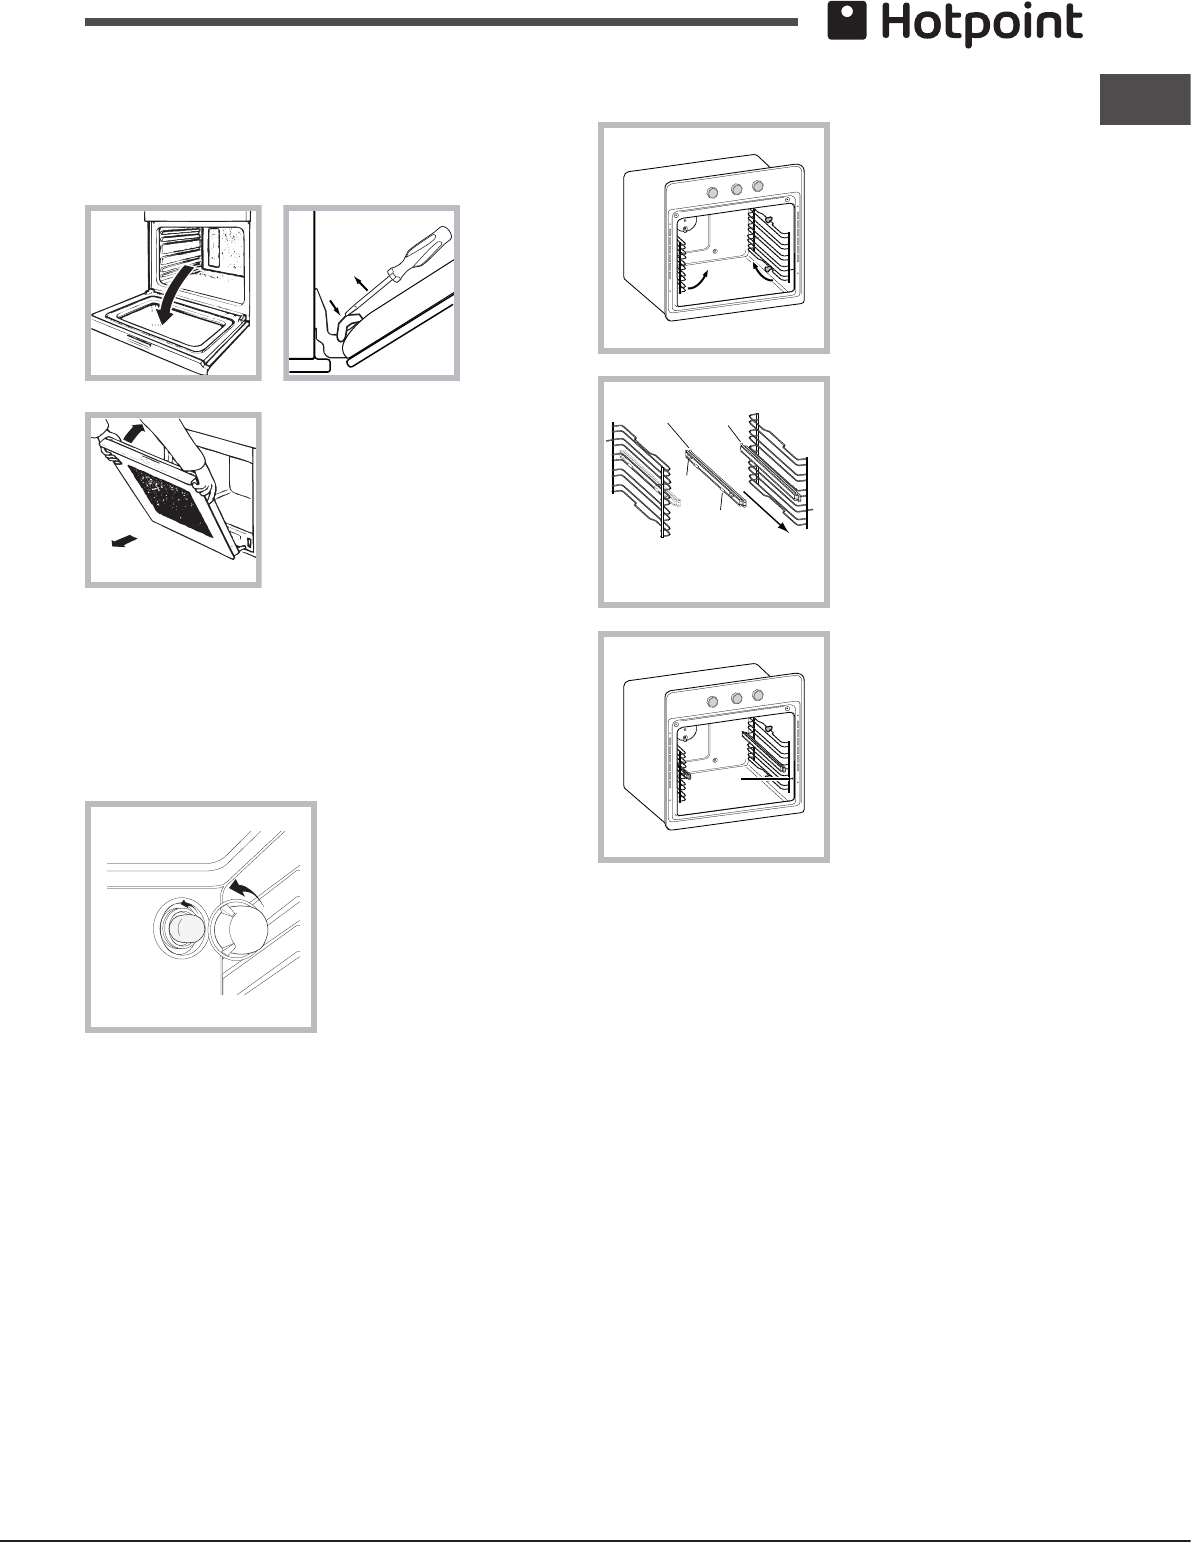
Formorethoroughcleaningpurposes,theovendoormay
be removed:
1.Opentheovendoorfully(seediagram).
2. Use a screwdriver to lift up and turn the small levers F
locatedonthetwohinges(seediagram).
F
3. Grip the door on the two outer
sides and close it approximately
half way. Pull the door towards you,
liftingitoutofitsslot(seediagram).
To replace the door, reverse this
sequence.
Inspecting the seals
Check the door seals around the oven regularly. If the seals
are damaged, please contact your nearest Service Centre
(seeAssistance).Werecommendthattheovenisnotused
until the seals have been replaced.
Remplacement de l’ampoule d’éclairage
Pour changer l’ampoule
d’éclairage du four:
1. Dévissez le couvercle en
verre du boîtier de la lampe.
2. Dévissez l’ampoule et
remplacez-la par une autre
de même type : puissance
25W,culotE14.
3. Remontez le couvercle à
saplace(voirgure).
! Ne pas utiliser la lampe du four comme éclairage de la
pièce.
Sliding rack kit assembly
To assemble the sliding
racks:
1. Remove the two frames,
lifting them away from the
spacersA(seegure).
2. Choose which shelf to use
with the sliding rack. Paying
attention to the direction in
which the sliding rack is to
beextracted,positionjointB
andthenjointConthe
frame.
3. Secure the two frames
with the guide rails using the
holes provided on the oven
walls(seediagram).The
holes for the left frame are
situated at the top, while the
holes for the right frame are
at the bottom.
4.Finally,ttheframeson
the spacers A.
!Donotplacetheslidingracksinposition5.
A
B
C
Left
guide rail
Right guide
rail
Direction
of extraction
D


