


The drive motor and the gear reducer of your Jackson
rack conveyor are responsible for moving racks of ware through
the dishmachine. If needed to be replaced, these instructions will
show you how to get your machine up and running in the shortest
possible time.
Jackson offers all of the repair parts necessary for per-
forming this task.
The instructions provided here are for maintenance per-
sonnel only. Unauthorized persons should not attempt any of the
steps contained in these instructions.
Warning: many of the instructions and steps within
this document require the use of tools. Only authorized per-
sonnel should ever perform any maintenance procedure on
the dishmachine!
PREPARATION
1. Power must be turned off to the unit at the service
breaker. Tag or lock out the service breaker to prevent accidental
or unauthorized energizing of the machine.
TOOLS REQUIRED
The following tools will be needed to perform this mainte-
nance evolution:
1. 7/16” socket and ratchet with extension
2. 9/16” socket and ratchet with extension
3. 7/16” combination wrench
4. 9/16” combination wrench
5. 3/4” combination wrench
6. 1/8” Allen wrench
7. 1/4” nutdriver
8. Large flathead screwdriver
9. Medium phillipshead screwdriver
10. Medium hammer
11. Rubber mallet
TIME REQUIRED
It is estimated that it will take (1) person one and a quar-
ter hours to replace the drive motor, one and a quarter hours to just
replace the gear reducer or two hours to do both at one time, not
including all of the items indicated in the section entitled “PREPA-
RATION”.
IMPORTANT NOTES
1. Read these instructions thoroughly before attempting
this maintenance procedure. Become familiar with the parts and
what actions need to be taken. This will save time in the long run!
2. The procedures demonstrated in this manual are
shown being performed on an AJ-44 rack conveyor dishmachine.
The actual maintenance steps, however, apply to any drive motor
or gear reducer found on a Jackson rack conveyor dishmachine.
STEPS
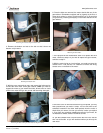
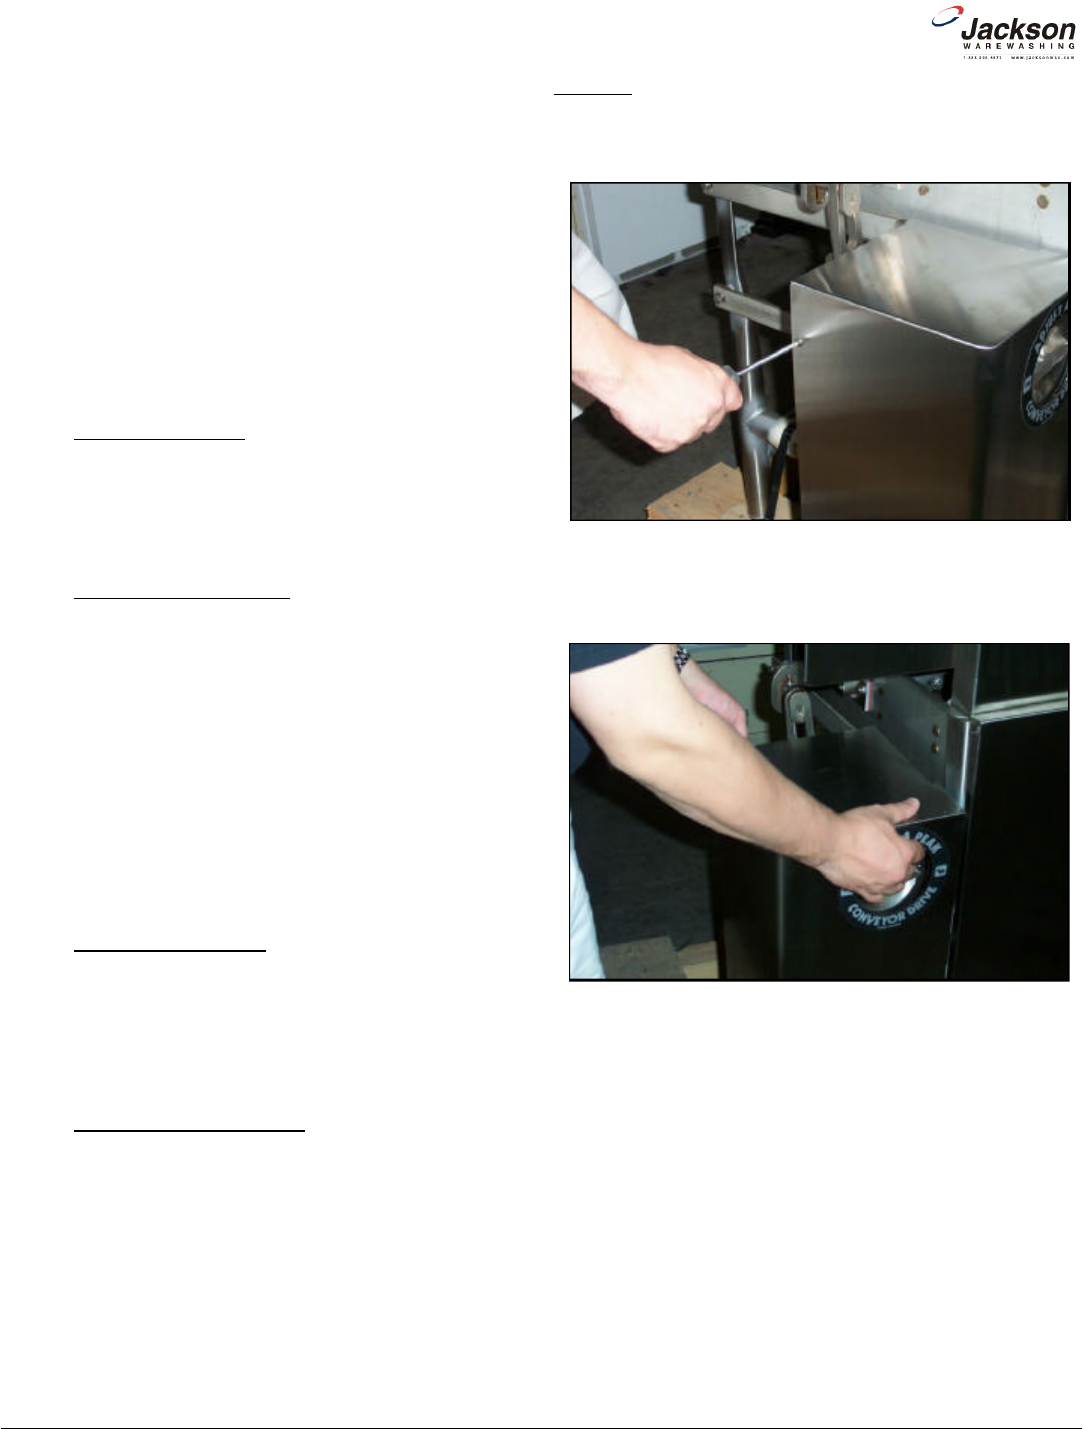
1. Remove the (2) screws that secure the top drive assembly cover
in place.
2. Remove the top cover to expose the drive assembly.
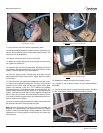
3. Set the top cover to the side and out of the way so that it does
not become a trip hazard. From here, the next step will be to
remove the bottom cover. This will require using the 7/16” socket
with ratchet and most likely the 7/16” combination wrench. Do not
lose the hardware for the covers as your repair kits do not come
with the hardware necessary to replace these. If you do require
hardware that is not present in your kits, do not hesitate to contact
Jackson Technical Service for help.
www.jacksonmsc.com
Rack Conveyor Drive Motor and Gear Reducer Replacement Instructions
Revision A (07/05/2005)
2
Removing the top cover.
Removing the screws from the top cover.