


JFT Series Technical Manual 7610-002-77-38
Issued: 03-16-2006 Revised: N/A
SECTION 3: PREVENTATIVE MAINTENANCE
23
DAILY/WEEKLY/MONTHLY MAINTENANCE
Daily:
1. Drain and clean the dishmachine as per the cleaning instructions supplied with this manual. During cleaning, any items that
may appear to be broken or failed should be reported to authorized service personnel.
W
eekly:
1. Delime the machine. NOTE: The deliming agent that you may use may require more or less frequency in application.
Because water conditions vary from installation to installation, it may be necessary to delime the machine more often or per-
haps even less. Follow the deliming agent manufacturers instructions regarding frequency of application and adjust the main-
tenance schedule as required.
2. Verify there are no leaks. This includes inspecting the integrity of all gaskets, including the ones inside the machine, as well
as ensuring that none of the silicone used between the individual sections has frayed or been removed. Any torn gaskets should
be immediately replaced. Re-apply silicone as required. The machine should be completely turned off and drained for this pro-
cedure so that gaskets in the lower parts of the tub(s) can be examined.
3. Verify the operation of the Emergency Stop Switches. Simply start the unit with all personnel standing clear and push in
Emergency Stop Switch to verify that they stop the machine. Do this for each switch. NOTE: The Emergency Stop Switch stops
the conveyor belt and the pumps, but the heaters will remain on. If the Emergency Stop Switch fails to halt the machine, then
the wiring to the switch should be verified. If, according to the schematic, the switch is wired correctly, then it is most likely faulty
and should be replaced. Immediately inform operating personnel of the defect and instruct them as to where the other
Emergency Stop Switch is at as well as the main stop switch on the front control panel.
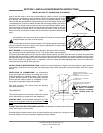
4. Verify the operation of the door safety switches. Start the unit with all personnel standing clear and open each door one at a
time to verify that the unit will shut off. Do this for all prewash, wash and power rinse doors. You should not have to lift the door
more than 6 inches to achieve the desired result. Be very careful as hot water may spray out from the bottom of the door. NOTE:
The door interlock switches stop the conveyor belt and the pumps, but the heaters remain on.
5. Verify that the prewash, wash and power rinse doors open all of the way.
6. Verify the conveyor belt tension as per the instructions given in the installation section of this manual.
7. Verify the operation of the temperature display. Operate the unit normally and ensure that the display cycles as it is supposed
to, through each required parameter. If it does not cycle or it appears that it is not reading the temperature, it must be replaced.
8. Verify the operation of all green start switches and red stop switches. With the unit energized, depress the start switch as
the control box and allow the unit to start. After approximately sixty seconds, press the stop switch. The unit should stop. Verify
that the lights in the switches are working as well. Any problems should be investigated immediately to see of components need
to be replaced. Perform this check on the switches located at the load and unload ends as well.
9. Verify drive motor stop switch, and slide stop switches.
Monthly:
1. Inspect the gear drive gears for missing or damaged teeth. If there has been any sort of damage, the gear should be replaced
immediately.
2. Inspect seals used in final rinse arms to ensure they are in good condition. Any that have nicks, tears or are missing should
be replaced.
3. Inspect the conveyor drive belt for damaged or missing pegs. Any that are suspect should be replaced. Loss of pegs decreas-
es the number of dishes per hour that the machine will wash. Check end caps to rods and ensure that none are missing.
4. Visual inspection of electrical boxes. W
ith power to the unit shut off at the service breaker, open the main control box
and the control boxes for each section and make a visual inspection of the components. Verify that there are no loose wires,
there is no carbon scoring and that all components are secure. Replace the covers and re-energize the unit if no problems are