


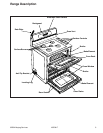
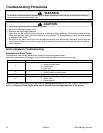
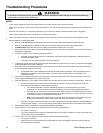

Troubleshooting Procedures
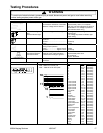
!
WARNING
To avoid risk of electrical shock, personal injury or death; disconnect power and gas to oven before servicing,
unless testing requires power and/or gas.
©2004 Maytag Services 16023417 13
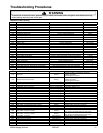
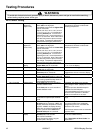
Component Troubleshooting
Problem Possible Cause Correction
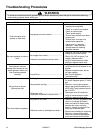
Part or all of the appliance
does not work
Power Outage..............................................
Improperly set oven controls .......................
Oven door locked ........................................
Delayed cooking/cleaning............................
• Check power supply/circuit
breaker
• Verify oven controls are properly
set
• Verify oven door is unlocked after
a self-clean cycle
• Verify oven is not set for delayed
cooking or cleaning program
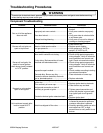
Burners will not ignite; no
spark at top burner.
Poor ground on burner cap..........................
Weak or failed spark module.......................
Low gas pressure ........................................
• Clean burner cap.
• Replace spark module.
• Verify pressure 4” WCP for
natural, 10” WCP for LP.
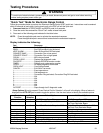
Burner will not ignite. No
spark to burner ignitors
when burner knob is rotated
to “LITE” position.
No 120 VAC to range ..................................
Micro switch contacts not closing ................
Faulty wiring. Bad connection at burner
electrode and electrode socket....................
Inoperative spark module ............................
Electrode dirty. Burner cap dirty ..................
Cracked or broken electrode, electrode
wire or electrode socket...............................
• Verify voltage at wall outlet.
• Check wiring against appropriate
wiring diagram, Verify all terminals
and connections are correct and
tight. Check micro switch contacts.
• Check wiring against appropriate
wiring diagram. Verify all terminals
and connections are correct and
tight.
• Check module according to testing
procedures information.
• Clean electrode or burner cap.
• Replace electrode.
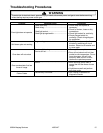
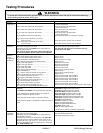
No spark or only random
spark at one ignitor.
Check for cracked ignitor or pinched
ignitor wire ..................................................
Poor continuity to burner cap.......................
Bad ground connection or lack of
continuity to ground or ignitor ......................
Cracked or broken ignitor extension lead....
• Replace ignitor lead or electrode.
• Clean burner cap and lead.
• Tighten ground connection and
correct any breaks in ground path
from ignitor path to unit ground
path.
• Replace ignitor lead.
Unit continues to spark after
knob is turned to OFF
position.
Shorted valve switch/harness......................
Switch has slipped off the valve ..................
• Replace switch/harness. If shorting
is caused by excessive spillovers,
customer education is advised.
• Carefully reposition switch on valve
and rotate from OFF to high,
several times to verify switch is not
broken.